- On Windows Live mail, compose a new email.
- Click on the Attach File icon (the little paper Clip).
- Find the picture you want to attach & select it.
- In case you want to send multiple images in the same email, follow the same steps and when selecting pictures, hold the Ctrl key while selecting the intended pictures.
- Once you’ve done this, and added the necessary body and subject to the email, simply send it.
The second thing to try is sending images as attachments and not albums. Doing this will almost certainly resolve Error code 0x8007007A. Follow these steps:
Hopefully this didn’t produce error code 0x8007007A. Just in case it did, move onto the next solution.
4. Remove and reconfigure the WLM account
- Open Windows Live mail and go to Tools.
- Find and open Accounts from the menu.
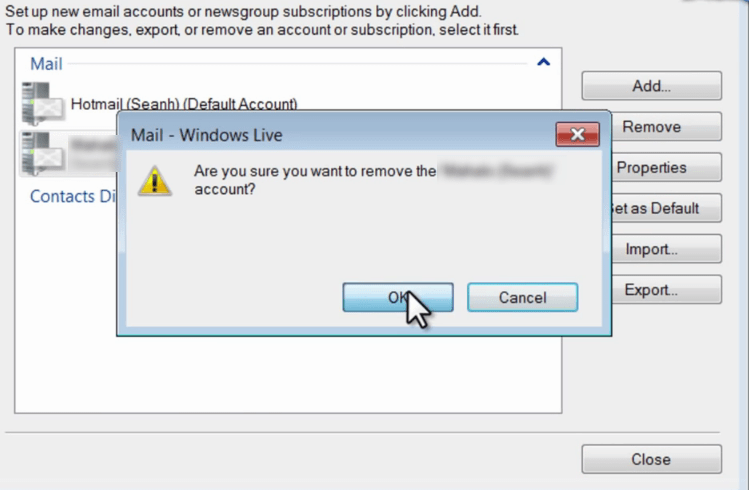
- Select the email address you intend to remove.
- Click the Remove button on the right side of the window.
- Click OK to confirm.
- Now to add your account again, open the same window (Tools > Accounts).
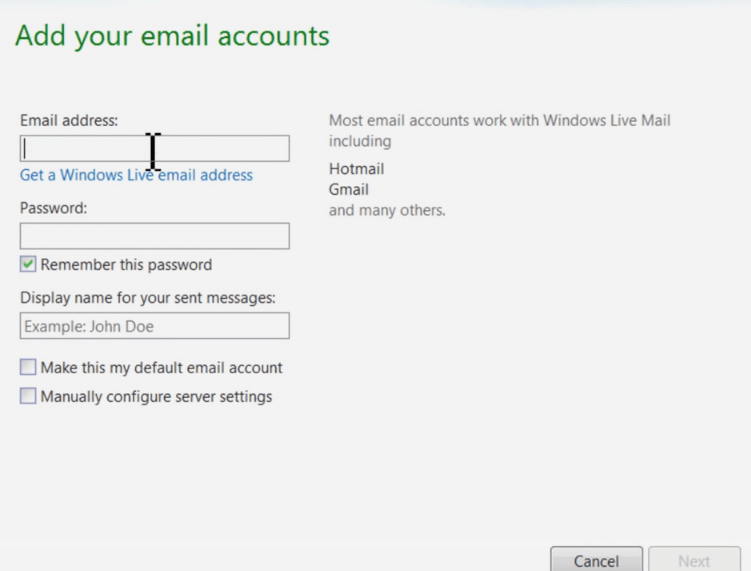
- Click the Add button, and select an email account.
- Click next and type in your email address, password and display name.
- Once you’re done, click Next and then Finish.
Removing and reconfiguring your Windows Live mail account could also help resolve error code 0x8007007A.
Try sending an email again. If error code 0x8007007A persists, move onto Solution 4 below.
5. Fix Windows Live Mail
- Open Control Panel.
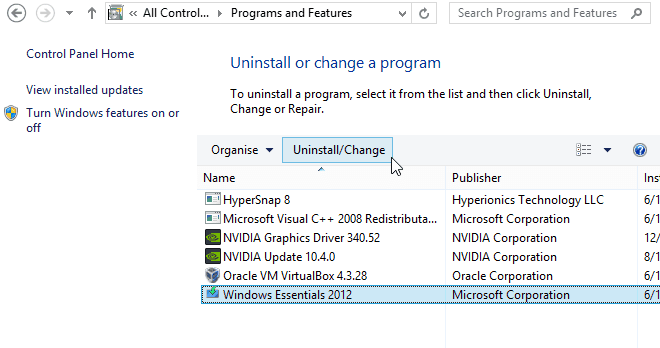
- Go to Programs and Features.
- Find and select Windows Essentials.
- Click on the Uninstall/Change button on the top of the window.
- In the dialogue that opens, select Repair all Windows Live programs.
- Wait until the process completes. Once it does, restart your computer.
- Try sending the email again.
Hopefully one of these solutions worked for you. If it didn’t try contacting Microsoft Support.
Also, in case you have any additional troubleshooting steps you deem worth suggesting, feel free to do so in the comments section below. We more than welcome them.
Editor’s Note: This post was originally published in March 2019 and has been since revamped and updated in September 2020 for freshness, accuracy, and comprehensiveness.
Thank you for viewing the article, if you find it interesting, you can support us by buying at the link:: https://officerambo.com/shop/


No comments:
Post a Comment