Tuesday, June 30, 2020

Webcam not working on Windows 10 [Logitech, Dell]


  • Webcam issues are nothing out of the ordinary in Windows 10, even if it’s considered stable.
  • To solve this problem, you may disable all USB hubs. Even more, BullGuard is a worthy alternative to other rivals that cause these webcam inconveniences.
  • If you’re looking for similar quick solutions, check out this Webcam Troubleshooting section.
  • We also encourage you to bookmark this Laptop & Computer Issues Hub for error-free future experiences.
Fix webcam not working

It is very likely that your webcam won’t work after the upgrade to Windows 10. Luckily, this issue is minor and it could be solved in a few simple steps, buy installing the right driver.

Windows 10 is already a good and stable operating system. We can only expect it to behave like a fully-finished operating system.

Even so, Windows 10 still lacks a lot of drivers and features that are necessary for everyday use of the computer.

Many users enjoy their webcam frequently, but sometimes certain issues with the webcam can appear.

Speaking of webcam problems, users reported the following issues:

  • We can’t find your camera Windows 10 – This is a relatively common problem with Windows 10. If Windows can’t find your camera, try reconnecting it or reinstalling its drivers.
  • Webcam not in Device Manager – If your webcam isn’t listed in Device Manager, it’s possible that it’s disabled. Many laptops support a keyboard shortcut that allows you to disable your webcam, so be sure to look for it.
  • Integrated webcam not working – This is another problem that many users have with their webcam. If the webcam isn’t working, be sure to update your drivers to the latest version and check if that helps.
  • Webcam upside down – Several users reported that their webcam is upside down. This is a minor problem, and we covered a similar issue in our Skype camera is upside down article, so be sure to check it out.
  • Webcam used by another application – Sometimes you might get this message on your PC. If you’re having this problem, be sure to disable all startup applications and check if that helps.
  • Webcam not working, detected, recognized, turning on, showing up – There are various webcam problems that can occur, but you should be able to solve most of them by using one of our solutions.

What can I do if the webcam is not working on Windows 10?

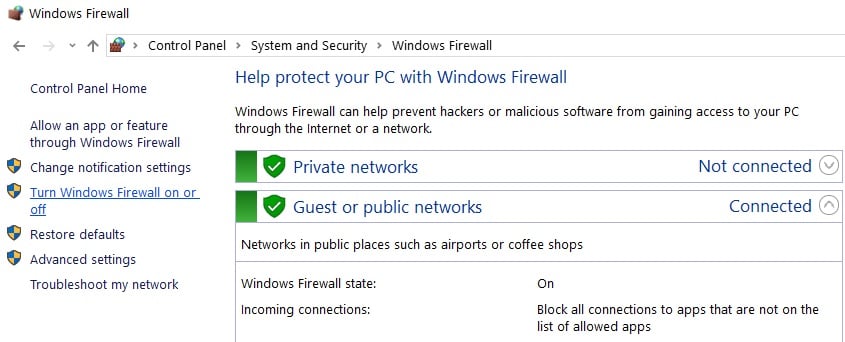
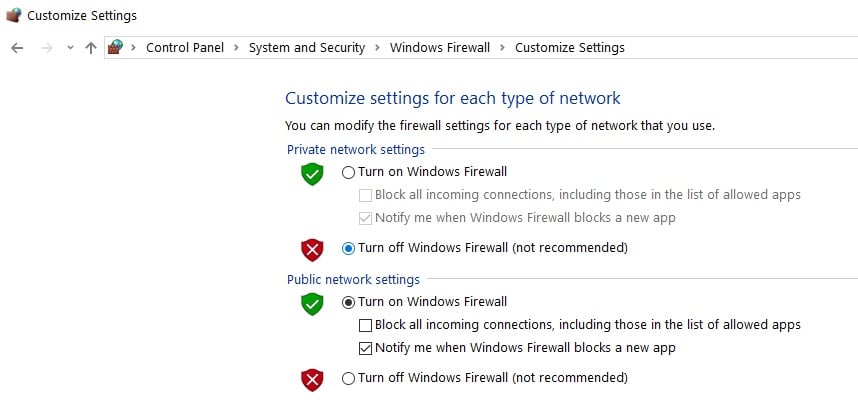
1. Check your antivirus settings

get Bullguard

If you’re having webcam problems, the issue might be caused by your antivirus software. These tools tend to block your webcam in order to prevent hackers from spying on you.

Webcam blocking is a useful feature. However, it can cause issues with your webcam. To fix that, you should check your antivirus configuration and disable the webcam protection feature.

If that doesn’t help or if you can’t find this setting, you can try disabling your antivirus completely. Sometimes, in order to fix this problem, you need to remove your antivirus software completely.

Since it’s not safe to use a PC without an antivirus, consider switching to a different antivirus solution. If you’re looking for new security software tools, you might want to try BullGuard.

Its impact on system performance is hard to notice. Even more, it’s a top choice in terms of design and usability, offering impeccable malware protection, email scanning, and a built-in firewall.

BullGuard

BullGuard

Some strong points of BullGuard are that it is lightweight and perfectly compatible with Windows 10, so it will let your webcam work like a breeze.

2. Make sure that apps are allowed to use your webcam

  1. Open the Settings app. You can do that quickly by pressing Windows Key + I shortcut.
  2. When the Settings app opens, go to the Privacy section.
    Integrated webcam not working
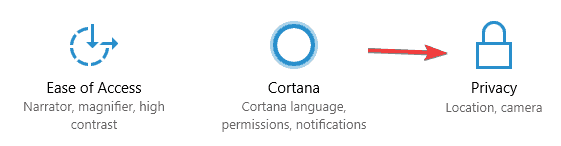
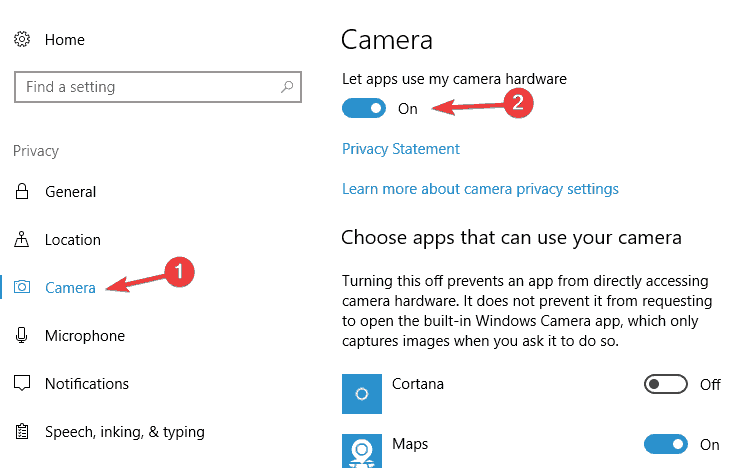
  3. In the left pane, choose Camera. Now make sure that Let apps use my camera hardware option is checked. If the problem appears only with a specific app, check the Choose apps that can use your camera list and make sure that the camera is enabled for that app.
    Webcam upside down

Webcam problems can occur if applications aren’t allowed to use your webcam. Windows 10 added a privacy feature that allows you to choose which applications can access your webcam.

To fix this problem, you need to check your privacy settings by doing as described above. After that, your apps should be able to access your webcam without any problems.


3. Update your drivers

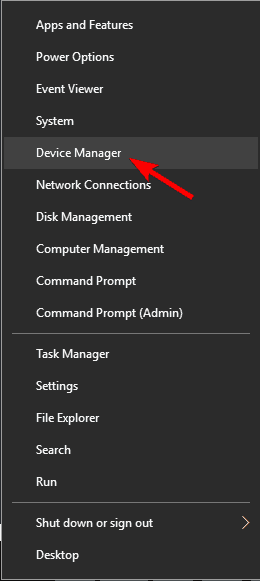
  1. Press Windows Key + X to open Win + X menu. Now choose Device Manager from the list.
    Webcam used by another application
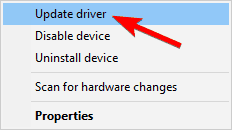
  2. When Device Manager opens, locate your webcam on the list and choose Update driver.
    Webcam not in Device Manager
  3. Now choose Search automatically for updated driver software.
    Integrated webcam not working

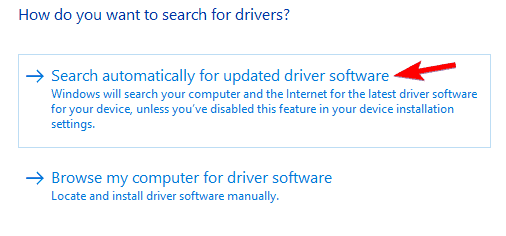
Sometimes webcam problems can be caused by outdated or missing drivers. If you’re having this problem, we advise you to try updating your drivers.

You can do that in several different ways. The easiest method is to use the automatic update. Windows will now automatically search and download the suitable driver for your PC.

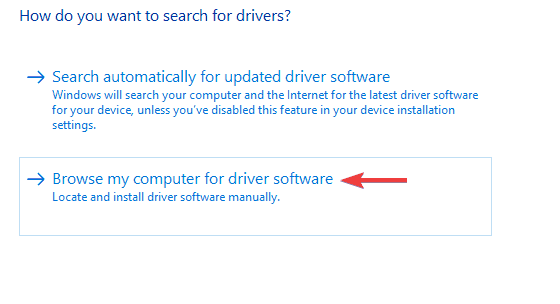
In some cases, you might have to install the driver manually.

Windows 10 comes with a set of default drivers and you can install them by doing the following:

  1. Repeat Step 1 and 2 from above.
  2. Now choose Browse my computer for driver software.
    Webcam upside down
  3. Select Let me pick from a list of available drivers on my computer.
    Webcam used by another application
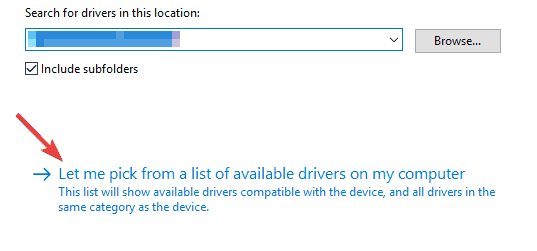
  4. Select the brand of your webcam and model and follow the instructions on the screen to install the driver.

If that doesn’t work, you might want to try rolling back to the older driver. This is rather simple and you can do it by following these steps:

  1. Open Device Manager, locate your webcam and double click it.
  2. When the Properties window opens, navigate to the Driver tab. Now choose the Roll Back Driver option.
    Webcam not working

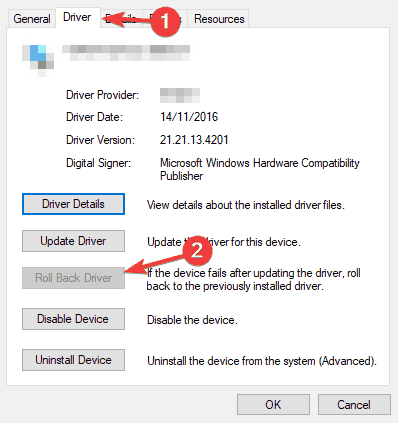
If this option isn’t available, you won’t be able to roll back to the older driver.

Although these methods are simple to use, the best way to update your webcam driver is to download the driver for it manually. Simply visit the manufacturer’s website and download the latest driver for your model.

Update drivers automatically (third-party tool suggested)

Downloading drivers manually can put your system to an unnecessary risk: getting the wrong driver installed. This may lead to serious malfunctions.

The safer and easier way to update drivers on a Windows computer is by using an automatic tool such as TweakBit Driver Updater.

Driver Updater automatically identifies each device on your computer and matches it with the latest driver versions from an extensive online database.

Drivers can then be updated in batches or one at a time, without requiring the user to make any complex decisions in the process. Here is how it works:

  1. Download and install TweakBit Driver Updater.
  2. Once installed, the program will start scanning your PC for outdated drivers automatically. Driver Updater will check your installed driver versions against its cloud database of the latest versions and recommend proper updates. All you need to do is wait for the scan to complete.driver updater scanning for drivers
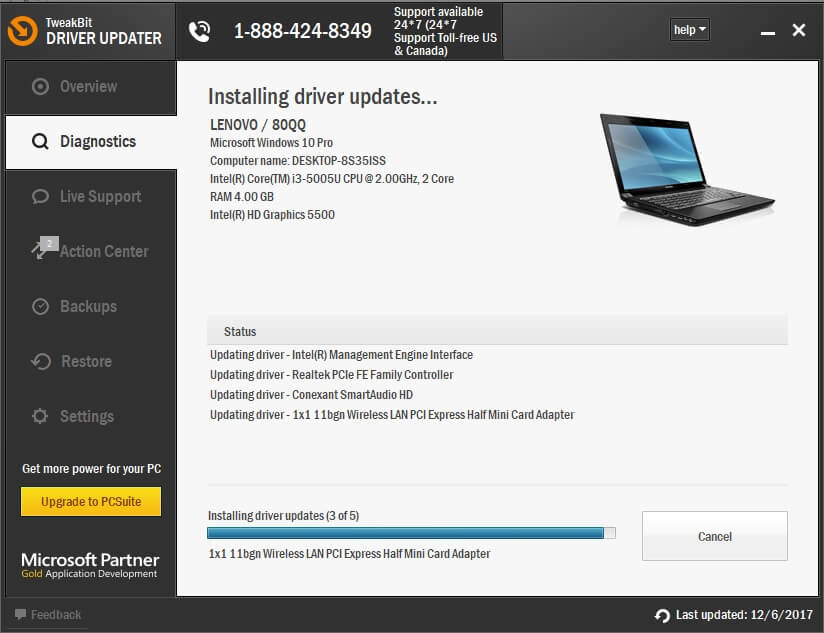
  3. Upon scan completion, you get a report on all problem drivers found on your PC. Review the list and see if you want to update each driver individually or all at once. To update one driver at a time, click the Update driver link next to the driver’s name. Or simply click the Update all button at the bottom to automatically install all recommended updates.
    Automatically Update complete

Note: Some drivers need to be installed in multiple steps so you will have to hit the ‘Update’ button several times until all of its components are installed.

Disclaimer: some features of this tool are not free.


 Toshiba webcam not working in Windows 10? Fix it in a few easy steps.


4. Check if your webcam is enabled

Many laptops allow you to enable or disable your webcam by using a keyboard shortcut. To check if your laptop supports this feature, look for a key that has a webcam picture on it.

To disable or enable your webcam, simply press the Fn key and that key together. On some laptops that keyboard shortcut is Fn + F6, but it might be different on your laptop.

To see if your laptop supports this feature and how to properly enable or disable your webcam, be sure to check your laptop’s instruction manual.


5. Disable all USB hubs

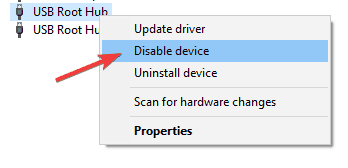
  1. Open Device Manager and expand Universal Serial Bus controllers section.
  2. Now locate USB Root Hub, right-click it and choose Disable from the menu.
    We can't find your camera Windows 10
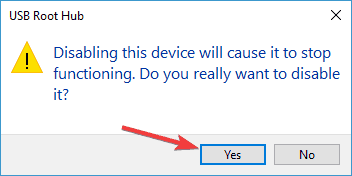
  3. A confirmation dialog will now appear. Click Yes to disable the device.
    Webcam not in Device Manager
  4. Repeat the last two steps for all available USB hubs. Keep in mind that by disabling USB hubs you’ll cause other USB devices, including your mouse and keyboard to temporarily stop working.
  5. After disabling all USB hubs, restart your PC.
  6. Once your PC restarts, go back to Device Manager and enable all USB hubs.

According to users, sometimes your USB hub device can cause webcam problems to appear. However, you can easily fix this problem by disabling all USB hubs.

This is rather simple and you can do it by following the above steps.  After doing that, your webcam should start working again.


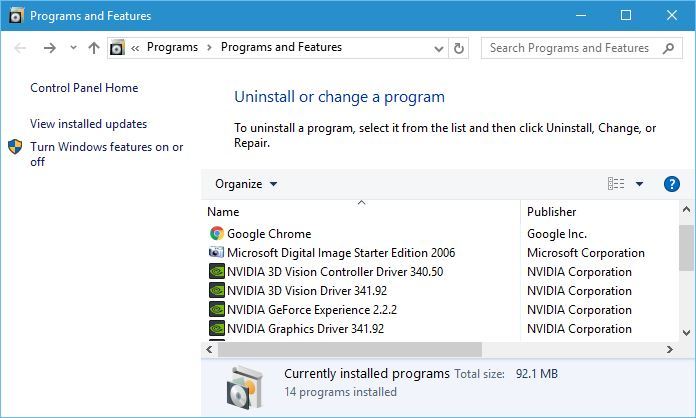
6. Install the default driver

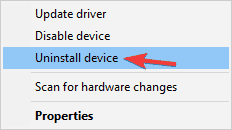
  1. Open Device Manager.
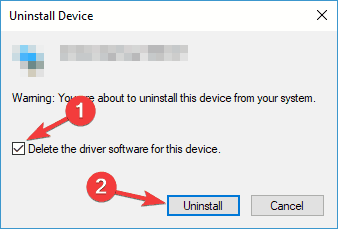
  2. Locate your webcam on the list, right-click it, and choose Uninstall device.
    Webcam not detected
  3. When the confirmation dialog appears, check Delete the driver software for this device if available. Now click the Uninstall button.
    Webcam not recognized
  4. After uninstalling the driver, click Scan for hardware changes icon.
    C:UsersmetalPicturesWork pictureswebcam problems
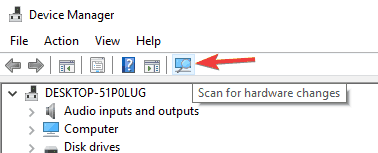
  5. Windows will now install the default driver. If for some reason the default driver isn’t installed, restart your PC and check if that solves the issue.

Another way to fix this problem is to install the default driver. This is rather simple and you can do it by following the given steps.

After installing the default driver, the problem should be resolved and your webcam will start working again.


7. Rename SoftwareDistribution and catroot2 directories

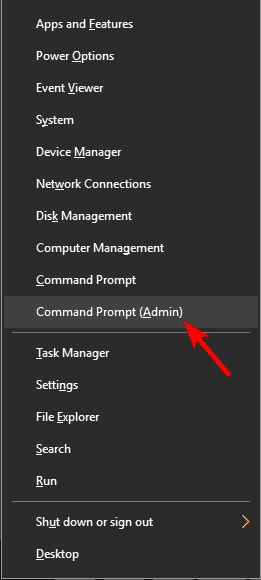
  1. Start Command Prompt as administrator. You can do that by pressing Windows Key + X and choosing Command Prompt (Admin) from the menu. If the Command Prompt isn’t available, you can also use PowerShell (Admin).
    Webcam upside down
  2. When Command Prompt starts, enter the following commands:
    • net stop wuauserv
    • net stop cryptSvc
    • net stop bits
    • net stop msiserver
    • ren C:WindowsSoftwareDistribution SoftwareDistribution.old
    • ren C:WindowsSystem32catroot2 catroot2.old
    • net start wuauserv
    • net start cryptSvc
    • net start bits
    • net start msiserver

According to users, you can fix webcam problems simply by renaming SoftwareDistribtion and catroot2 directories. This is relatively simple and you can do it by running several commands.

After doing so, check if your webcam is working again.

If you’re still facing the webcam problem, besides checking for updates and installing necessary drivers, reach for the comments section.

We will do our best to help you further in order to solve your problem.

FAQ: Learn more about Windows 10 webcams

  • Why is my webcam not working on PC?

Apps that are not allowed to use your webcam and outdated drivers are both common culprits. To correct that, refer to this guide on how to fix Windows cannot download drivers.

  • How do I get my webcam to work on Windows 10?

You may update your drivers, disable all USB hubs, or apply the quick fixes detailed in this article dedicated to fixing webcam issues in Windows 10.

  • How do I change my webcam settings in Windows 10?

From the Start screen of Windows 10, you need to left-click on the Webcam app and follow this simple procedure on how to access webcam settings in Windows 10.

Editor’s Note: This post was originally published in March 2018 and has been since revamped and updated in July 2020 for freshness, accuracy, and comprehensiveness.

Was this page helpful?

Thanks for letting us know! You can also help us by leaving a review on MyWOT or Trustpillot.

Get the most from your tech with our daily tips

Tell us why!


and

If you are looking for a cheap and genuine microsoft product key, warranty for 1 year.
It will be available at the link: https://officerambo.com/shop/
Microsoft Windows Embedded 8.1 Industry Pro : https://officerambo.com/product/windows-embedded-8-1/
Key Windows 7 Professional / Home Base / Home Premium (2 USER) : https://officerambo.com/product/key-windows-7/
Microsoft Windows 8.1 PRO (2 PC) : https://officerambo.com/product/microsoft-windows-8-1-pro/
Windows Server 2012 R2 : https://officerambo.com/product/windows-server-2012-r2/
Visual Studio Enterprise 2019 : https://officerambo.com/product/visual-studio-enterprise-2019/
Windows Server Standard / Datacenter / Essentials : https://officerambo.com/product/windows-server-all-version-standard-datacenter-essentials/
Microsoft Office Professional Plus for Windows : https://officerambo.com/product/microsoft-office-professional-plus-for-windows/
Microsoft Office Home and Student for Windows : https://officerambo.com/product/microsoft-office-home-and-student/
Key Microsoft Access 2016 : https://officerambo.com/product/key-microsoft-access-2016/
Microsoft Visio Professional : https://officerambo.com/product/microsoft-visio-professional/
Microsoft Project Professional : https://officerambo.com/product/microsoft-project-professional/
Account Microsoft Office 365 Profestional Plus 2020 Update For 5 Devices : https://officerambo.com/product/account-microsoft-office-365/
Key Microsoft Windows 10 Profestional / Profestional N : https://officerambo.com/product/key-microsoft-windows-10/
Key Microsoft Windows XP Pro : https://officerambo.com/product/key-microsoft-windows-xp-pro/
Microsoft Office Home and Business for Mac : https://officerambo.com/product/microsoft-office-home-and-business-for-mac/

Microsoft launches emergency security updates to fix codecs


  • CVE-2020-1425 and CVE-2020-1457 are two security vulnerabilities or remote code execution vulnerabilities as Microsoft calls them.
  • Both vulnerabilities exploit a vulnerability in the way that Microsoft Windows Codecs Library handles objects in memory.
  • If you're interested in the latest Windows 10 updates, check our Windows 10 Updates section.
  • For more information on updates and security, feel free to visit our comprehensive Updates & Security Hub.
Microsoft launches emergency security updates to patch codecs

Usually, security updates come in the notorious Patch Tuesday (the second Tuesday of the month), but Microsoft just released two new, out-of-bound security updates.

That is two weeks before Patch Tuesday and gives us some idea about the CVE vulnerabilities importance and the urgency of the updates.

CVE-2020-1425 and CVE-2020-1457 are two security vulnerabilities or remote code execution vulnerabilities as Microsoft calls them.

The vulnerabilities affect the Windows Codecs Library for all Windows 10 versions and Windows Server versions.

How can CVE-2020-1425 and CVE-2020-1457 be exploited?

Both vulnerabilities exploit a vulnerability in the way that Microsoft Windows Codecs Library handles objects in memory.

CVE-2020-1425 is a critical vulnerability and the attacker who would exploit it could obtain information to further compromise the user’s system.

CVE-2020-1457 is listed just as important but it sounds just as dangerous as the attacker who exploits this vulnerability could execute arbitrary code.

Microsoft specifies that the vulnerabilities were not publicly disclosed, have not been exploited, and are less likely to be exploited.

What is the exploitation method for the vulnerabilities?

Apparently, to benefit from this bug, the attacker sends a specially crafted image file that needs to be processed by a program on your computer.

The good news is that you don’t need to do anything to patch your system. The Windows Media Codec will be updated automatically through the Microsoft Store.

Affected customers will be automatically updated by Microsoft Store. Customers do not need to take any action to receive the update.

Alternatively, customers who want to receive the update immediately can check for updates with the Microsoft Store App; more information on this process can be found here.

What do you think about Microsoft’s latest updates? Tell us all about it in the comments section below.


and

If you are looking for a cheap and genuine microsoft product key, warranty for 1 year.
It will be available at the link: https://officerambo.com/shop/
Microsoft Windows Embedded 8.1 Industry Pro : https://officerambo.com/product/windows-embedded-8-1/
Key Windows 7 Professional / Home Base / Home Premium (2 USER) : https://officerambo.com/product/key-windows-7/
Microsoft Windows 8.1 PRO (2 PC) : https://officerambo.com/product/microsoft-windows-8-1-pro/
Windows Server 2012 R2 : https://officerambo.com/product/windows-server-2012-r2/
Visual Studio Enterprise 2019 : https://officerambo.com/product/visual-studio-enterprise-2019/
Windows Server Standard / Datacenter / Essentials : https://officerambo.com/product/windows-server-all-version-standard-datacenter-essentials/
Microsoft Office Professional Plus for Windows : https://officerambo.com/product/microsoft-office-professional-plus-for-windows/
Microsoft Office Home and Student for Windows : https://officerambo.com/product/microsoft-office-home-and-student/
Key Microsoft Access 2016 : https://officerambo.com/product/key-microsoft-access-2016/
Microsoft Visio Professional : https://officerambo.com/product/microsoft-visio-professional/
Microsoft Project Professional : https://officerambo.com/product/microsoft-project-professional/
Account Microsoft Office 365 Profestional Plus 2020 Update For 5 Devices : https://officerambo.com/product/account-microsoft-office-365/
Key Microsoft Windows 10 Profestional / Profestional N : https://officerambo.com/product/key-microsoft-windows-10/
Key Microsoft Windows XP Pro : https://officerambo.com/product/key-microsoft-windows-xp-pro/
Microsoft Office Home and Business for Mac : https://officerambo.com/product/microsoft-office-home-and-business-for-mac/

AVG antivirus won't update or uninstall


  • An updated virus signature database is paramount in order for your antivirus to properly perform its task.
  • If AVG fails to install the latest security updates, do not simply ignore the issue - get it fixed with these tested methods instead.
  • Check out more information about AVG.
  • Feel free to explore our Antivirus Hub as well to discover the latest and greatest security solutions.
how to di if avg fails to update

It’s more essential to update anti-virus utilities than most software. However, some users have stated on forums that their AVG anti-virus utilities don’t update.

That leaves them with outdated AVG anti-virus software. Here are a few resolutions that might fix an AVG utility that isn’t updating.

What can I do if AVG fails to update?

  1. Manually Update AVG
  2. Change your antivirus solution
  3. Delete Temporary Update Files
  4. Scan for Malware
  5. Turn Off the Windows Firewall
  6. Reinstall AVG Antivirus

1. Manually Update AVG

First, try updating AVG manually. That’s not exactly a fix for AVG‘s automatic updates, but at least you might then get the software updated. This is how you can manually update AVG.

  • First, open this page in your browser.
  • Select your AVG version on the page, and then click update to save to HDD or USB drive.

  • If you’re utilizing the freeware AVG, you can get the July 2018 updates from this webpage.
  • Open your AVG utility in Windows.
  • Click Options at the top right of the AVG window.
  • Then select Update from directory to open a Browse for Folder window.
  • Select the folder that includes the AVG update, and press the OK button.

2. Change your antivirus solution

If AVG does not make the cut, it might be a good idea to consider replacing your antivirus with a more well-balanced security solution that benefits from regular updates.

Install Bullguard

Bullguard

Powered by Bullguard, this feature-rich security solution is renowned for its stability, and triple-layered protection, but most importantly, its signature database is constantly updated to keep even the newest threats at bay.

Moreover, Bullguard relies on sophisticated algorithms and artificial intelligence in order to detect, identify and protect against emerging and advanced threats without requiring your intervention for virus updates.

Let’s quickly look at its key features:

  • Multiple learning layers analyze malware properties to identify malicious code
  • sophisticated behavioral detection with daily updates
  • Vulnerability scanner to alert you when security updates are missing and warn you if you’ve connected an unsafe Wi-Fi
  • Parental Controls to block access to suspicious sites, put search filters in place, limit time spent online, monitor activity
  • Integrated firewall and secure browser features
Bullguard Internet Security

Bullguard Internet Security

Get premium, real-time protection powered by BullGuard to keep even emergent threats at bay.

3. Delete Temporary Update Files

Deleting the software’s temporary update files might fix AVG updates if AVG returns an update or general error message when updating. To do that, open the AVG window.

  • Click Options and select Advanced Settings on the menu.
  • Click the + to expand Update, and press the Manage button.
  • Then you can select a Delete temporary update files option.
  • Click Yes to confirm and erase temporary update files.

Windows 10 temporary files will not delete? Here’s what you need to do.


4. Scan for Malware

Malware can block AVG updates. As such, purging malware might fix the utility’s updates. You can do that with Malwarebytes.

Press the Free Download button on this page to add the freeware Malwarebytes to Windows. Then you can run a scan with that software by pressing its Scan Now button.

5. Turn Off the Windows Firewall

The Windows Firewall might be blocking AVG from updating. To ensure that isn’t the case, you can temporarily switch that firewall off. This is how you can turn the firewall off in Windows 10.

  • Open the Cortana search box by pressing the Type here to search button on the taskbar.
  • Input the keyword ‘Windows Defender’ in Cortana’s search box, and select to open Windows Defender Firewall.

turn off windows firewall

  • Click Turn Windows Defender Firewall on or off to open the firewall settings shown directly below.

disable windows firewall

  • Select both the Turn off Windows Defender Firewall options there, and press the OK button. You can turn the firewall back on after AVG updates.

VPN got blocked by Windows Firewall? Fix it with these tested methods.


6. Reinstall AVG Software

Reinstalling the AVG utility will at least ensure that you have the latest version installed. A fresh copy of AVG will also replace the utility’s components and settings, which can fix numerous update issues.

Follow the guidelines below to reinstall AVG.

  • Open the Run accessory by pressing the Windows + X hotkey and selecting Run.
  • Enter ‘appwiz.cpl’ in Run to open the Control Panel applet shown directly below.

  • Select your AVG anti-virus package listed there, and press its Uninstall button.
  • Then click Yes to confirm that you intend to remove the software.
  • Restart Windows after uninstalling the software.
  • Alternatively, you can more thoroughly remove AVG utilities with AVG Remover. Click Download on this page to add AVG Remover to Windows.
  • Uninstall the anti-virus software with AVG Remover, and restart Windows.
  • You can download the latest AVG software from this page.
  • Then reinstall your AVG utility with its setup wizard. Note that you might also need to reactivate non-freeware AVG anti-virus software with a product key.

One or more of those resolutions might get your AVG anti-virus software updated.

Note that you can also select a Repair option for AVG in the Programs and Features Control Panel applet. That option might also come in handy for fixing AVG update errors.

Share your experience with us in the comments section below.

FAQ: Learn more about

Editor’s Note: This post was originally published in July 2018 and has been since revamped and updated in July 2020 for freshness, accuracy, and comprehensiveness.


and

If you are looking for a cheap and genuine microsoft product key, warranty for 1 year.
It will be available at the link: https://officerambo.com/shop/
Microsoft Windows Embedded 8.1 Industry Pro : https://officerambo.com/product/windows-embedded-8-1/
Key Windows 7 Professional / Home Base / Home Premium (2 USER) : https://officerambo.com/product/key-windows-7/
Microsoft Windows 8.1 PRO (2 PC) : https://officerambo.com/product/microsoft-windows-8-1-pro/
Windows Server 2012 R2 : https://officerambo.com/product/windows-server-2012-r2/
Visual Studio Enterprise 2019 : https://officerambo.com/product/visual-studio-enterprise-2019/
Windows Server Standard / Datacenter / Essentials : https://officerambo.com/product/windows-server-all-version-standard-datacenter-essentials/
Microsoft Office Professional Plus for Windows : https://officerambo.com/product/microsoft-office-professional-plus-for-windows/
Microsoft Office Home and Student for Windows : https://officerambo.com/product/microsoft-office-home-and-student/
Key Microsoft Access 2016 : https://officerambo.com/product/key-microsoft-access-2016/
Microsoft Visio Professional : https://officerambo.com/product/microsoft-visio-professional/
Microsoft Project Professional : https://officerambo.com/product/microsoft-project-professional/
Account Microsoft Office 365 Profestional Plus 2020 Update For 5 Devices : https://officerambo.com/product/account-microsoft-office-365/
Key Microsoft Windows 10 Profestional / Profestional N : https://officerambo.com/product/key-microsoft-windows-10/
Key Microsoft Windows XP Pro : https://officerambo.com/product/key-microsoft-windows-xp-pro/
Microsoft Office Home and Business for Mac : https://officerambo.com/product/microsoft-office-home-and-business-for-mac/

Windows 10 hardware GPU scheduling heading to AMD & Intel soon


Hardware accelerated GPU

Hardware-accelerated scheduling support for GPU was recently added to Windows 10 with May 2020 Update and Windows Display Driver Model (WDDM 2.7).


Hardware acceleration is a technical term used to describe tasks being offloaded to specific hardware. As the name suggests, Windows 10’s new feature allows both integrated and dedicated GPUs to more directly manage their VRAM (Video RAM), which holds pixels and other information on a monitor.


Windows 10 already passes most of the graphical intensive tasks within the apps such as Google Chrome to the GPU.


On the other hand, hardware-accelerated GPU scheduling (HAGS) will pass memory management control from the software to the GPU, which in turn should allow the GPUs to better manage their VRAM and free up the CPU a little to improve graphics responsiveness and performance.


Earlier this month, Nvidia released new drivers adding support for hardware-accelerated GPU scheduling Microsoft introduced with the Windows 10 May 2020 update. Following last week’s Nvidia driver release, AMD and Intel have shared more details.


Hardware accelerated GPU sheduling


Over the weekend, AMD published its driver version 20.5.1 Beta with Graphics Hardware Scheduling driver. For now, the driver offers support for Windows 10’s new feature on two products—Radeon 5700 series and 5600 series. Support for Ryzen, Vega and even Navi 14 5500 series is currently absent.


On the other hand, Intel has quietly published new documentation to confirm that support for hardware-accelerated GPU scheduling (HAGS) will be included in a future release of their WDDM 2.7-based drivers.


“At the same time, WDDM 2.7 introduced a new feature named Hardware-accelerated GPU scheduling. This feature is currently not supported by the latest Intel DCH drivers [but] Intel is looking to include support for this feature in future driver releases,” the chipmaker noted in the documentation.


It’s likely that most of the Intel’s integrated GPUs will support the feature, but don’t expect anything too significant here and some users have also discovered that game performance can be negatively impacted.


and

If you are looking for a cheap and genuine microsoft product key, warranty for 1 year.
It will be available at the link: https://officerambo.com/shop/
Microsoft Windows Embedded 8.1 Industry Pro : https://officerambo.com/product/windows-embedded-8-1/
Key Windows 7 Professional / Home Base / Home Premium (2 USER) : https://officerambo.com/product/key-windows-7/
Microsoft Windows 8.1 PRO (2 PC) : https://officerambo.com/product/microsoft-windows-8-1-pro/
Windows Server 2012 R2 : https://officerambo.com/product/windows-server-2012-r2/
Visual Studio Enterprise 2019 : https://officerambo.com/product/visual-studio-enterprise-2019/
Windows Server Standard / Datacenter / Essentials : https://officerambo.com/product/windows-server-all-version-standard-datacenter-essentials/
Microsoft Office Professional Plus for Windows : https://officerambo.com/product/microsoft-office-professional-plus-for-windows/
Microsoft Office Home and Student for Windows : https://officerambo.com/product/microsoft-office-home-and-student/
Key Microsoft Access 2016 : https://officerambo.com/product/key-microsoft-access-2016/
Microsoft Visio Professional : https://officerambo.com/product/microsoft-visio-professional/
Microsoft Project Professional : https://officerambo.com/product/microsoft-project-professional/
Account Microsoft Office 365 Profestional Plus 2020 Update For 5 Devices : https://officerambo.com/product/account-microsoft-office-365/
Key Microsoft Windows 10 Profestional / Profestional N : https://officerambo.com/product/key-microsoft-windows-10/
Key Microsoft Windows XP Pro : https://officerambo.com/product/key-microsoft-windows-xp-pro/
Microsoft Office Home and Business for Mac : https://officerambo.com/product/microsoft-office-home-and-business-for-mac/

Microsoft Edge imports data without permission if you kill its process


As of May 2020, Google Chrome has 70% of the browser usage share and Microsoft Edge trails far behind with 8%, but Edge has seen improvement in its usage after Microsoft switched over to Chromium and increased marketing efforts.


To get more users to the new Edge browser, Microsoft recently started forcing Windows 10 update that migrates legacy Edge to the new Edge.


The Edge Windows Update will import your favourites, passwords, and other existing data from the old Edge. In addition, Chromium Edge also suggests importing your existing bookmarks from Chrome and Firefox, but this is optional and there are two minimal decisions to be made: Import bookmarks or start clean.


While import support is handy when you switch to a new browser, some users have alleged that their data is being imported without their permission. It seems that those reports aren’t entirely true and a lot of people are actually stopping the “first-run experience” of Microsoft Edge, which leads to this behaviour.


After applying Windows 10 update, Edge’s window will open automatically and it will ask you for your permissions to import data.


During the setup process, you will notice that some of your data is already in Edge before you grant permission. As part of the setup process, Microsoft allows you to deny this permission and your information is deleted from Edge before you start using the browser.


If a user ends the Microsoft Edge process using Task Manager, that information remains on Edge and you may not see the option to discard them when you launch Edge again. This appears to be normal behaviour and Microsoft says that the “residual data may not be fully deleted” if a user stops the setup process prematurely.


In a statement, Microsoft also noted that consumers have the right to decide what they should with their data and Edge always offer the opportunity to discard data during the first-experience process.


If you simply go through the first-experience process as intended, you are given the option to disable data import. Users aren’t supposed to end the Microsoft Edge process using Task Manager and break the first-run experience prematurely.


The post Microsoft Edge imports data without permission if you kill its process appeared first on Windows Latest


and

If you are looking for a cheap and genuine microsoft product key, warranty for 1 year.
It will be available at the link: https://officerambo.com/shop/
Microsoft Windows Embedded 8.1 Industry Pro : https://officerambo.com/product/windows-embedded-8-1/
Key Windows 7 Professional / Home Base / Home Premium (2 USER) : https://officerambo.com/product/key-windows-7/
Microsoft Windows 8.1 PRO (2 PC) : https://officerambo.com/product/microsoft-windows-8-1-pro/
Windows Server 2012 R2 : https://officerambo.com/product/windows-server-2012-r2/
Visual Studio Enterprise 2019 : https://officerambo.com/product/visual-studio-enterprise-2019/
Windows Server Standard / Datacenter / Essentials : https://officerambo.com/product/windows-server-all-version-standard-datacenter-essentials/
Microsoft Office Professional Plus for Windows : https://officerambo.com/product/microsoft-office-professional-plus-for-windows/
Microsoft Office Home and Student for Windows : https://officerambo.com/product/microsoft-office-home-and-student/
Key Microsoft Access 2016 : https://officerambo.com/product/key-microsoft-access-2016/
Microsoft Visio Professional : https://officerambo.com/product/microsoft-visio-professional/
Microsoft Project Professional : https://officerambo.com/product/microsoft-project-professional/
Account Microsoft Office 365 Profestional Plus 2020 Update For 5 Devices : https://officerambo.com/product/account-microsoft-office-365/
Key Microsoft Windows 10 Profestional / Profestional N : https://officerambo.com/product/key-microsoft-windows-10/
Key Microsoft Windows XP Pro : https://officerambo.com/product/key-microsoft-windows-xp-pro/
Microsoft Office Home and Business for Mac : https://officerambo.com/product/microsoft-office-home-and-business-for-mac/

Microsoft Edge tracks your Firefox data without permission?


  • Microsoft Edge users complained that, during setup, the browser accessed their Firefox browsing data without first asking.
  • Microsoft says it respects users' rights to browser data.
  • Check out the Browsers section to learn more about troubleshooting and making the most of Chrome, Firefox, Edge, and other browsers.
  • Our Microsoft Edge section covers everything there's to know about the Chromium-based browser, from activating cookies to managing passwords. Be sure to visit it anytime!
Edge browser data privacy issue

Microsoft Edge sometimes behaves like a coin with two sides. While it recently received a whole bunch of nice features that would make any browser user happy, it also tends to ruffle feathers in certain situations.

Consider the latest user backlash that Edge attracted based on how it handles importing rival browser data. Just the other day, some users complained that Microsoft was too aggressive with its Edge promos in Windows.

Microsoft Edge data importing controversy

Over the past few days, a good number of Microsoft Edge users gathered on Reddit to express their frustration with how the browser imports data from Chrome or Firefox during setup. Many claimed that the Chromium-based browser first accessed their browsing data before asking for permission to import it.

One user laments:

Are we going to get treated to spam popups advertising Edge and having it duplicate our data from Firefox without asking every time Microsoft decides to update it from now on?

Another added:

I just installed Edge today for testing, and I noticed my bookmarks from Firefox appear in the background/browser BEHIND the import acceptance dialog. The bookmarks disappeared after I said I didn’t want it to import anything. Obviously it still went looking before asking!

Based on these comments, it appears that Edge doesn’t end up importing your browsing data without your permission. But at least it looks for and finds the data before offering you the option to discard it, which raises valid user privacy concerns.

The folks at Windows Central contacted Microsoft about this issue. The company replied that it acknowledges customers’ rights to their browsing data. It added that Edge, just like other browsers, gives users the option to import data during setup.

In short, Microsoft doesn’t deny that Edge accesses your Firefox or Chrome browsing data before offering you the opportunity to import or discard it.

Do you think Microsoft Edge’s approach to importing browser data constitutes a breach of user privacy? Feel free to express your views in the comments section below.


and

If you are looking for a cheap and genuine microsoft product key, warranty for 1 year.
It will be available at the link: https://officerambo.com/shop/
Microsoft Windows Embedded 8.1 Industry Pro : https://officerambo.com/product/windows-embedded-8-1/
Key Windows 7 Professional / Home Base / Home Premium (2 USER) : https://officerambo.com/product/key-windows-7/
Microsoft Windows 8.1 PRO (2 PC) : https://officerambo.com/product/microsoft-windows-8-1-pro/
Windows Server 2012 R2 : https://officerambo.com/product/windows-server-2012-r2/
Visual Studio Enterprise 2019 : https://officerambo.com/product/visual-studio-enterprise-2019/
Windows Server Standard / Datacenter / Essentials : https://officerambo.com/product/windows-server-all-version-standard-datacenter-essentials/
Microsoft Office Professional Plus for Windows : https://officerambo.com/product/microsoft-office-professional-plus-for-windows/
Microsoft Office Home and Student for Windows : https://officerambo.com/product/microsoft-office-home-and-student/
Key Microsoft Access 2016 : https://officerambo.com/product/key-microsoft-access-2016/
Microsoft Visio Professional : https://officerambo.com/product/microsoft-visio-professional/
Microsoft Project Professional : https://officerambo.com/product/microsoft-project-professional/
Account Microsoft Office 365 Profestional Plus 2020 Update For 5 Devices : https://officerambo.com/product/account-microsoft-office-365/
Key Microsoft Windows 10 Profestional / Profestional N : https://officerambo.com/product/key-microsoft-windows-10/
Key Microsoft Windows XP Pro : https://officerambo.com/product/key-microsoft-windows-xp-pro/
Microsoft Office Home and Business for Mac : https://officerambo.com/product/microsoft-office-home-and-business-for-mac/

Cortana Reminders not working in Windows 10 [Fixed]


  • Cortana is one of the most useful features that Windows 10 introduced.  But, like any other feature, Cortana has some faults, one being with Reminders, which stop working.
  • In this article, we explore some solutions to restore Cortana's reminders feature.
  • If you want to read more about Cortana, see our dedicated Cortana section.
  • For even more useful articles, go to our Windows 10 Troubleshooting Hub.
cotrana cover

Cortana is a digital assistant that supports both Windows Phone 8.1 and Windows 10 on your PC. Cortana is able to do many things including managing and providing you reminders.

To avoid forgetting important things, you can just command Cortana and it sets a reminder like Hey Cortana! Remind me to send the email at 7 PM and she will set a reminder for you.

On the other hand, no innovation is entirely perfect. While Cortana reminders are explicitly awesome, they have some issues such as:

  • Once you have set a reminder, it is not possible to edit it. You have to delete it and set it all over again.
  • If you try to set a reminder by giving complex statements like locations, it ends up saying, Couldn’t create the reminder. Please try again later.
  • Sometimes due to the constant background listening, you might choose to turn Cortana off. When you turn it back again you might find the reminders are not working. This can be solved by restarting or by signing out and in of the device.
  • And the least bothering issue is that the reminder doesn’t show up in Cortana’s History after completion.

Apart from these, there might be issues where you can’t figure out why your Windows are not working. Even after the reminder is not, we don’t get any notification regarding and sometimes we get the notification when we next set it up. As a solution, there is something that you can try and fix this issue.


What to do if Windows 10 Cortana reminders stop working

Table of contents: 

  1. Check the antivirus configuration
  2. Check Cortana’s Reminders section
  3. Turn the Calendar on
  4. Check your Account Settings
  5. Turn Location on
  6. Check Regional settings
  7. Run the Apps Troubleshooter
  8. Reset Cortana
  9. Tweak Registry
  10. Run the SFC
  11. Run the DISM

1. Check the antivirus configuration

It’s already known that Windows 10 features and third-party antivirus programs can sometimes interfere.

Consequently, it is possible that your antivirus has actually disabled Cortana. To see if that’s indeed the case, disable your antivirus for a couple of minutes, and see if Cortana works now.

On the other hand, we recommend using an antivirus with little to no impact upon the system configuration or processes. BullGuard would be just the best solution in this case.

With BullGuard, not only do you get the toughest protection against malware; the tool is also designed to optimize PC performance and processes, which it does from the first minutes after installation.

BullGuard Antivirus

BullGuard Antivirus

Download BullGuard now to benefit from next-gen protection technologies against online threats, as well as from seamless PC performance.

It’s worth mentioning that, at the latest tests in the industry, BullGuard scored almost impeccably when it comes to interference with other processes that run simultaneously with a full system scan, for instance. And it definitely scored better than other competitors on the market.

Couple this with the top scores at detection rates and protecting against malware, and you get the perfect antivirus program.


2. Check Cortana’s Reminders section

Windows 10 Cortana reminders not working

You need to check is if you really have saved any reminders or not. To do that, just open Cortana and then open the reminders section. This will show you the list of reminders that you have set.

If the list is empty, then there were no reminders set at all.


3.  Turn the Calendar on

Windows 10 Cortana reminders not working

If you are not receiving notifications based on the date and time, it is a possibility that your reminders calendar is off.

Go to Calendar, search for the settings. In the display, go to Remind me, and tick the checkbox beside Reminders.


4. Check your Account Settings

  1. Open the start menu and open Settings.
  2. Now go to the Accounts section and open it.
    Windows 10 Cortana reminders not working
  3. Now open the Family & Other Users settings and then click on Add someone else to this PC.
    Windows 10 Cortana reminders not working
  4. This will help you in adding a new user to your PC with their Outlook account.

This is necessary since, in case of person-based reminders, you might have accidentally deleted the contact or use an account without the contact’s name.


5. Turn Location on

  1. Open the start menu and then open Settings.
  2. Now open the Privacy section inside Settings and now you will be on a new screen.
    Windows 10 Cortana reminders not working
  3. Now click on Location and turn it on from the slider shown in the image above.

When it comes to a location-based reminder, the error occurs because either you are not connected to the internet or your location is off, so this solution should be helpful.


6. Check Regional settings

First things first, let’s make sure Cortana is supported in your region. Because if it’s not, well, you won’t be able to use it.

This is the list of supported regions and languages:

  • Australia: English
  • Brazil: Portuguese
  • Canada: English/French
  • China: Chinese (Simplified)
  • France: French
  • Germany: German
  • India: English
  • Italy: Italian
  • Japan: Japanese
  • Mexico: Spanish
  • Spain: Spanish
  • United Kingdom: English
  • United States: English

If you were able to use Cortana seamlessly before the update, and now it’s not available, there’s a great chance that something with your Region settings is wrong.

Either you have installed an unsupported language by mistake or the installation changed the settings on its own. In both cases, you can resolve this issue in a few easy steps.

  1. Open Settings.
  2. Go to Region & Language.
  3. Under the Country or Region drop-down menu, select one of the supported regions/countries.
  4. Now, go to Speech.
  5. Under the Speech language drop-down menu, select one of the supported spoken languages.
  6. Restart your PC and the Cortana should be placed on the taskbar after the system is up.

7. Run the Apps Troubleshooter

  1. Go to Settings.
  2. Head over to Update & Security, then Troubleshoot.
  3. Find Windows Store apps, and click Run the troubleshooter.
  4. Follow further on-screen instructions.
  5. Restart your computer.

Although Cortana comes integrated with Windows 10, it still counts as an app. This is why we can use Windows 10’s built-in troubleshooter to resolve potential problems with it.


8. Reset Cortana

  1. Go to Search, type powershell and run Windows PowerShell as administrator.
  2. When PowerShell starts, run the following command: Get-AppXPackage | Foreach {Add-AppxPackage -DisableDevelopmentMode -Register “$($_.InstallLocation)AppXManifest­.xml

9. Tweak Registry

  1. Go to Search, type regedit, right-click regedit and choose Run as Administrator.
  2. Navigate to HKEY_CURRENT_USERSOFTWAREMicrosoftWindowsCurrentVersionSearch.tweak registry for cortana
  3. Change the BingSearchEnabled value from 0 to 1.
  4. Make sure all of the Cortana flags are set to 1 instead of 0.
  5. Restart PC and check out Cortana again.

There’s a chance something inside your system actually disabled Cortana. So this would be the best way to re-enable Cortana.


10. Run the SFC

  1. Right-click on the Start Menu button, and open Command Prompt (Admin).
  2. Enter the following line and press Enter: sfc/scannow
  3. Wait until the process is done (it may take a while).
  4. If the solution is found, it will automatically be applied.
  5. Now, close the Command Prompt and restart your computer.

The SFC scan is a command-line tool that scans your computer for potential problems and resolves them (if possible). So, maybe it will be helpful in this case.


11. Run DISM

  1. Open the Command Prompt as shown above.
  2. Enter the following command and press Enter:
      • DISM.exe /Online /Cleanup-image /Restorehealth
  3. Wait for the process to finish.
  4. Restart your computer.
  5. In case the DISM can’t obtain files online, try using your installation USB or DVD. Insert media and type following command:
      • DISM.exe /Online /Cleanup-Image /RestoreHealth /Source:C:RepairSourceWindows /LimitAccess
  6. Make sure to replace the ”C:RepairSourceWindows” path of your DVD or USB.
  7. Follow further on-screen instructions.

This is an alternative to the previous solution. DISM stands for Deployment Image Servicing and Management, and as its name says, it deploys the system image all over again, including Cortana.


If you still experience any other errors other than those regarding the reminders, feel free to contact us in the comment section so that we will help you solve them and add them up to the above list.


FAQ: Learn more about Cortana

  • How do I fix Cortana not working?

One of the most frequent issues with Cortana is failing at voice recognition. So if your problem with Cortana is that it can’t hear you, we’ve got some steps that will help you fix it.

  • Why did Cortana stop working?

Cortana issues are usually caused by corrupted system files or your settings. See this guide with easy-to-follow solutions that anyone can apply to restore Cortana’s functionalities.

  • How do I uninstall and reinstall Cortana?

If you want to get rid of Microsoft’s virtual assistant, it’s better to just disable/enable it by following the steps in this guide. 

Editor’s Note: This post was originally published in January 2016 and was revamped and updated in June 2020 for freshness, accuracy, and comprehensiveness.


Was this page helpful?

Thanks for letting us know! You can also help us by leaving a review on MyWOT or Trustpillot.

Get the most from your tech with our daily tips

Tell us why!


and

If you are looking for a cheap and genuine microsoft product key, warranty for 1 year.
It will be available at the link: https://officerambo.com/shop/
Microsoft Windows Embedded 8.1 Industry Pro : https://officerambo.com/product/windows-embedded-8-1/
Key Windows 7 Professional / Home Base / Home Premium (2 USER) : https://officerambo.com/product/key-windows-7/
Microsoft Windows 8.1 PRO (2 PC) : https://officerambo.com/product/microsoft-windows-8-1-pro/
Windows Server 2012 R2 : https://officerambo.com/product/windows-server-2012-r2/
Visual Studio Enterprise 2019 : https://officerambo.com/product/visual-studio-enterprise-2019/
Windows Server Standard / Datacenter / Essentials : https://officerambo.com/product/windows-server-all-version-standard-datacenter-essentials/
Microsoft Office Professional Plus for Windows : https://officerambo.com/product/microsoft-office-professional-plus-for-windows/
Microsoft Office Home and Student for Windows : https://officerambo.com/product/microsoft-office-home-and-student/
Key Microsoft Access 2016 : https://officerambo.com/product/key-microsoft-access-2016/
Microsoft Visio Professional : https://officerambo.com/product/microsoft-visio-professional/
Microsoft Project Professional : https://officerambo.com/product/microsoft-project-professional/
Account Microsoft Office 365 Profestional Plus 2020 Update For 5 Devices : https://officerambo.com/product/account-microsoft-office-365/
Key Microsoft Windows 10 Profestional / Profestional N : https://officerambo.com/product/key-microsoft-windows-10/
Key Microsoft Windows XP Pro : https://officerambo.com/product/key-microsoft-windows-xp-pro/
Microsoft Office Home and Business for Mac : https://officerambo.com/product/microsoft-office-home-and-business-for-mac/