This issue can occur due to other missing environment variables, so to find out which variable is missing we advise you to check the list of environment variables on a working PC and compare it to yours.
Add the environment variable using the Registry Editor
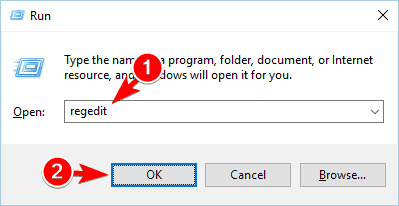
- Press Windows Key + R, enter regedit and press Enter or click OK.

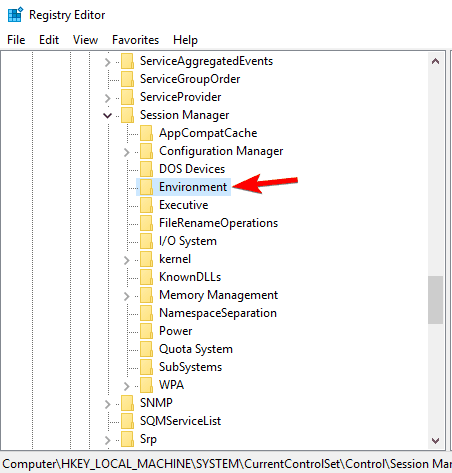
- In the left pane, navigate to
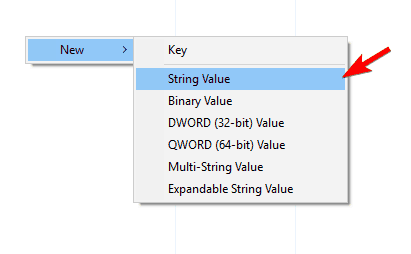
HKEY_LOCAL_MACHINESYSTEMCurrentControlSetControlSession ManagerEnvironment - If the windir value is missing, you need to recreate it. Right-click the empty space in the right pane and choose New, then select String Value.
- Enter windir as the name of the new string.
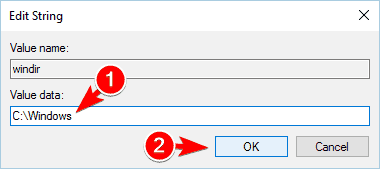
- Double click newly created windir string to open its properties. Enter C:Windows as Value data and click OK to save changes.
- Close the Registry Editor and restart your PC to apply the changes.
Note: This solution is provided if you can’t access Advanced System Settings. Modifying the registry can be potentially dangerous so we advise you to create a backup just in case.
If the windir value is present in your registry, it’s possible that another missing environment variable is causing this issue. You need to find the missing variable and add it manually to the registry.
3. Install Visual C++ Redistributables

Many applications require Visual C++ Redistributable in order to run properly, and if this component is missing you might encounter The system could not find the environment option that was entered message.Users reported that this error usually occurs when trying to start a specific game, and if that’s the case, you can find the necessary files in _CommonRedistvcredist directory.
This directory is located in the game’s installation folder, and you just have to run the setup files from vcredist folder to fix the issue.
In case you’re trying to start an application, you might have to download the Visual C++ Redistributables manually. All necessary files are available from Microsoft’s website and you can download them for free.
Keep in mind that there are many versions of Visual C++ Redistributables available, so you might have to download some older versions as well depending on the application you’re trying to run.
These components come in both 32-bit and 64-bit versions, and if you’re using a 64-bit system you’ll need to install both versions. After installing the necessary redistributables, the problem should be completely resolved.
4. Perform an SFC scan
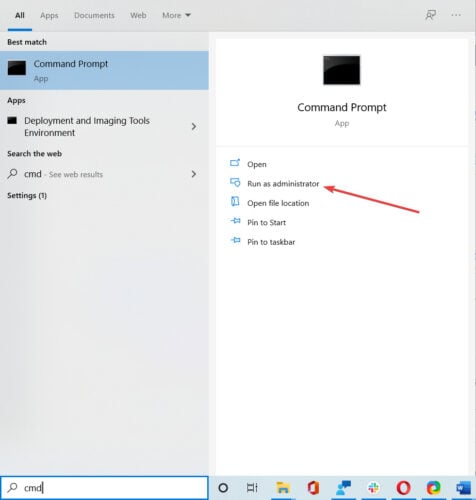
- Search for cmd and click on Run as administrator to open Command Prompt from the list.
- Enter the sfc /scannow command and press Enter to run it.
- This process can take a while, so try not to interrupt it.
The SFC scan has stopped? Here’s an excellent guide to fix this problem
5. Reinstall Unifi and Java

Several users reported this problem while trying to run Unifi. According to them, they managed to fix the problem by reinstalling Java and Unifi.After doing that, the issue was completely resolved and they were to access Unifi again without problems.
If you’re having this issue with any other application, we suggest you reinstall it and check if that solves the problem.
6. Modify your registry
- Start Registry Editor (check solution number 2 for instructions).
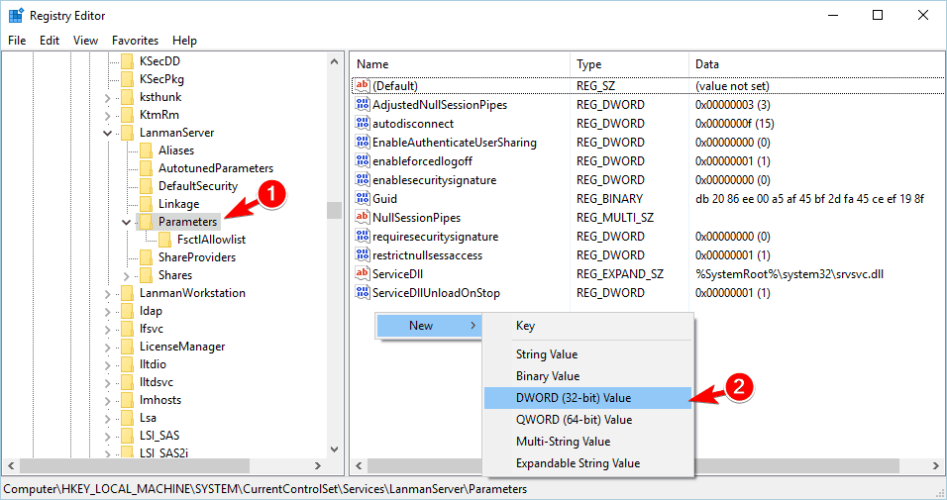
- Navigate to the following path:
HKEY_LOCAL_MACHINESYSTEMCurrentControlSetServicesLanmanServerParameters - In the right pane, right-click the empty space and choose New and select DWORD (32-bit) Value.
- Enter IRPStackSize as the name of the new DWORD and double click it to open its properties.
- In the Data Value field enter the value that is appropriate for your network and click OK (the supported values are from 11 to 50).

Note: Modifying the registry can lead to system instability, therefore we strongly advise you to create a backup in case anything goes wrong.
Keep in mind that these issues occur while working on C# projects meaning that this solution won’t work for most standard users.
7. Copy msvcr71.dll to the Tomcat installation directory

This solution applies to developers that use Java and Tomcat. If you’re not a developer and you’re not using Tomcat, you can skip this solution.Several developers reported this issue with Tomcat, but you can fix it by copying msvcr71.dll from the Javabin to Tomcatbin directory on your PC. After doing that, you should be able to use Tomcat without any issues.
8. Perform a System Restore
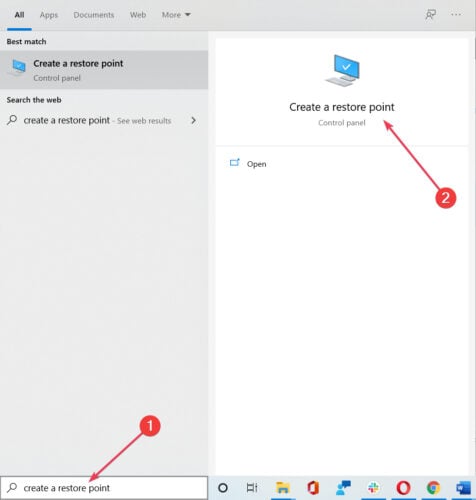
- Search for create a restore point and click on it from the results.
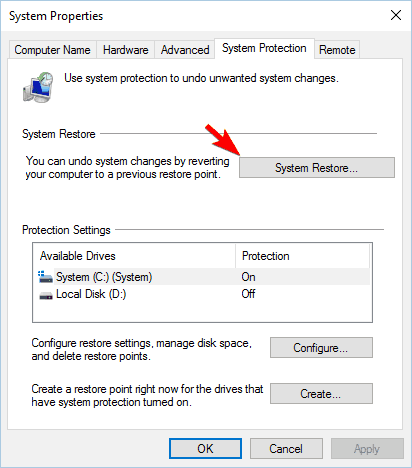
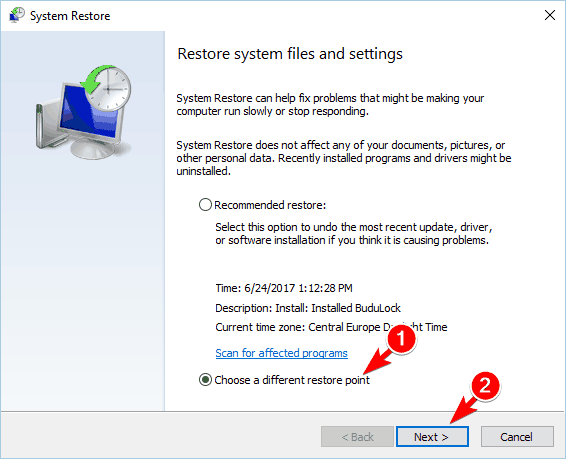
- Click on the System Restore button.
- Select Choose a different restore point option and click Next.
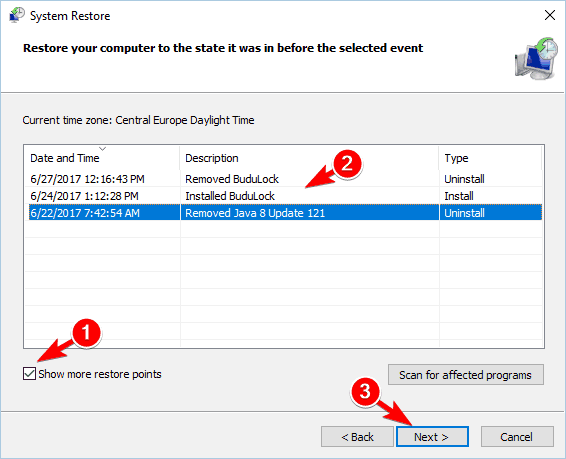
- Check Show more restore points option in the bottom right corner, choose the desired restore point, and click on Next.
- Follow the instructions on the screen in order to complete the restore process.
Note: If for some reason System Restore doesn’t work, you can try to perform it from Safe Mode. We showed you how to run Windows 10 in Safe Mode in solution number 2, so be sure to check it for extra instructions.
If this problem doesn’t appear in Safe Mode, it’s likely that your user profile is corrupted, but you can fix the problem by creating a new profile.
You find this too hard? Here’s a full guide on how to use System Restore
9. Create a new user profile
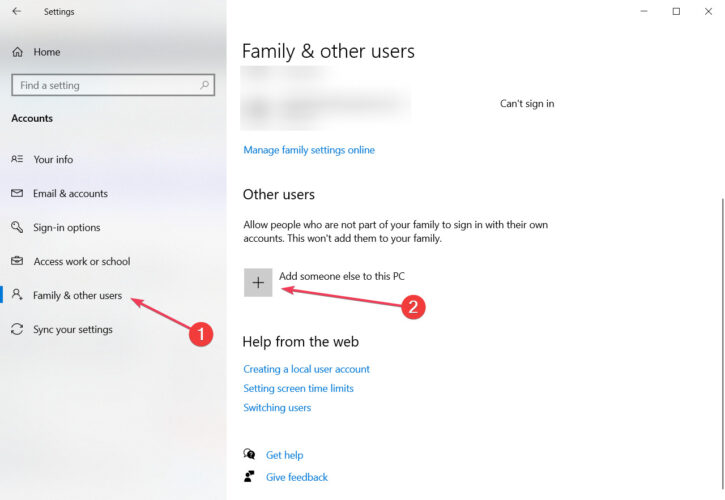
- Press the Windows Key + I to open the Settings app.
- Go to Accounts section, then to Family & other users, and click on Add someone else to this PC.
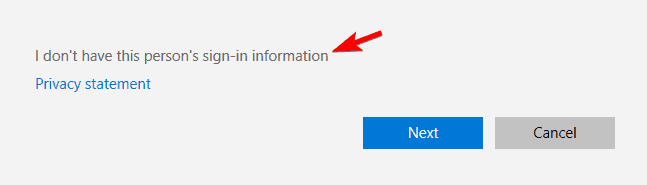
- Click on I don’t have this person’s sign-in information.
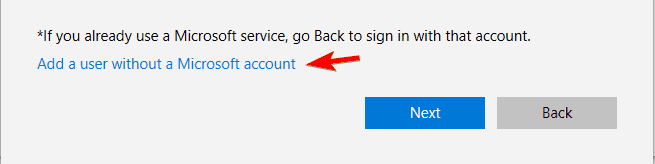
- Select Add a user without a Microsoft account.
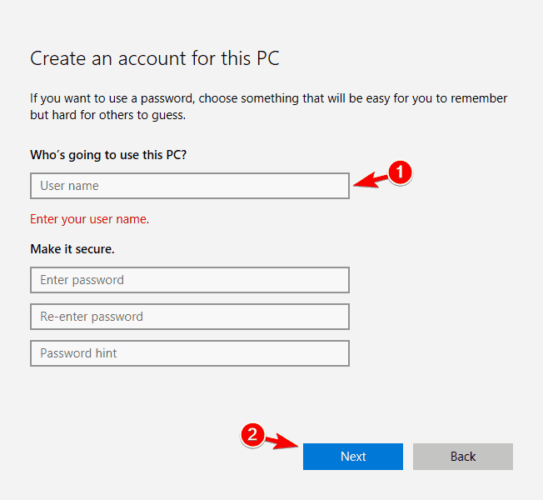
- Enter the user name for the new user and click on Next.
Note: After creating a new user account, check if the problem appears again. If not, you’ll have to move your personal files to the new account and use it as your main account.
If the problem is still there, you might have to reset Windows 10. Read on to learn how you can do that.
10. Reset Windows 10

- Open the Start Menu, click the Power button, press and hold the Shift key on your keyboard and click the Restart option.
- Click on Troubleshoot, and then on Reset this PC.
- If you already have a backup of your personal files feel free to choose the Remove everything option. If not, you might prefer the Keep my files option.
- If you are prompted, insert the Windows 10 installation media.
- Choose your version of Windows and select Only the drive where Windows is installed (your system drive and all files on it will be removed).
- Choose Just remove my files option.
- Be sure that all your important files are backed up and click the Reset button.
- The reset process will now start. It might take a while so you need to wait while it finishes.
Note: This process will remove all files from your primary partition, so we advise you to back them up. In some cases this procedure can require Windows 10 installation media, so be sure to create one using Media Creation Tool.
After the process is completed, you’ll have a fresh installation of Windows 10, and all problems with this error will be resolved. Now you just have to restore all your files and installed applications.
This is a drastic solution and we suggest to perform it only if all other solutions can’t fix the problem.
ERROR_ENVVAR_NOT_FOUND and The system could not find the environment option that was entered message can cause a lot of problems on your PC, but in most cases, you can fix this message by checking environment variables.
If the issue still persists, feel free to try any other solution from this article. For any additions or suggestions, use the comments section below.
Editor’s Note: This post was originally published in September 2017 and has been since revamped and updated in October 2020 for freshness, accuracy, and comprehensiveness.
Thank you for viewing the article, if you find it interesting, you can support us by buying at the link:: https://officerambo.com/shop/
No comments:
Post a Comment