However, without audio, you can’t enjoy your movies and other videos on VLC. If you’re currently experiencing this issue, then this guide is for you.
Some related issues include the following:
- VLC audio stopped working – Undo recent changes made to your computer and update your drivers.
- VLC not playing audio – Confirm that you didn’t mute the player. Fix it with this guide.
- VLC audio track not working – Go to Audio > Audio Track and select a different track.
What can I do if VLC audio is not working?
1. Unmute VLC from the player interface
- Open VLC Media Player.
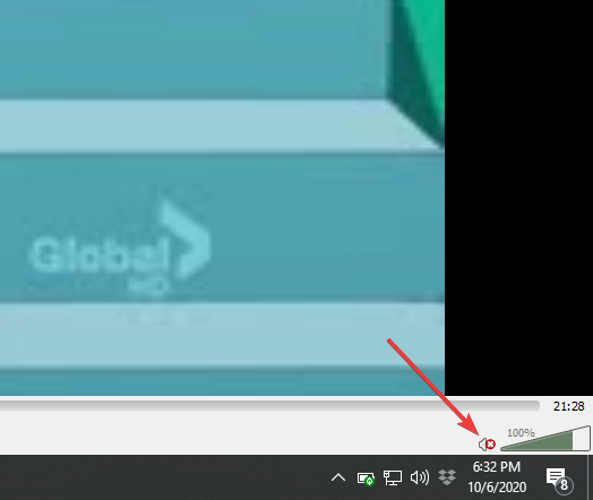
- Look on the player interface, to the left of the volume control, and ensure that there’s no red mark beside the speaker icon.
- If there is, click on the speaker icon to unmute the video.
2. Unmute VLC Media Player from the volume mixer
- Open VLC Media Player and play a video that has sound.
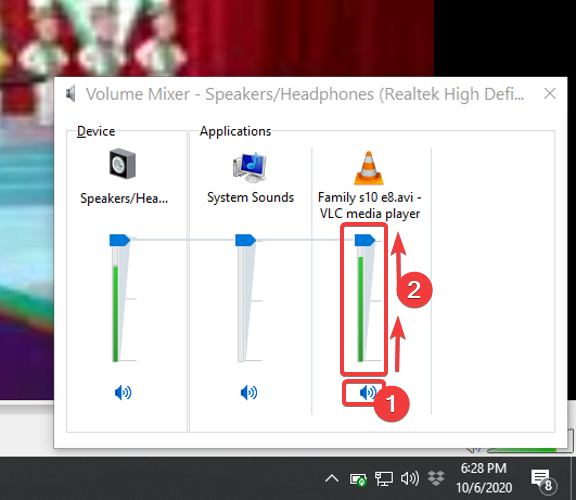
- Right-click on the Volume icon on your taskbar and select Open Volume Mixer.
- Click on the speaker icon below the VLC mixer and ensure that it isn’t muted.
- Drag the volume slider for VLC Player all the way up.
3. Enable the sound device
- Click on the Start menu button.
- Search for Control Panel and open it from the results.
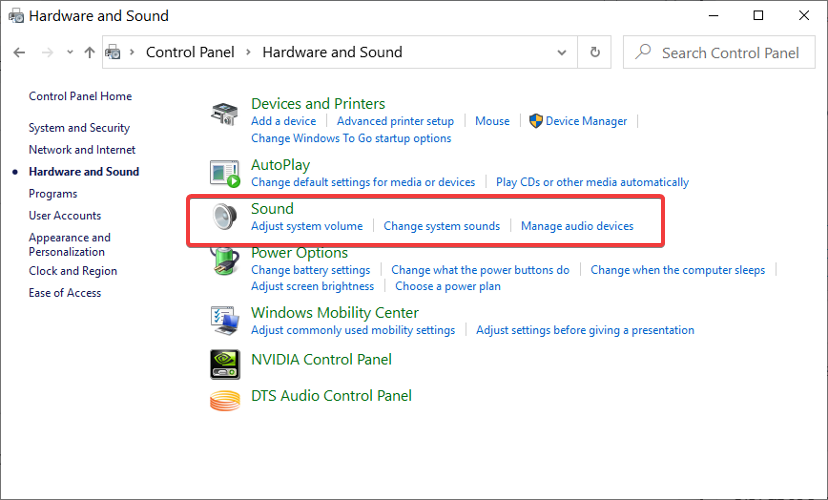
- Go to Hardware and Sound.
- Click on Sound.
- Right-click on every sound device on this screen and hit Enable.
- Click on the Apply button to save it.
- Click Ok.
4. Re-enable VLC audio track
- Launch VLC Media Player and play a video.
- Ensure that the player isn’t on fullscreen mode.
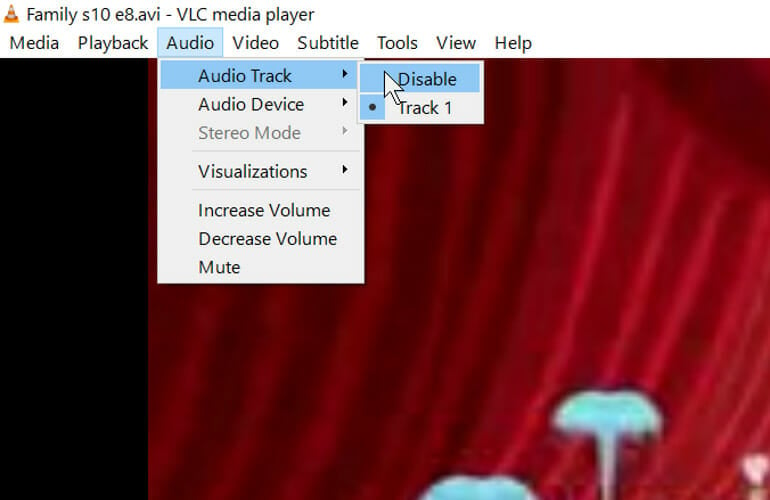
- Click on the Audio menu.
- Go to Audio Track and disable it.
- Return to the Audio menu.
- Select Audio Track but enable it this time.
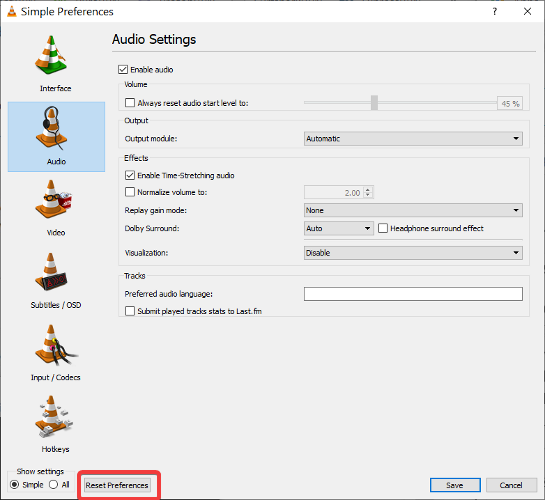
5. Reset the audio preferences of VLC Media Player
- Open VLC Media Player.
- Click on the Tools menu and select Preferences.
- Switch to the Audio section.
- Hit Reset Preferences at the bottom of the screen.
- Hit the Save button.
- Restart VLC Media Player.
6. Disable all enhancements
- Press the Windows key and search for Control Panel. Open it from the results.
- Click on Hardware and Sound.
- Select Sound.
- Right-click on a sound device and choose the Properties option.
- If you see the Enhancements tab click on it.
- Mark the Disable all enhancements checkbox.
- Hit the Apply button.
- Repeat steps 4 to 6 for every sound device in the Sound dialog box.
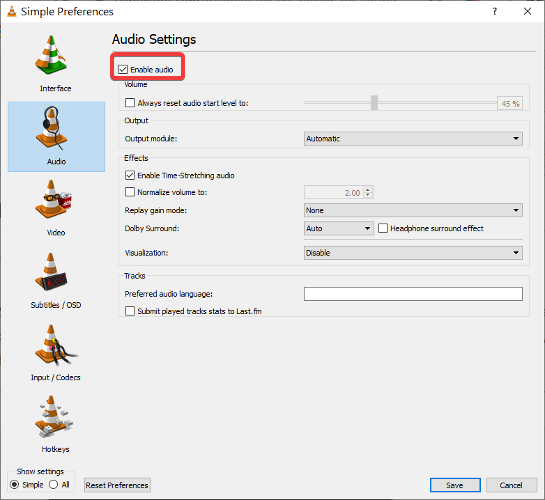
7. Modify VLC audio settings
- Launch VLC Media Player.
- Click on the Tools menu and go to Preferences.
- Click on the Audio section.
- Mark the Enable Audio checkbox.
NOTE: Enabling VLC audio can fix the issue, but if VLC audio still doesn’t work, continue with the steps below. - Click on the Output module dropdown menu and change it to Automatic.
- Hit the Save button.
On switching the output module to select automatically, VLC will select the best fit for your system.
However, if VLC audio is still not working with the Automatic setting, go back to Step 5 and try again with each of the other options.
The fixes here will et you right back on track and bring back your VLC audio. If you try all of these, and your VLC audio is not working still, then update your VLC Media Player and audio drivers.
Did this solve your VLC audio issue? Feel free to tell us what you think in the comments section below.
Thank you for viewing the article, if you find it interesting, you can support us by buying at the link:: https://officerambo.com/shop/

No comments:
Post a Comment