Although it’s a little less known, this great security solution offers advanced active protection, web filtering, and automatic virus definitions updates.
The customer support for VIPRE is free and based in the U.S. so you won’t have any communication problems.

VIPRE Antivirus Plus
Switching your antivirus have never been easier with VIPRE and the performance per price ratio is awesome.
2. Check your internet connection and switch off the VPN

- Try to connect via a browser. If there is no connection, move on.
- Restart your router and PC.
- Try using a wired connection instead of Wi-Fi.
- Disable VPN if you are using any.
- Run the Troubleshooter.
- Disable bandwidth hogging programs like a torrent client and download managers.
If your VPN was the problem, you might want to consider switching to a different solution.
Sometimes, VPN tools can interfere with your network connection and cause this issue to appear, therefore it’s important to use a good VPN tool.
There are many great VPN tools available, but the best is Private Internet Access so feel free to try it out.
This great tool will provide you with a dedicated, secure IP making your PC untraceable while you’re online.
Among other advantages, you will have access to different content available in other countries for on-demand video platforms like Netflix, HBO, Amazon Prime Video, and more.
Private Internet Access has a 30-day money-back guaranteed policy so it’s plenty of time to figure out if you like it or not.

Private Internet Access
This awesome VPN solution doesn't mess with your system and offers perfect online privacy protection!
3. Check the .NET Framework
- Open Windows Search and type Windows Features.
- Click on Turn Windows Features on or off.
- Check any boxes related to .Net Framework and save the selection.

- Restart your PC.
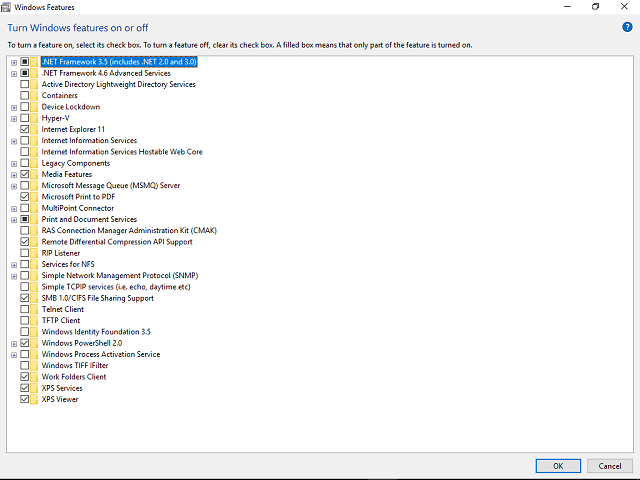
Note: Use this with caution since there are some essential features. Just enable the .NET Framework and move on. On the other hand, if the update error is relentlessly reappearing, move on to next steps.
Are you experiencing Windows update issues? Check out this guide to fix them
4. Use a third-party partitioning tool to change partition size

If somehow, due to the excess of data, your system partition lacks space, you may use a third-party tool to extend it. Have in mind that at all times you’ll need at least 500 MB of free space in order to install updates.If you have less than that, you can try to delete some files, use a built-in system tool to clean up junk or extend partition with a third-party partitioning tool.
If you’re looking for good partitioning software, we strongly recommend considering Paragon Partition Manager Advanced. This tool is incredibly simple to use, and it will allow you to modify your partitions any way you like.
Partitioning your drives is not a very simple task for everyone but this professional-grade partitioning tool will help you divide your hard disk extremely easy, making you look like a Pro.
This solution creates partitions quickly, and it will make sure that the storage space is used optimally.
And if you’re worried about risks, Paragon comes with built-in backup functions that help you save the current configuration before working on a hard drive.
That means that in case you run into any possible problems, you won’t suffer any damage and the built-in recovery wizard will restore your system immediately.

Paragon Partition Manager Advanced
Disk partitioning becomes a formality by using Paragon and your drives will be tuned for efficient storage.
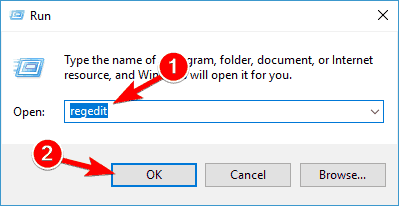
5. Delete certain registry values
- Search for regedit and press Enter or click OK to start the Registry Editor.
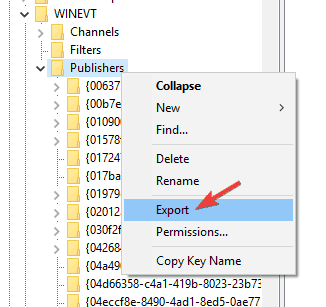
- In the left pane, navigate to:
HKEY_LOCAL_MACHINESOFTWAREMicrosoftWindowsCurrentVersionWINEVTPublishers - Right-click the Publishers key and choose Export from the menu.
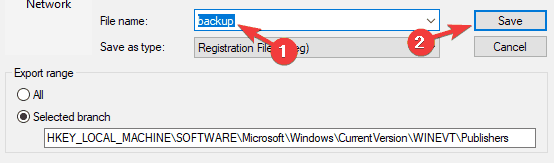
- Select the location where you want to export this key and enter the desired file name.
- Click Save (in case anything goes wrong after modifying your registry, you can simply run the file created in this step to restore it).
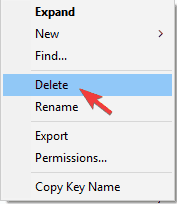
- Locate the following keys and delete them:
HKEY_LOCAL_MACHINESOFTWAREMicrosoftWindowsCurrentVersionWINEVTPublisherse7ef96be-969f-414f-97d7-3ddb7b558cccHKEY_LOCAL_MACHINESOFTWAREMicrosoftWindowsCurrentVersionWINEVTPublishers 8c416c79-d49b-4f01-a467-e56d3aa8234cTo delete a key, simply right-click it, choose Delete from the menu, and click Yes to confirm.
Note: If you can’t access the Registry Editor, check out this expert guide and solve the issue quickly.
6. Remove all your temporary files
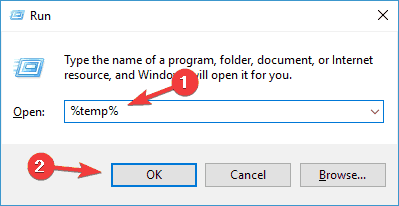
- Press the Windows Key + R, enter %temp% and press Enter or click OK.
- Delete all its content.
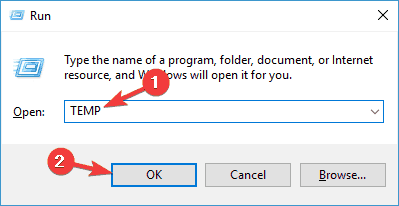
- Press the Windows Key + R, enter TEMP, and press Enter or click OK.
- Delete the contents of the TEMP folder.
Temporary files won’t delete? Solve the issue quickly in a few easy steps
7. Disable the Secure Boot
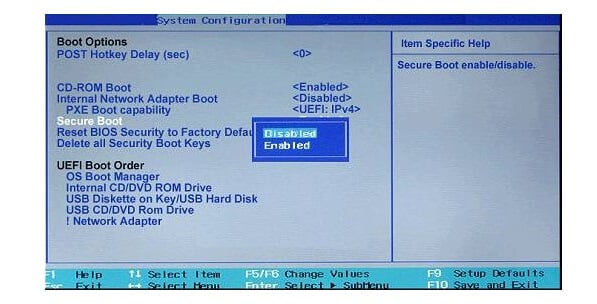
The Secure Boot is a useful feature that can protect your PC from certain malware, but this feature can also cause problems with certain updates.
Many users reported that they encountered error 0x800f0922 due to the Secure Boot feature.
In order to fix the problem, it’s advised to temporarily disable it. To do that you just need to enter BIOS and disable Secure Boot from there.
To see how to perform this procedure, we strongly advise you to check your motherboard manual for detailed instructions.
You can get the necessary information about your motherboard if you use a third-party motherboard information tool.
Once you disable the Secure Boot, try to install the update again. Once the update is installed, you can go back to BIOS and enable the Secure Boot again.
8. Repair your installation with SFC and DISM scans
8.1 Run a SFC scan
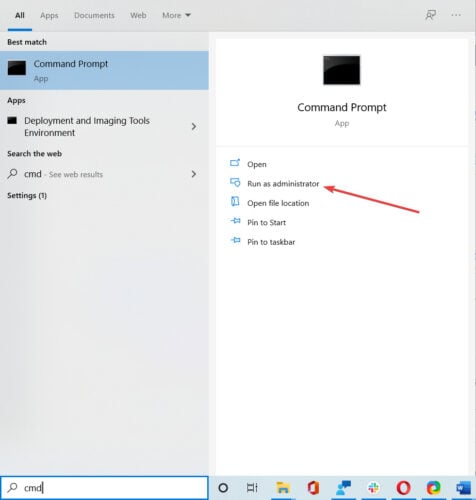
- Search for cmd and click on Run as administrator to open Command Prompt.
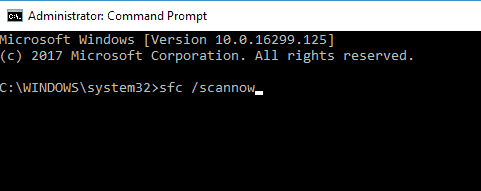
- Enter sfc /scannow and press Enter.
- The scan can take about 15 minutes, so don’t interfere with it.
Note: If you can’t run an SFC scan or if it doesn’t solve the problem, you should use a DISM scan instead.
8.2 Run a DISM scan
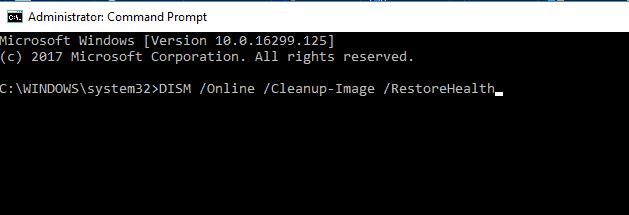
- Start Command Prompt as administrator and run the following command:
DISM /Online /Cleanup-Image /RestoreHealth - DISM scan can take up to 20 minutes, so don’t interrupt it.
Note: Once the DISM scan is finished, check if the problem is still there. If you were unable to run an SFC scan before, or if the DISM doesn’t solve the problem, be sure to repeat the SFC scan again.
And that’s it. We hope you’ll manage to resolve your update issue with these workarounds. If you are having any questions or suggestions on your mind, the comment section is always open.
Editor’s Note: This post was originally published in May 2018 and has been since revamped and updated in October 2020 for freshness, accuracy, and comprehensiveness.
Thank you for viewing the article, if you find it interesting, you can support us by buying at the link:: https://officerambo.com/shop/
No comments:
Post a Comment