
Bitdefender Antivirus Plus
Isn’t Smite responding? This antivirus never interferes with your gaming sessions and overall system!
2. Reinstall Smite and Microsoft Visual C++ 2010 Redistributable Package
- Download Microsoft Visual C++ 2010 Redistributable Package.
- Run this file. If you get a message saying that you have an updated version installed on your computer, make sure that you uninstall Microsoft Visual C++ Redistributable from your computer and try to run the downloaded file again.
- If you have a 64-bit version of Windows that you need to install both 32-bit and 64-bit versions of Microsoft Visual C++ 2010.
- After Microsoft Visual C++ 2010 Redistributable Package installs, install Smite again.
According to users, sometimes this issue can occur if there’s a problem with Smite and Visual C++ installation. To fix it, try to reinstall Smite and Visual C++ components.
Before we start, be sure to remove Smite from your PC. You can do that right from the Settings app, but usually, the better option is to use an uninstaller software tool.
In case you’re not familiar, uninstaller software is a special application that can remove all files and registry entries associated with the problematic application.
IObit Uninstaller is a simple, yet powerful uninstaller application, and if you want to remove a certain application from your PC, we suggest that you try out this application.
After you remove Smite from your PC, you just need to complete the above procedure. Some users also suggest installing all versions, both x86 and x64, of Visual C++ Redistributable from 2010 to 2013.
In some cases, you might not even have to download the Visual C++ Redistributables. Most games come with necessary redistributables, so you can easily install them.
To do that, go to the Smite’s installation directory and navigate to BinariesRedist. Now run the setup files from that directory in order to install the necessary redistributables.

IObit Uninstaller
IObit Uninstaller lets you completely remove Smite in just one click. Ready to try it out?
3. Make sure that Hi-Rez Studios Authenticate and Update Service is running
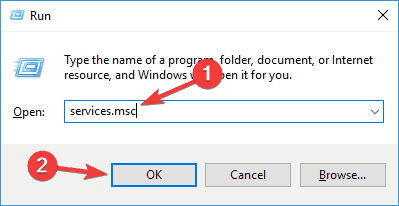
- Press Windows Key + R shortcut, type Services.msc and press Enter.
- A list of services will appear. Locate Hi-Rez Studios Authenticate and Update Service.
- Right-click this service and choose Start.
- Try installing Smite again.
Users complain that they cannot install Smite on Windows 10, and if you’re having this issue, as well, you might want to try enabling Hi-Rez Studios Authenticate and Update Service.
After starting this service, try to install the game again and check if the problem is resolved.
4. Install Smite through Steam
If Smite crashes on launch, maybe you can try downloading the game from Steam.
Users have confirmed that downloading the game from Steam has fixed this issue for them, so this solution might be worth trying.
5. Move msvcp110.dll and msvcr100.dll to SysWow64 folder
One more solution to this issue is to move msvcp110.dll to the SysWow64 folder.
To fix this. you need to download the 32-bit version of that dll file and move it to the SysWow64 Windows 10 directory.
To fix the problem, just find these files and move them to this directory: C:WINDOWSSysWOW64Wow64
After moving these two files, the problem should be completely resolved and Smite should start working again.
6. Remove the updates for Microsoft Visual C++ x64 and x86
- Open the Settings app by using Windows Key + I shortcut.
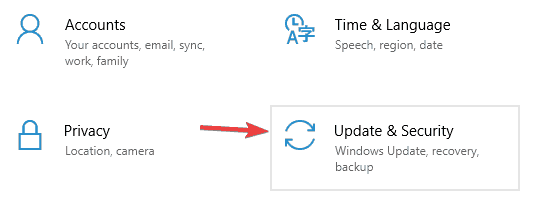
- Now go to the Update & Security section.
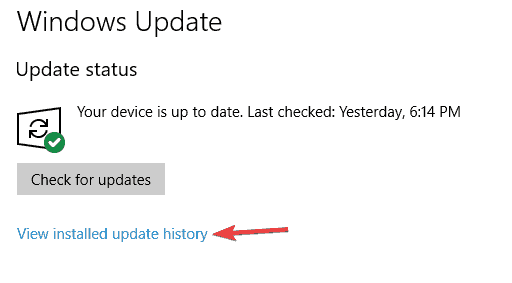
- Select View update history.
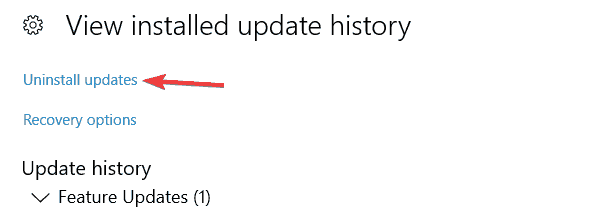
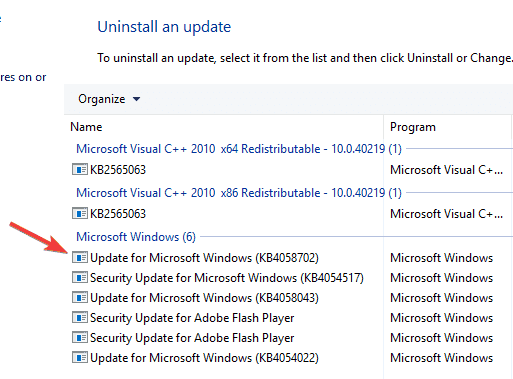
- Select the Uninstall updates option.
- Locate the problematic update and double-click it to remove it.
This solution applies to your case as well, so don’t hesitate to remove the updates for Microsoft Visual C++ x64 and x86.
This is quite simple and you can do it by following the above steps. Once you remove the problematic updates, check if the problem is resolved.
If the issue doesn’t appear anymore, be sure to block Windows from installing automatic updates with the help of this dedicated guide in order to prevent this issue from reappearing.
If you’re having trouble opening the Setting app, take a look at this article to solve the issue.
7. Create a new user account
- Open the Settings app by using Windows Key + I shortcut.
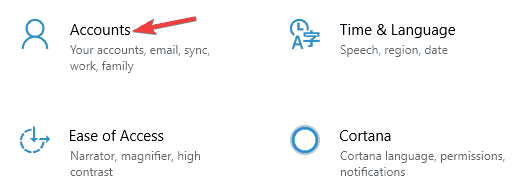
- In the Settings app, navigate to the Accounts section.
- Select Family & other people from the left pane. Now click Add someone else to this PC button in the right pane.
- Select I don’t have this person’s sign-in information.
- Now, choose Add a user without a Microsoft account.
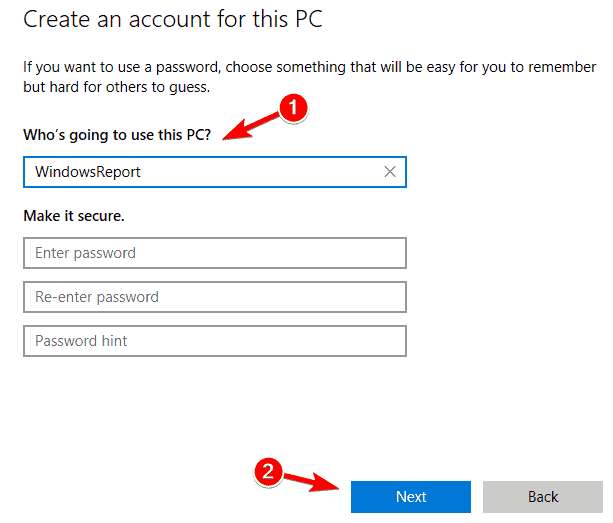
- Enter the desired username and click Next.
Sometimes Smite issues can be caused by your user account. Several users reported that they fixed the problem simply by creating a new user account.
This is quite simple to do on Windows 10, and you can do it by following the above procedure.
Once you create a new account, switch to it, and check if the problem still appears. If not, you’ll have to move your personal files to the new account and start using it instead of your old one.
8. Run the game on a single monitor
According to users, Smite issues such as crashes can occur if you’re using a dual-monitor setup.
Sometimes multiple monitors can cause this issue to occur, and in order to fix it, it’s advised to disconnect the second monitor before starting Smite.
This is just a workaround, but it should work according to users, so be sure to try it out.
9. Install the game on SSD drive
If you’re having Smite issues, such as freezing, the issue might be your hard drive. Hard drives are slower than SSD.
If you’ve noticed any increased hard drive activity while trying to run Smite, the problem might be your hard drive.
According to users, they managed to fix this issue simply by installing their game on the SSD drive, so if you have an SSD drive, be sure to try this solution.
Want more details on how to install games on SSD? Find out how it’s done right here!
Smite issues tend to repeat and sometimes you won’t be able to play the game at all due to these issues. Speaking of Smite problems, here are some other common issues that users reported:
- Smite unable to connect to server – This issue can occur due to your antivirus, and if you’re having any problems, we advise you to disable your antivirus and check if that helps.
- Smite won’t launch, doesn’t open – If Smite won’t even start on your PC, it’s possible that you don’t have the necessary DLL files. To fix the problem, install the required Visual C++ redistributables and check if that solves the issue.
- Smite crash – Smite crashes can sometimes occur due to certain updates. To fix the problem, simply find and remove these updates from your PC.
- Smite bad or missing configuration – This problem can occur if your Smite installation is damaged. However, you can fix the issue simply by reinstalling Smite.
We hope that these solutions were helpful to you and that you’ve managed to fix any issues that you had with Smite on Windows 10.
Editor’s Note: This post was originally published in September 2018 and has been since revamped and updated in October 2020 for freshness, accuracy, and comprehensiveness.
Thank you for viewing the article, if you find it interesting, you can support us by buying at the link:: https://officerambo.com/shop/







No comments:
Post a Comment