What do I do if I can’t set priority in Task Manager on Windows 10?
1. Go to Safe Mode
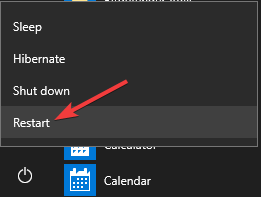
- Open the Start Menu, click the Power button, press and hold the Shift key and select Restart.
- Now go to Troubleshoot > Advanced options > Startup Settings and click on Restart.
- One the PC restarts, press F4 or F5 to enter Safe Mode.
- After entering the Safe Mode, check if the problem is still there.
If there’s no problem in Safe Mode, it’s rather likely that your settings or installed applications are causing this issue, so you might want to try disabling certain applications and check if that helps.
2. Show processes from all users
- Make sure that you’re using an administrator account.
- Open Task Manager.
- Now click on Show processes from all users.
- After doing that, try to change the priority and check if the problem is resolved.
3. Make sure that Administrators have full control
- Start Task Manager.
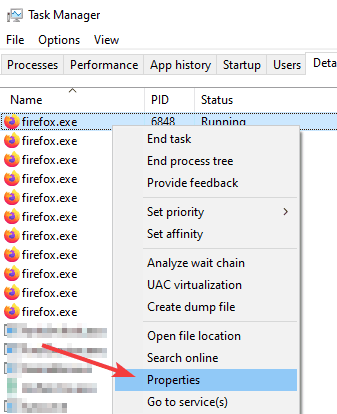
- Locate the process whose priority you want to change.
- Right-click the process and choose Properties.
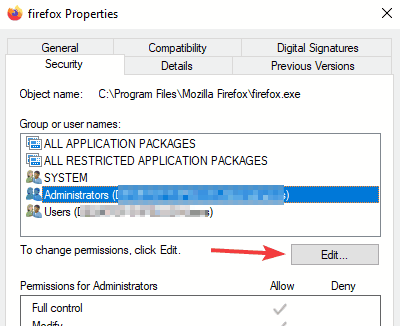
- Go to the Security tab and click on Edit.
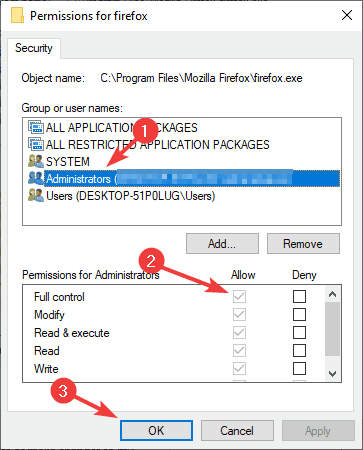
- Select Administrators and check the Full control option in the Allow Now click Apply and OK to save changes.
You can also give Full control to the Users group, but that comes with some minor security risks.
4. Disable User Account Control
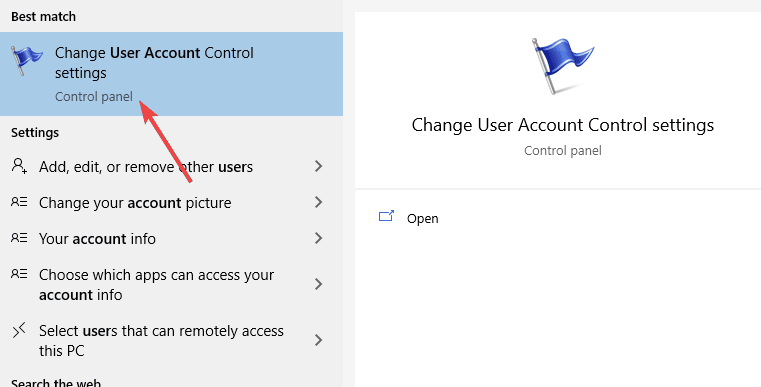
- Press Windows Key + S and enter user control. Select Change User Account Control settings.
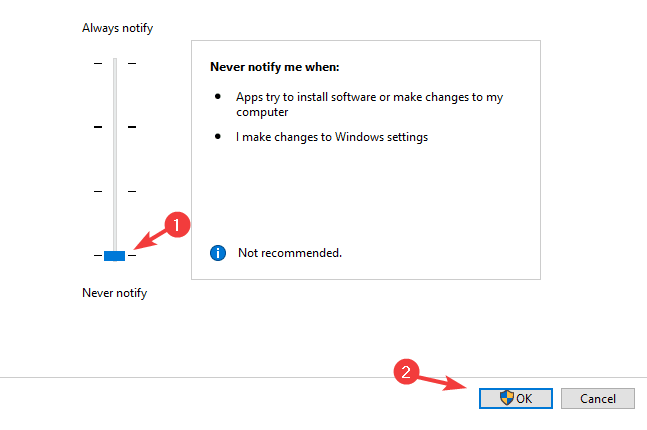
- Now move the slider all the way down to Never notify. Click OK to save changes.
After doing that, User Account Control will be disabled, and you should be able to change the priority of your processes.
If you can’t set priority in Task Manager, it’s rather likely that your settings are causing the problem, but you should be able to fix the problem after using our solutions.
Thank you for viewing the article, if you find it interesting, you can support us by buying at the link:: https://officerambo.com/shop/
No comments:
Post a Comment