DriverFix
Is Battle.net client freezing on your PC? Make sure to use DriverFix to manage driver updates!
2. Downgrade drivers to an older version
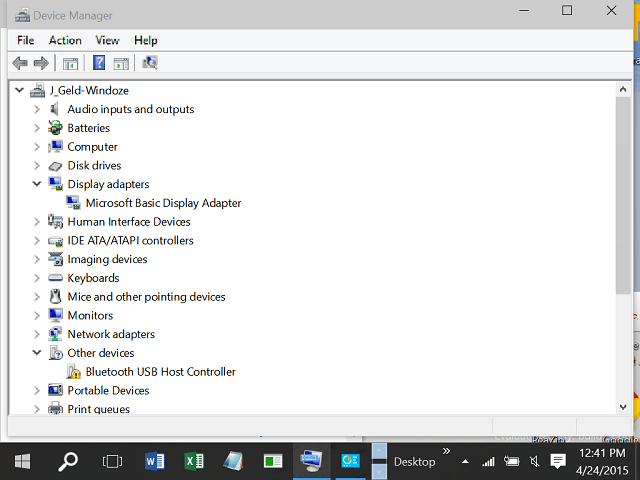
- Right-click This PC/My Computer on the desktop.
- Open Properties.
- Go to Device Manager.
- Find Display Adapters and right-click your main GPU.
- Select the Driver tab.
- Click the option that says Roll Back driver.
On the other hand, if the problem occurred after a driver update, you should roll back your drivers to an earlier version. To do so, follow the instructions above or, once again, use DriverFix.
3. Uncheck browser hardware acceleration
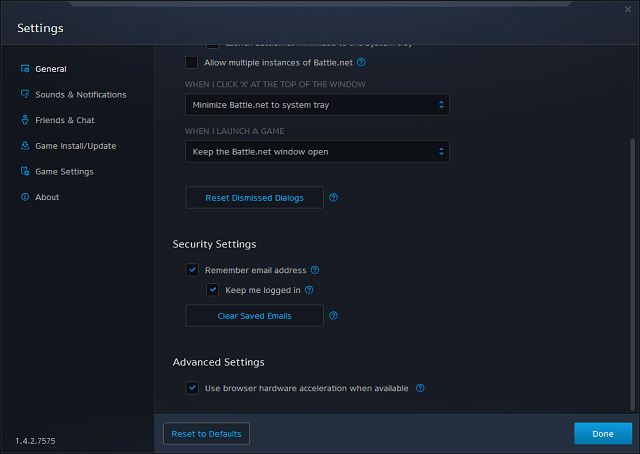
- Open your Battle.net client.
- Click Settings.
- Choose Advanced.
- Disable Use browser hardware acceleration when available.
- Restart client.
Browser hardware acceleration is a common reason for GPU crashes, as stated by the gaming community. According to developers, disabling it may cause compatibility issues.
However, we advise you to disable it and choose a lesser evil. To do so, follow the above procedure.
If disabling the browser‘s hardware acceleration didn’t get the job done, move on to another solution from below.
4. Disable Battle.net client from running in the background
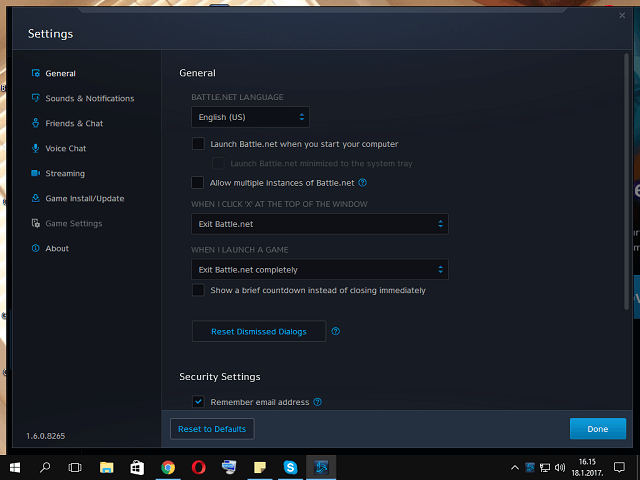
- In the Battle.net app, go to Settings.
- Enter General and find WHEN I LAUNCH A GAME.
- Choose Exit Battle.net completely.
- Launch preferred game.
- Press Alt + Enter to switch to a windowed mode.
- Right-click on the taskbar and open Task Manager.
- Find remaining Battle.net processes and stop them.
- Close the Task Manager and click the game.
- Press Alt + Enter shortcut to retrieve full-screen mode.
You can disable the Battle.net client with the Task manager, while the game is running. Stop all the processes that are related to the launcher and get back in the game.
Can’t open Task Manager? Don’t worry, we’ve got the right solution for you.
5. Change in-game settings to DX9 from DX10
- Open your Battle.net app.
- Go to Settings.
- Open Game Settings.
- Check Additional command-line arguments.
- In the bar below type -dx9.
Even though most of the playable games that Blizzard offers are primarily made for DX10, some of them may better perform with DX9.
You can change this setting in the client without any problems. The best and safest way to change the default API. Follow the instructions above to do so.
6. Run game in compatibility mode set to Windows XP Service Pack 3
- Go to the game installation folder and find the main exe file.
- Right-click and open Properties.
- Select Compatibility.
- Check Run this program in compatibility mode box.
- Select Windows XP Service Pack 3.
- Check Run As Administrator box.
- Save and exit.
By changing the compatibility mode, some other graphics issues may be fixed. Many users reported a problem when combining older graphics and newer Windows OS.
In addition, you can change administrative privileges for games you are running. To do so, follow the instructions above.
After enabling Compatibility mode, check if the problem is still there. If the issue still appears, you might have to adjust Compatibility mode settings until you find settings that work for you.
We searched diligently and collected these fixes for you. We hope you’ll manage to resolve GPU and Battle.net issues and enjoy your games.
Do you have any alternative solutions? Be so good and share them with us in the comments area below.
Editor’s Note: This post was originally published in March 2019 and has been since revamped and updated in March 2020 for freshness, accuracy, and comprehensiveness.
Thank you for viewing the article, if you find it interesting, you can support us by buying at the link:: https://officerambo.com/shop/


No comments:
Post a Comment