For example, attackers might be trying to steal your information. One way to fix the issue is by flushing the DNS.
If you’re having trouble accessing Command Prompt as an admin, then you better take a closer look at this guide.
3. Change DNS server address
- Open Control Panel by pressing Windows Key + X.
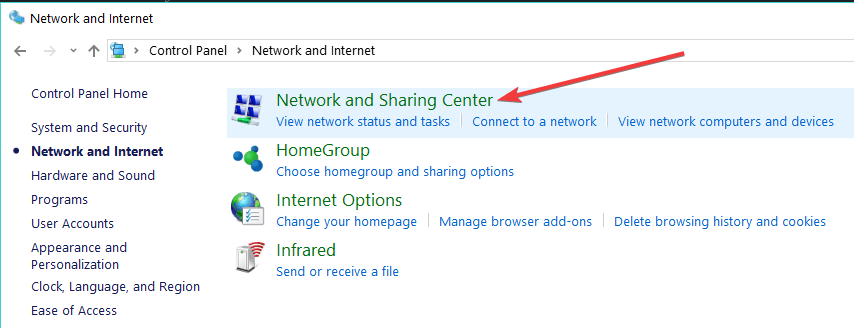
- Click on Network and Internet.
- Open Network and Sharing Center.
- Open Change Adapter settings. (left pane)
- Right-click on your Wi-Fi or LAN connection and select Properties.
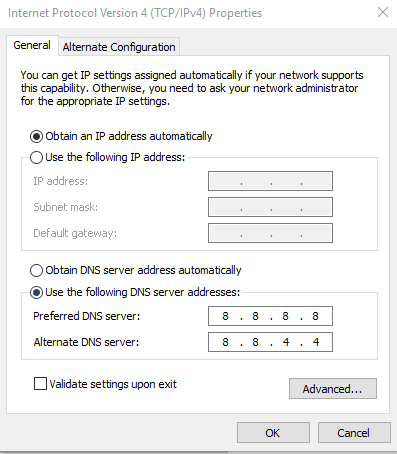
- In the properties window, select Internet Protocol Version 4 (TCP/IPv4) and click on the Properties button.
- Select the Use the following DNS server address option.
- In the Preferred DNS Server and Alternate DNS Server field, enter a third-party address. For this guide, I have used Google DNS server.
- Enter the following DNS server one by one:
Preferred DNS server: 8.8.8.8
Alternate DNS server: 8.8.4.4 - Click OK to save the changes.
If flushing the DNS doesn’t work, change the DNS server address manually. You can also use a DNS changer program to do the same.
You can’t open Control Panel? Take a look at this step-by-step guide to find a solution.
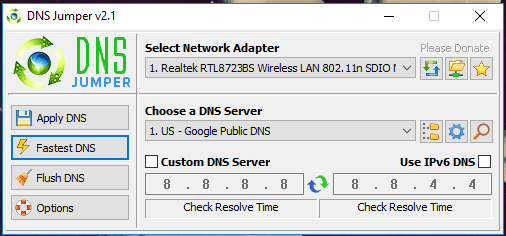
You can also use DNS Jumper
DNS Jumper is a free utility program for Windows OS that enables you to change the default DNS server with free third-party DNS servers.
It also has the option to find the fastest free DNS server. Download DNS Jumper, click on the Fastest DNS button. Apply the DNS server.
4. Check your computer’s date and time
- Click Start and open Settings.
- Open Time and language.
- Turn off the Set time automatically option.
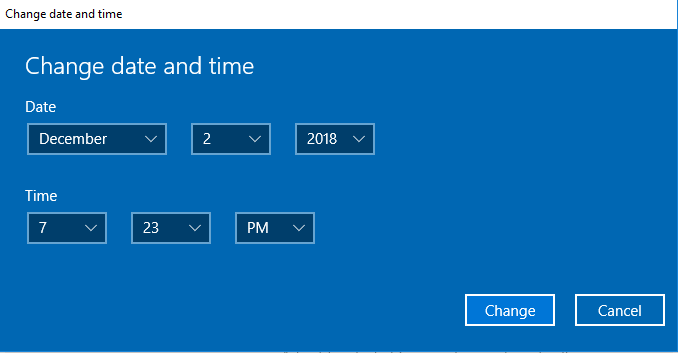
- Click on the Change button under the Change data and time section.
- Set the correct date and time and click the Change button to save the changes.
Security-related network errors are common, and one of the reasons for this can be incorrect date and time on the computer.
The modern web browser does block the users from accessing any websites thinking it is a phishing attack when the time, date, and timezone on the PC mismatch with its own servers.
You can check the time and date on the taskbar beside the Action Center icon. If the time and date are incorrect, do the following to correct it.
Just make sure you turn on the Set time automatically option before closing the Settings window.
If you’re having trouble opening the Setting app, take a look at this article to solve the issue.
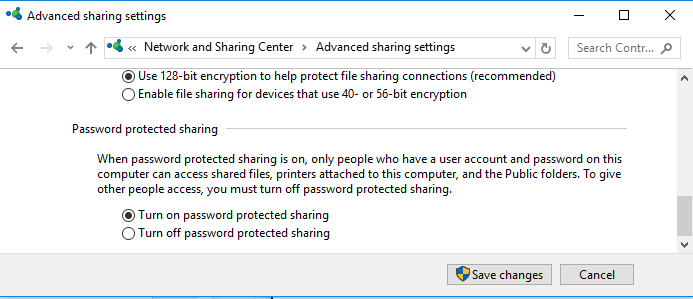
5. Enable Password Protected Sharing
- Open Control Panel.
- Go to Network and Internet > Network and Sharing Center.
- On the left pane, click on Change advanced sharing settings.
- Look for Home or Work profile. If you don’t find them, look for All Networks and expand it.
- Scroll to the end and select the Turn on password protected sharing option.
- Click on the Save changes button.
If you have turned off password protecting sharing in network and sharing center for your network, the attackers might be trying to steal your information from error may occur.
Make sure that password protected sharing is turned on to fix the issue.
6. Check your Internet Security Settings
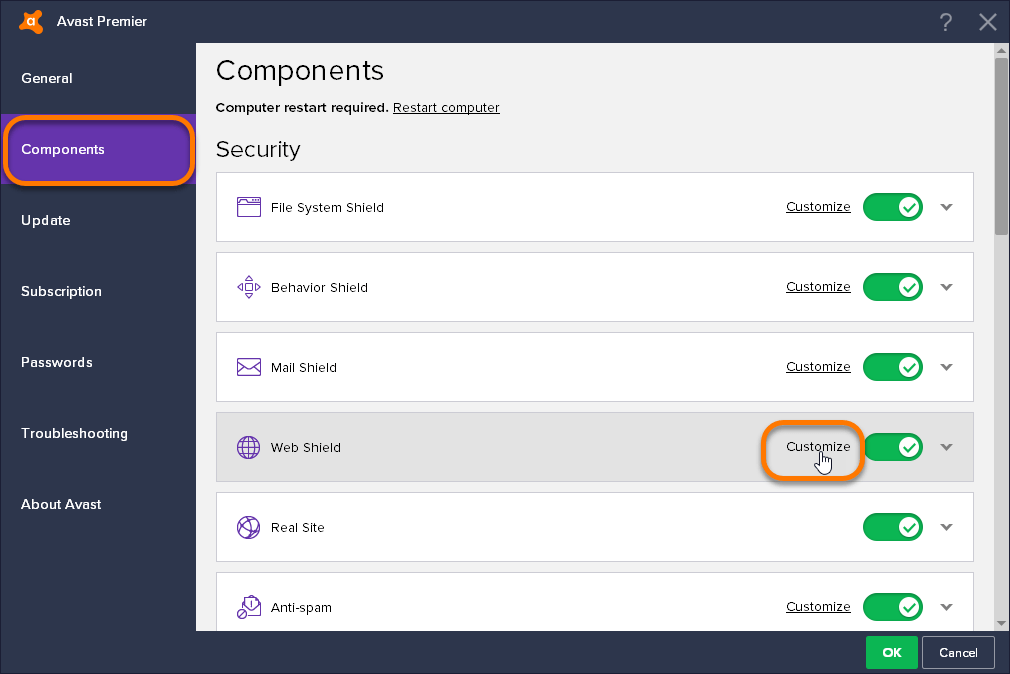
Different antivirus programs offer a different kind of security and at times security programs may block all the SSL/https connection to/from the network.
For example, if you are using Avast security, try to disable Webshield security or go to customization for Web Shield and turn off HTTPS scanning option. Check for similar settings in other security programs as well.
If nothing works, disable the firewall temporarily and then disable antivirus temporarily to see if that makes any difference.
7. Clear browser cache and cookies
- Click on Menu > More Tools > Clear browsing data.
- Select the time range and set it back to 1 day or 1 week, depending on when the error first occurred.
- Check Cookies and other side data and cached images and files option.
- Click on the Clear data button to clear the cache.
The bad cache can cause Your connection is not private error in Google Chrome and other web browsers. Here is how to clear cache and cookies in Google Chrome and Edge.
8. Use Chrome’s built-in malware removal tool
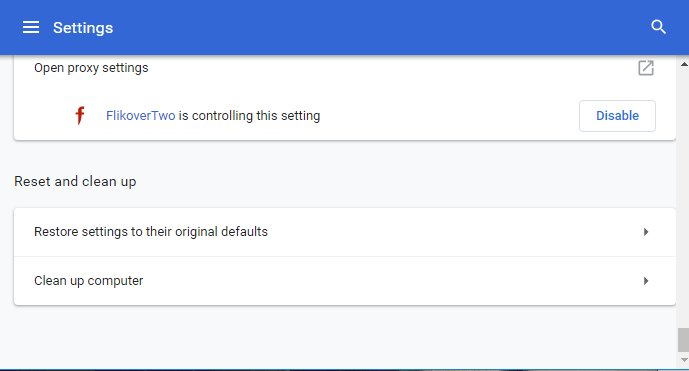
- Open Google Chrome. Click on Menu and select Settings.
- Scroll to the end of the page and look for the Reset and Clean up section.
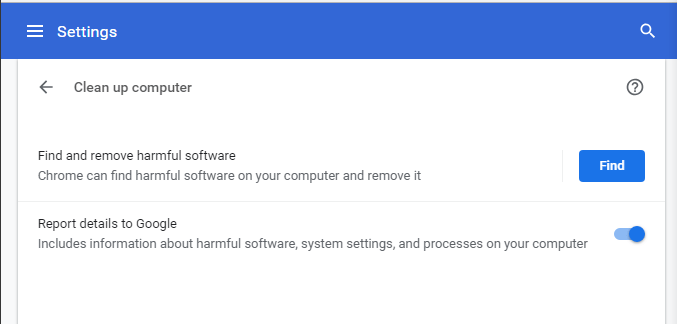
- Click on Clean up computer.
- Click on the Find button to begin the scanning process.
Google Chrome comes with a built-in malware removal tool. The tool will check for any malicious software that might be affecting the browser and remove it.
The tool will scan and remove any harmful software from your computer if found.
9. The problem can be on the server end
If you are facing the connection not private error while visiting a particular website, the problem can be from the owner’s end.
In this situation, you can report the problem to the website administrator and wait for it to be resolved.
The connection is not private – attackers might be trying to steal your information error can be annoying, and we hope one of the mentioned solutions may have helped you resolve the issue.
Of course, the quickest way remains downloading Bitdefender, an antivirus that will help you get rid of all malware-related causes.
Make sure to leave a comment if the problem persists or if you have found a new solution. We would try to update the article with any new information available.
Editor’s Note: This post was originally published in December 2018 and has been since revamped and updated in October 2020 for freshness, accuracy, and comprehensiveness.
Thank you for viewing the article, if you find it interesting, you can support us by buying at the link:: https://officerambo.com/shop/




No comments:
Post a Comment