DriverFix will recommend only compatible software for each outdated driver. Although you might be unsure which one to choose, any option will be a safe choice.

DriverFix
Avoid unexpected printer errors by keeping all the essential system drivers in top shape with this efficient tool.
2. Check your system for malware
Several users reported that Print Spooler error 0x800706b9 was caused by malware infection. To fix this problem, it’s advised that you perform a full system scan and remove all malware from your PC.
You can use any antivirus to scan your PC, but bear in mind that not all antivirus tools are equally effective.
Therefore, it’s advised to use a reliable antivirus such as Bitdefender. This antivirus uses next-gen detection technologies to offer just the ultimate protection.
Rest assured that it will find any malware and remove it from your device.
Once you scan and remove the malware, the issue should be resolved.

Bitdefender Antivirus Plus
Malware can seriously affect various processes, printing included, but with Bitdefender you're safe from any type of online attacks.
3. Create a new user account
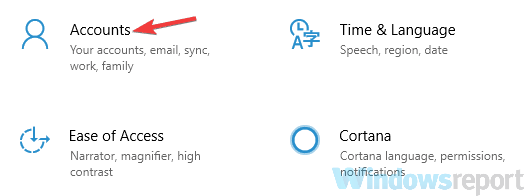
- Open the Settings app and go to the Accounts section.
- Now choose Family & other people from the left pane.
- Click Add someone else to this PC button in the right pane.
- Choose I don’t have this person’s sign-in information.
- Select Add a user without a Microsoft account.
- Type the desired user name and password and click Next.
After creating a new user account, switch to it. If the issue doesn’t appear on the new account, you need to move your personal files to the new account and start using it instead of your old one.
4. Modify your registry
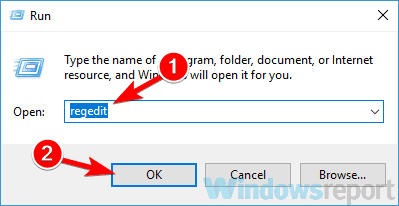
- Press Windows Key + R and enter regedit.
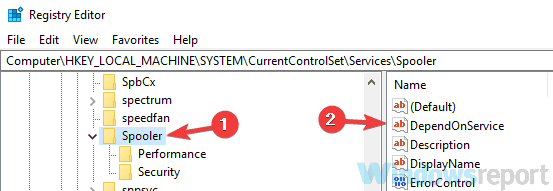
- Navigate to the following key in the left pane (if you want, you can export this key and use it as a backup in case anything goes wrong after modifying the registry):
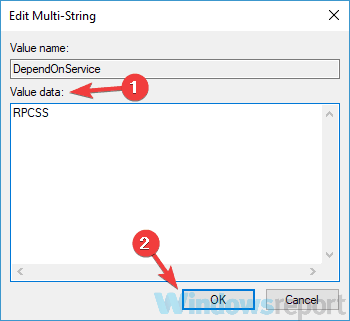
HKEY_LOCAL_MACHINESYSTEMCurrentControlSetServicesSpooler - In the right pane, double-click the DependOnService.
- Now delete http from the Value data field and click OK.
After making these changes, restart your PC and check if the problem is still there.
Several users reported that this method worked for them, so you might want to try it out. Just be cautious while modifying the registry and create a backup just in case.
5. Reset winsock
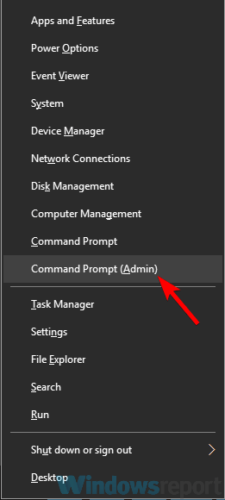
- Press Windows Key + X and choose Command Prompt (Admin) from the menu.
- Type the following command and hit Enter:
netsh winsock reset - Then restart your PC.
After your PC restarts, check if the problem is still there. A couple of users fixed this issue by performing running this command, so be sure to try it out.
6. Run the Printer troubleshooter
- Open the Settings app and go to the Update & Security section.
- Select Troubleshoot from the menu on the left.
- Go to Printer and click Run the troubleshooter button.
- The troubleshooting process will now start. Follow the instructions on the screen to complete it.
After the troubleshooting is finished, check if the problem with your printer is resolved. Troubleshooter might not be the most effective solution, but if you have some minor glitch on your system, you can fix it using this solution.
7. Stop the Print Spooler service
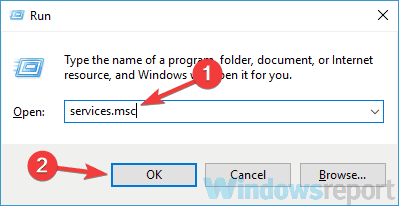
- Press Windows Key + R and enter services.msc.
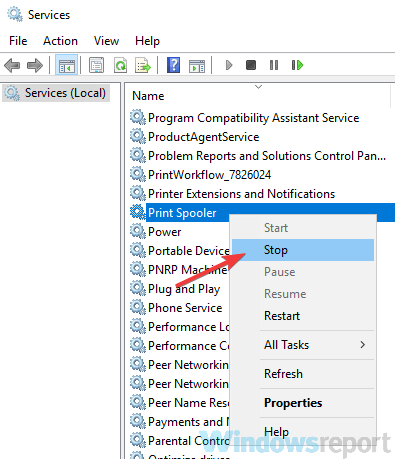
- Locate Print Spooler service on the list, right-click it, and choose Stop from the menu.
- Minimize the Services window.
- Now open File Explorer and paste the following in the address bar:
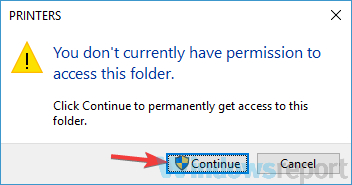
C:Windowssystem32spoolPRINTERS - When the confirmation message appears, click Continue.
- Once you enter the PRINTERS folder, delete all files from it and close File Explorer.
- Go back to the Services window, right-click Print Spooler service, and choose Start from the menu.
After doing that, the problem should be resolved and you’ll be able to print again without any issues.
8. Perform a System Restore
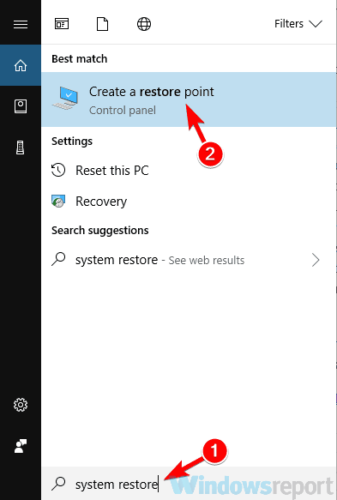
- Type system restore in the search field.
- Now choose to Create a restore point from the list.
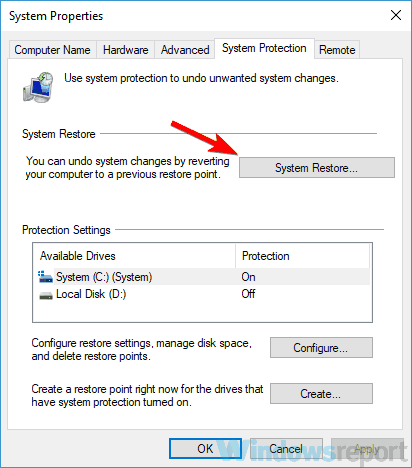
- Click the System Restore button.
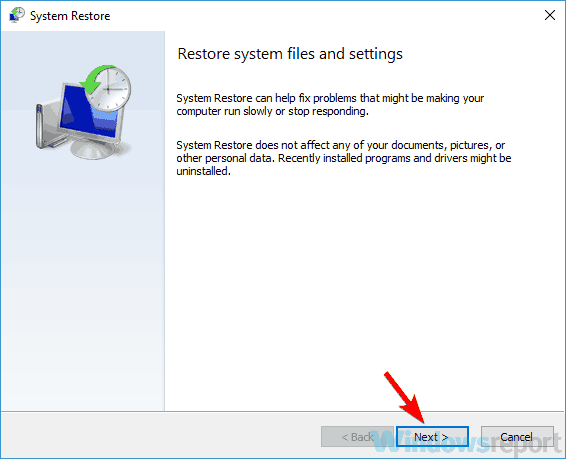
- Hit the Next button to continue.
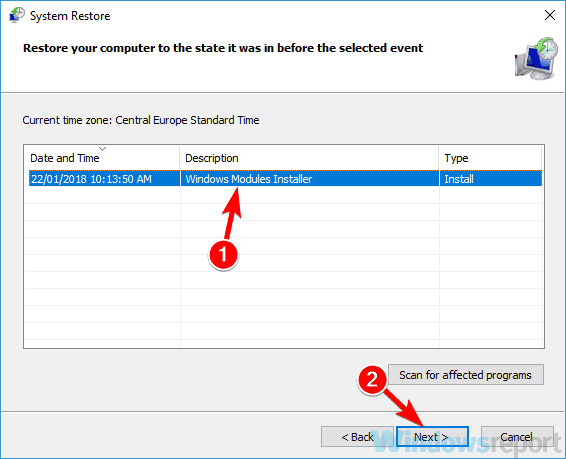
- A list of available restore points will appear. If available, check to Show more restore points option. Select the desired restore point and click Next.
- Follow the instructions on the screen to finish the restoration process.
After performing System Restore, your problem should be completely resolved and the printer will start working again.
Whatever the cause of the issue was, we hope that you managed to solve the printing error by using one of our solutions. Your feedback is welcome, and you can contact us using the comments section below.
Editor’s Note: This post was originally published in October 2019 and was completely revamped and updated in October 2020 for freshness, accuracy, and comprehensiveness.
Thank you for viewing the article, if you find it interesting, you can support us by buying at the link:: https://officerambo.com/shop/




No comments:
Post a Comment