Friday, October 9, 2020

Hands-on with Windows 10 October 2020 Update: A pleasant surprise


Windows 10 October 2020 Update, also known version 20H2, will begin rolling out to consumers later this month as an optional feature update. Installing the October Update will add several subtle features to improve your user experience and prepare the device for future releases.


The feature update for Windows 10 comes with performance and quality improvements to the operating system.


After the update, you will notice UI improvements to the Start Menu, but for the most part, you’re unlikely to notice any significant changes for other areas of Windows 10.


In this article, we’ll highlight our experience with the October 2020 Update and what you can expect.


Installation and download experience


As we reported last month, Microsoft’s next feature update for Windows 10 will install on your PC in just a few minutes.


In one case, we observed that Microsoft installed the update for our SSD machine in just two minutes. This works only when you’re upgrading from the May 2020 Update (v2004).


October 2020 Update will install in a matter of minutes because it’s simply an enablement package that weighs just 80MB. The underlying code for version 20H2 features is already present in Windows 10 version 2004 as long as you’re using August 2020 patch.


As mentioned, the size of the feature update is less than 80MB and it should download in less than a minute if you’re connected to a reliable internet connection.


  • Installation roughly takes less than two minutes on SSD hardware.

  • Installation roughly takes 5-10 minutes on HDD hardware.

  • Requires one reboot to apply all changes.

If you’re still rocking Windows 10 version 1909 or version 1903, you’ll need to download Windows 10 version 20H2 as a full-featured update for 4GB. Depending on the hardware specs, the process would be much longer.


What changes can you expect in version 20H2


In Windows 10’s October 2020 Update, you will not notice any major changes. According to Microsoft changelog, users of the Start Menu will notice a change right away when they look at the live tiles.
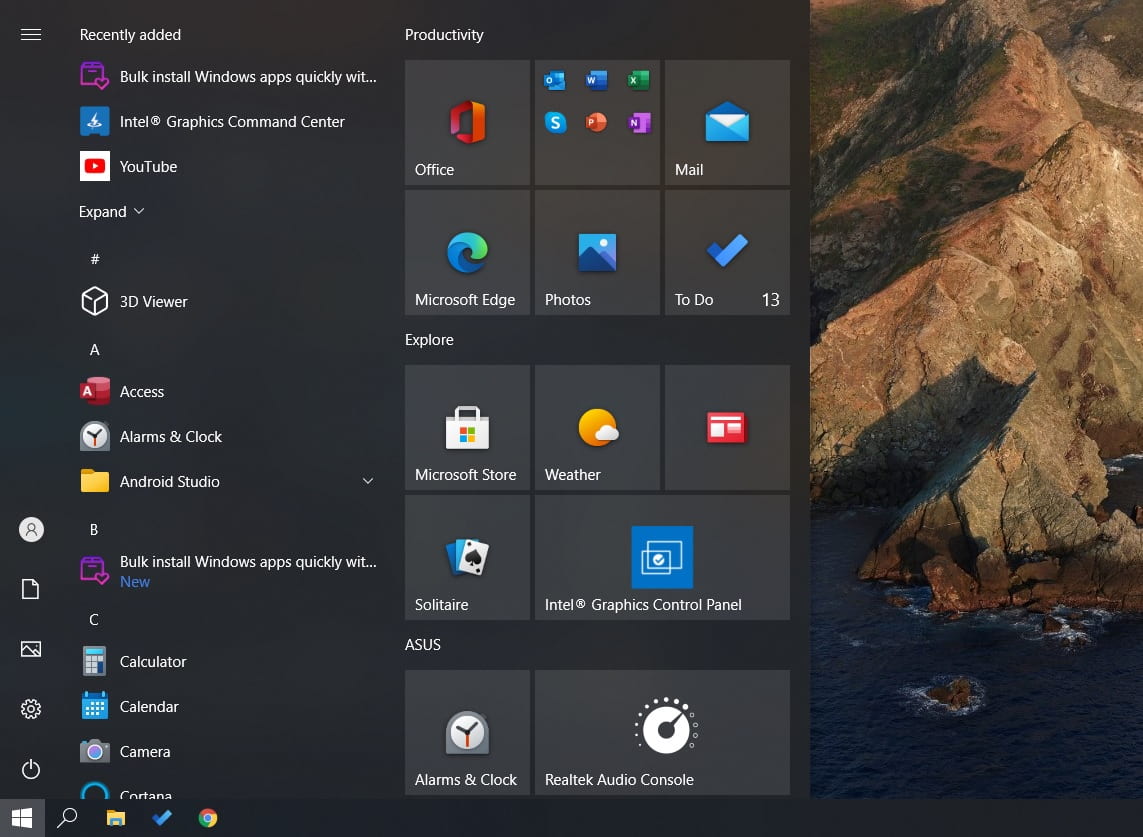

Windows Start Menu theme aware


As you can see in the screenshot above, Microsoft is introducing theme-aware tiles for Windows 10 Start Menu where you can apply the accent colour behind pinned tiles on Start. These tiles will respect your theme preference, including dark and light modes.


Taskbar


When setting up a new account or a new device, you will notice a more personalized out-of-box experience with the default taskbar layout.


For example, if you use Office and Your Phone frequently, Microsoft will automatically pin those apps to the taskbar when setting up a new account. The goal here is to provide a cleaner and more personalized experience.


Improvements to the Settings app


In version 20H2, Microsoft is killing off the System applet in the Control Panel for an improved version of ‘About’ page in the Settings.
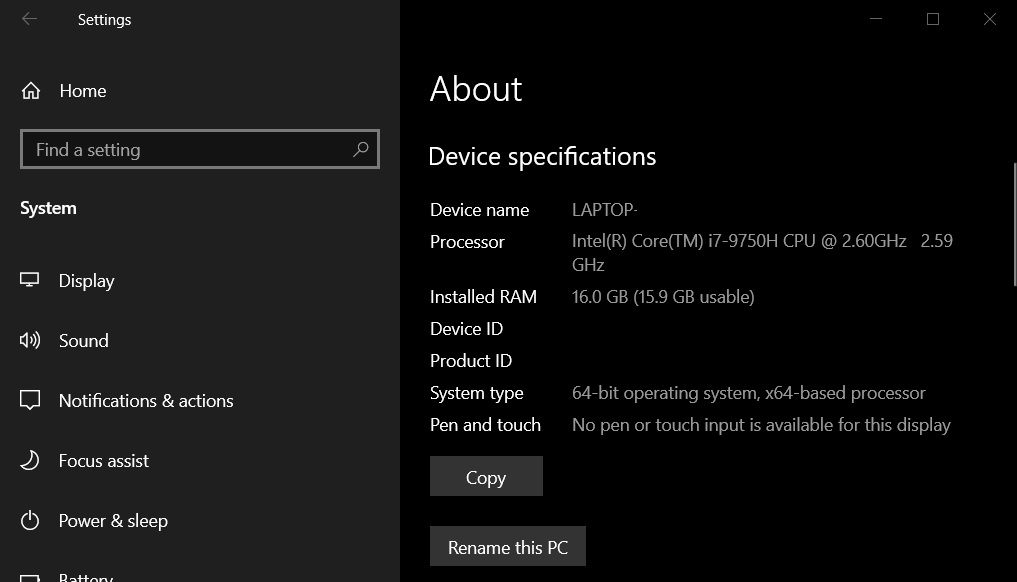

About settings screen


The updated Settings app comes with links to older utilities and a new button that lets you copy information under the “Specifications” sections. This would make it easier to share your system information with your friends or tech support.
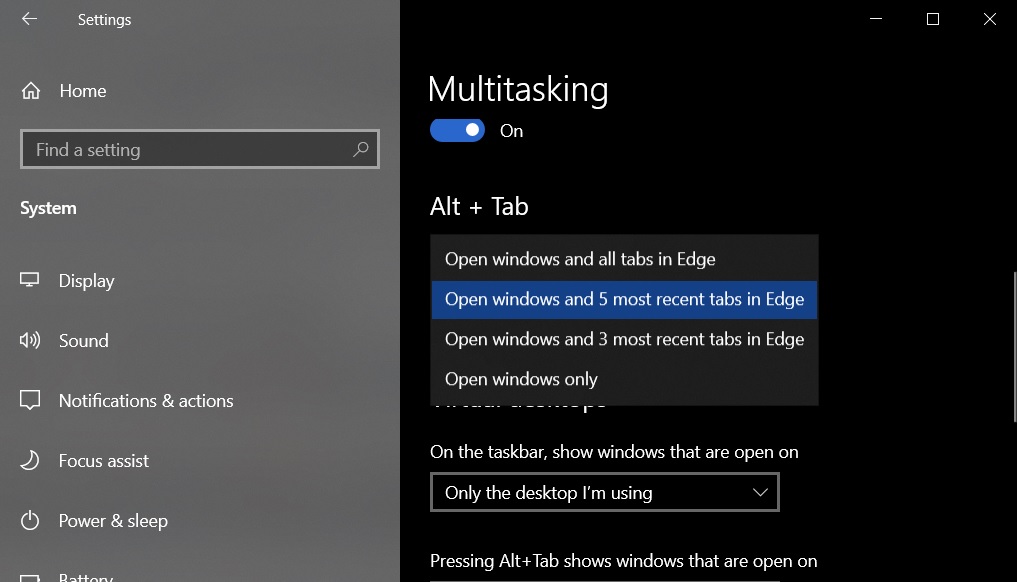

Windows 10 Alt Tab settings


If you use Microsoft Edge, you’ll also find a new multitasking feature helpful. With October Update, Microsoft is bringing Edge browser tabs to the Alt+Tab task switcher.


You can choose to show three or five most recently visited tabs of Edge, or you can also go back to the default windows experience.
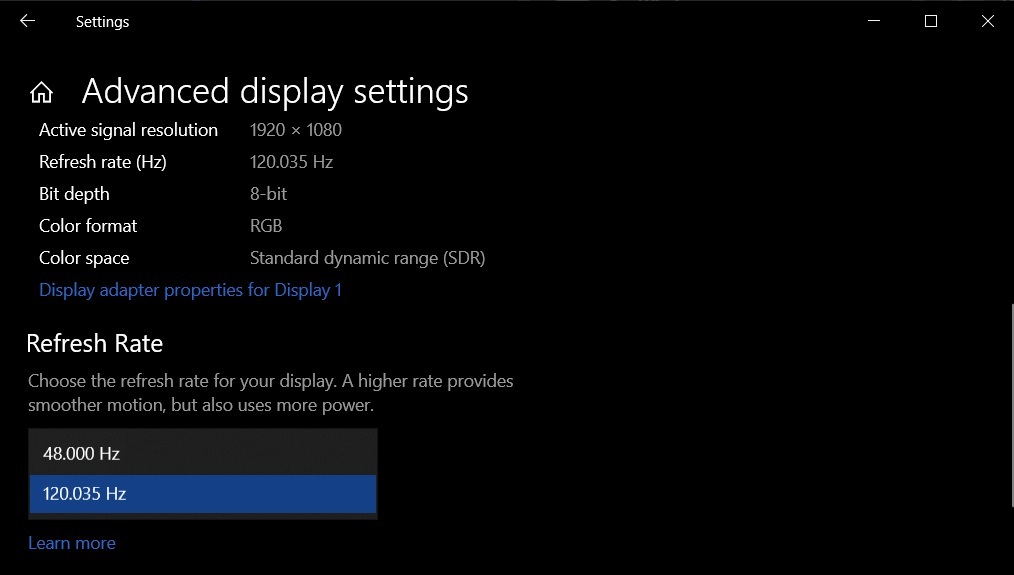

Windows 10 display settings


In addition, Windows 10 Settings page now allows you to change the refresh rate for your monitors. This feature was previously accessible via a third-party utility.


The post Hands-on with Windows 10 October 2020 Update: A pleasant surprise appeared first on Windows Latest


Thank you for viewing the article, if you find it interesting, you can support us by buying at the link:: https://officerambo.com/shop/
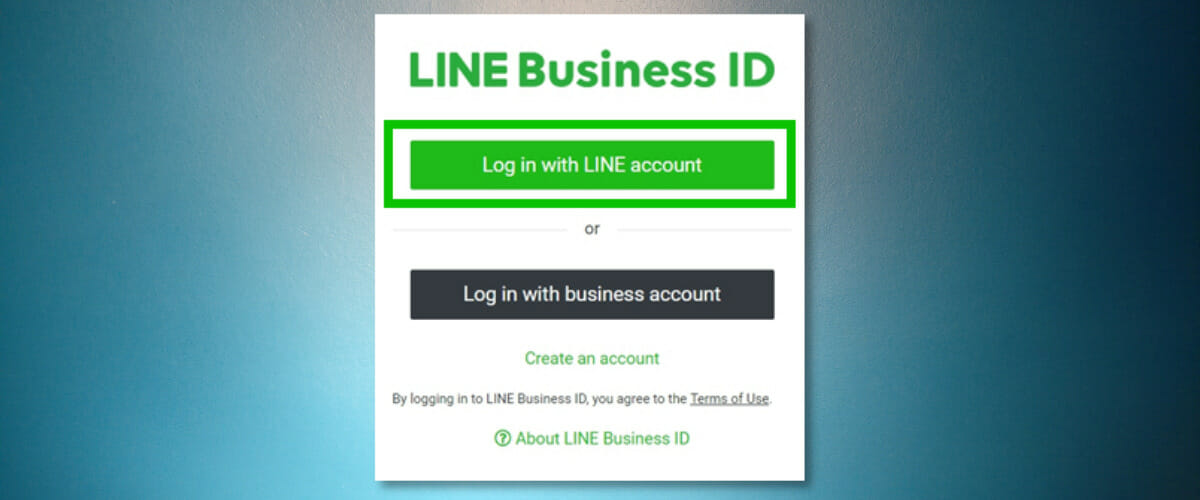
How to recover deleted Line account [3 easy steps]


Note: If you deleted your account and you reinstall the LINE app, you will not be able to transfer the data from the old account to the new one.


Moreover, if you have a LINE Pay account, is advised that you delete it before you delete your LINE account.


To conclude, once you deleted your account you can not restore it.


Not all is lost though, as the name used for your ID will become available again. Follow the steps below to set it up again.


2. How to re-use the same Line ID


  1. Go to the Home or More tab and select Settings.

  2. Select the Edit profile option and go to ID.

  3. Enter your ID and select the Check option.

  4. You should see the message This ID is available.

  5. Select Save.

Since the ID will become available once again after the accounts they were registered have been deleted, you can follow the above steps to use the ID again.


If you want to start off fresh, the solution below will ensure that you do so successfully.


3. Register a new Line account


  1. Go to your smartphone, on the LINE app, and register your email address.

  2. Download LINE for PC.

  3. Log in using the email and password used for registering on your smartphone.

Note: If you are getting an error when entering your email address or password, make sure that your password does not include any unnecessary spaces or you didn’t enter only half-width characters.


If you checked all these but you still see an error message, then make sure to reset your password and then try the steps again.


As you can see, there are several ways to check the status of your account. Only by simply deleting or uninstalling your app it does not necessarily mean you have permanently deleted the Line account.


But if that is not the case, and you have deleted it from the settings menu, then it’s important to remember that all the data will be lost and that your account cannot be recovered.


You can either create a new account or simply wait for the ID you already have to become available and use it once again.


Of course, there is always the option to create a new Line account from scratch baring in mind that this will not automatically transfer any data from the past chat history or previous earnings to the new one.


We’d love to hear if the solutions and information mentioned in this guide have proven useful for you.


If you have additional suggestions or recommendations, please let us know in the comments section below.


Thank you for viewing the article, if you find it interesting, you can support us by buying at the link:: https://officerambo.com/shop/

Microsoft Teams gets better attendance system, 7×7 grid layout and more


Microsoft Teams is getting another update this week that will allow you to see more people in a meeting. For those using mobile devices, Microsoft says the update will also optimize the Teams app for low bandwidth connections, so you can easily access chat and upload files.


In the latest version of Microsoft Teams, you can now view up to 49 participants at once in a 7×7 grid layout. The feature works on Windows and you will need to enable the new multi-window meeting experience.


Before, it was only possible to communicate with only 9 participants on a Teams call, which is not good enough for large conferences or online classes.


With the new Microsoft Teams version, Microsoft is finally bringing Zoom-like gallery layout that surfaces every participant on one screen, as shown in the screenshot below.


Microsoft Teams grid layout


In addition, Microsoft says educators can create breakout rooms and allow participants to discuss their assignments and collaborate in small groups.


Attendance system improvements


Microsoft Teams will now allow organizers and educators to download a list of participants at the end of a meeting. Previously, it was only possible to download the attendance report during a meeting or when the participants were present in the session.


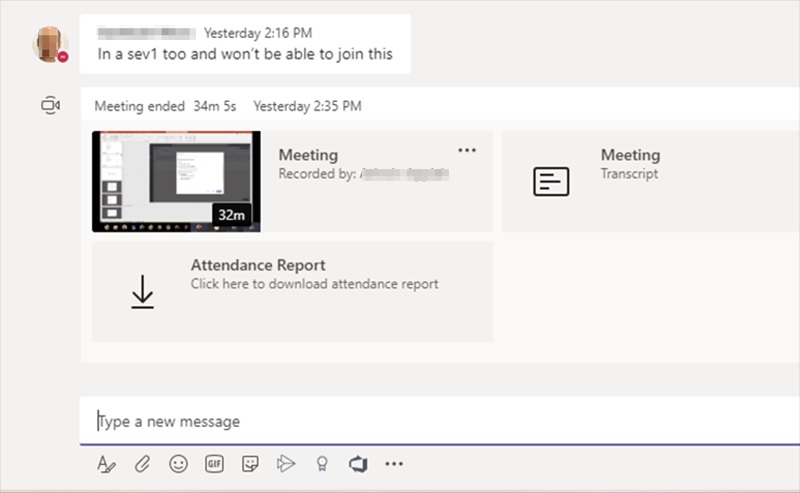
After the update, organizers will be able to click on the ‘Download’ button to obtain the attendance report after the meeting. This feature is especially helpful for teachers if they want to download attendance reports for meetings at the end of the day.


Teams attendance report


In the report, Microsoft says you can view the duration and meeting start time for all attendees along with their email address.


Bandwidth optimization


Microsoft is also rolling out a new update to Android and iOS users with support for improved bandwidth optimization.


This will improve latency, reliability, and even network quality detection logic to help users quickly upload and access files.


For desktop users, Microsoft is rolling out a new offline mode that will queue up your messages when your device is offline and deliver them when you’re connected to the internet again.


The post Microsoft Teams gets better attendance system, 7×7 grid layout and more appeared first on Windows Latest


Thank you for viewing the article, if you find it interesting, you can support us by buying at the link:: https://officerambo.com/shop/
Realtek High Definition Audio Driver has a problem


What do I do if Realtek has a driver problem?


1. Use DriverFix


Realtek has a driver problem message usually appears if your drivers are corrupted, and the simplest way to deal with that is by using the DriverFix software.


The software is simple to use, and it will scan your computer and list all the drivers that are out of date. Now you just need to select the drivers that you want to update, and the software will do the rest.


All drivers will be downloaded from the online database, so you can rest assured that your drivers are up to date at all times.


Other useful features:


  • Online database of over 18 million different files

  • Download manager for driver downloads

  • Driver backup feature

  • Ability to schedule scans and driver updates

DriverFix

DriverFix


Update all your drivers automatically and fix Realtek driver issues with DriverFix software.


2. Reinstall the driver


  1. Press Windows Key + X and choose Device Manager.
    device manager realtek has a driver problem

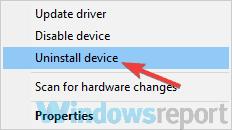
  2. Locate Realtek driver, right-click it, and select Uninstall driver.
    uninstall device device manager

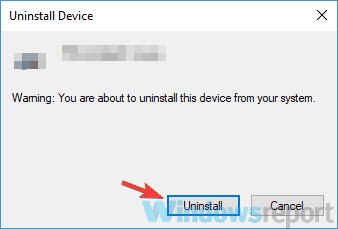
  3. When the confirmation dialog appears, choose the option to remove the driver software and click on Uninstall.
    uninstall confirmation realtek has a driver problem

  4. Restart your computer and the default audio driver will be installed.

Alternatively, you can install the latest Realtek driver from your sound card or motherboard manufacturer’s website.


In some instances, using an older version of the driver might fix the problem as well, so be sure to also consider that.


3. Disable the audio device temporarily


  1. Open the Device Manager.

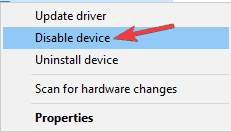
  2. Locate the Realtek audio driver, right-click it, and choose Disable device.
    disable device realtek has a driver problem

  3. Wait for a few moments and then right-click the Realtek driver again, but this time choose Enable device.

  4. After doing that, check if the problem is still there.

Keep in mind that this is just a workaround, but few users reported that it worked for them.


Realtek has a driver problem message will cause audio problems, but you should be able to fix this and other audio problems with our solutions.


Thank you for viewing the article, if you find it interesting, you can support us by buying at the link:: https://officerambo.com/shop/

Windows Defender won’t update [BEST FIXES]


When Windows Defender fails to meet your expectations, it’s time to consider using an alternative. Well, if you want to forget all about update errors, then do try it out Vipre.


This lightweight antivirus does its job in the background and always keeps you safe from computer viruses, malware, ransomware, and identity theft.


Moreover, rest assured that it’s easy to install Vipre on your computer and straightforward to use, having no pointless features that could clutter the interface.


Vipre Antivirus Plus

Vipre Antivirus Plus


Windows Defender won’t update? Vipre is the antivirus solution you should use instead!


2. Preliminary fixes


take a look at preliminary fixes


  • Check if you have other security software installed, as these will turn off Windows Defender and disable its updates. Uninstall your current anti-malware software.

  • Check for updates in Windows Defender Update Interface and try Windows Update if it failed. To do this, click StartProgramsWindows Defender>Check for Updates Now.

  • Install all updates that may be pending and restart your computer, then try the Windows Defender update again. Set Windows Defender to automatically get updates (it gets this as part of Windows Updates).

  • Run Windows Update troubleshooter.

3. Manually install update definitions


install update definitions


  1. Go to the Windows security portal.

  2. Follow the instructions to download and install the definition updates.

  3. If you cannot install manually or still get update errors, there are other things hindering it so contact Microsoft tech support for further assistance.

Microsoft usually delivers updates through Windows Update, Automatic Updates, or Windows Server Update Service (WSUS).


In some cases, Windows Defender won’t update because of problems with these services. In this case, update the definitions manually, as described above.


If you were able to install updates manually, the issue is caused by a Windows Update problem.


Don’t know how to solve Windows Update issues? Just make sure to use one of these great tools!


4. Verify that you have all required Windows Update files


Windows Update files


  1. Open the Windows Update website.

  2. Install all recommended updates.

  3. Review the Windowsupdate.log file for error messages by clicking Start, then type %windir%windowsupdate.login the Search box, and then press enter.

  4. Go to Windows Help and How-to web page and enter the keywords describing the problem from the log file you found.

5. Set Windows Defender service as automatic


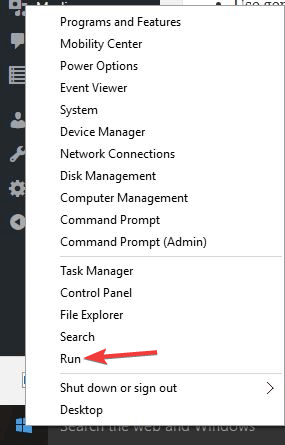
  1. Right-click Start and select Run.Windows Defender won’t update

  2. Type services.msc and press Enter.

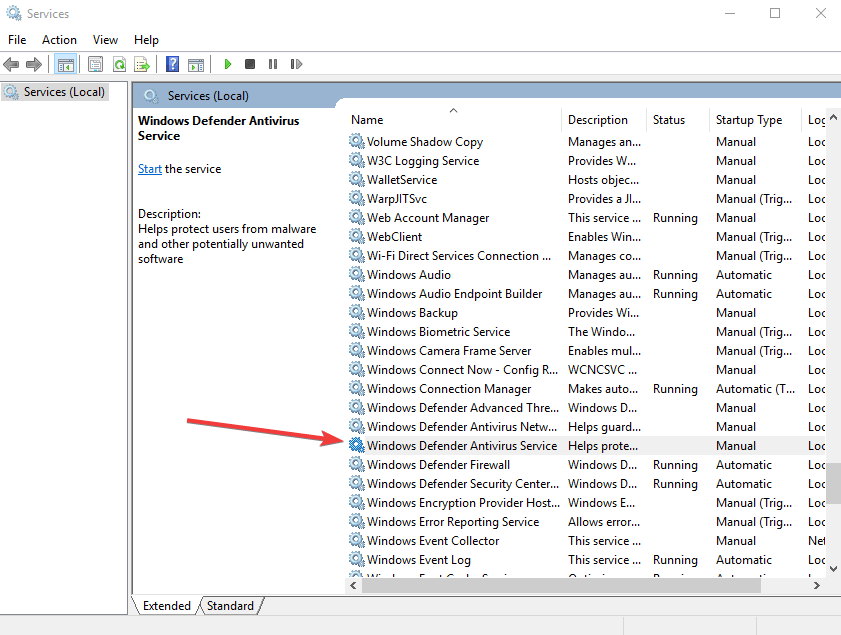
  3. Right-click Windows Defender antivirus service.Windows Defender won’t update

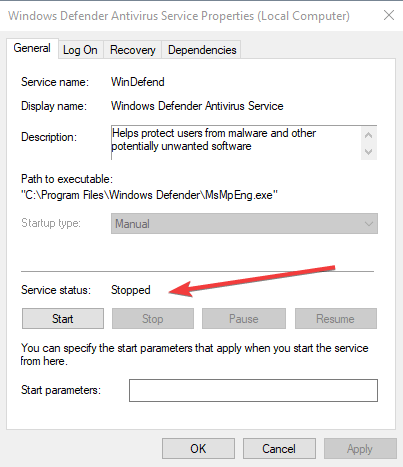
  4. Click Properties.

  5. Ensure that Service Status is running.Windows Defender won’t update

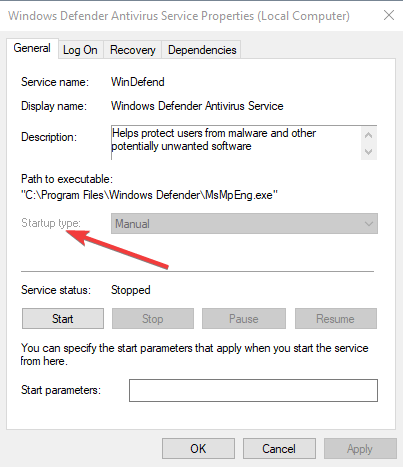
  6. Ensure Startup type is Automatic (if not, select Startup type as automatic and click Start).Windows Defender won’t update

  7. Click Apply then click OK.


Windows Defender service won’t start? Check out this detailed guide to fix the problem in no time!


6. Run an SFC Scan


  1. Click Start.

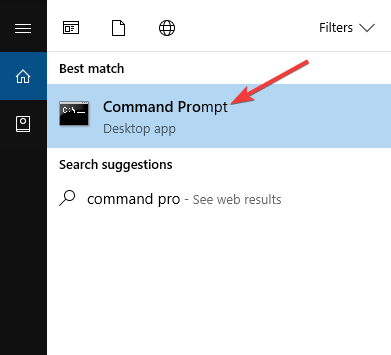
  2. Type CMD in the search box.

  3. Right-click Command Prompt and select Run as Administrator.Windows Defender won’t update

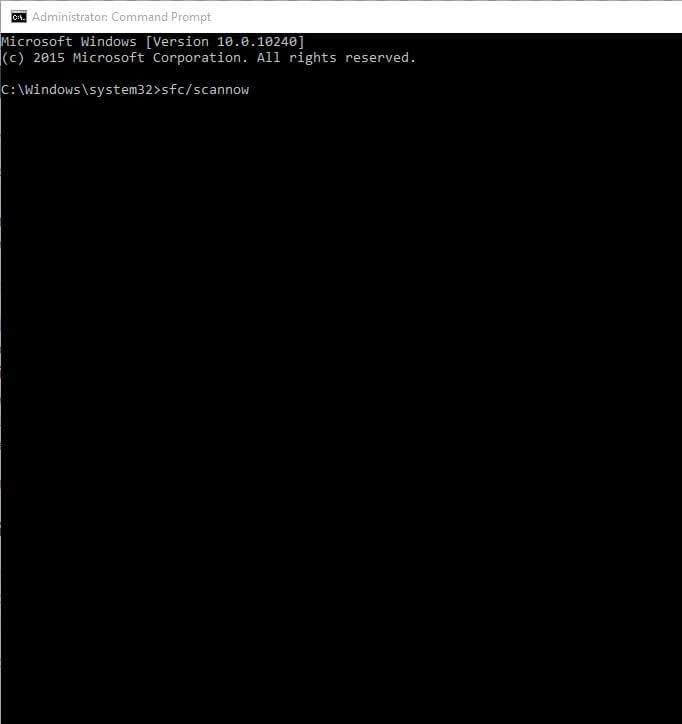
  4. Type sfc/scannow and press Enter.Windows Defender won’t update

This will check whether there are corrupted system files that cause Windows Defender not to update. To do this,


Let us know if any of these solutions worked when Windows Defender update failed. Just leave a comment in the section below.


Editor’s Note: This post was originally published in April 2018 has been since revamped and updated in October 2020 for freshness, accuracy, and comprehensiveness.


Thank you for viewing the article, if you find it interesting, you can support us by buying at the link:: https://officerambo.com/shop/

Among Us crossplay guide [PC, iOS, Android, Steam]


The company launched the game on both PC (via Steam) and mobile platforms including iOS and Android.


Some people were saying that Among Us crossplay is not working, but they have yet to read the workaround presented in this guide.


Is Among Us Crossplay with mobile?


Yes, you can use the software we describe in this guide to play Among Us from your PC with your friends that use a mobile device. Read on for more details about this topic.


How can I play Among Us cross-platform?


1. Play Among Us with BlueStacks


Among Us crossplay


BlueStacks is a popular Android emulator for Windows and Mac systems. It allows you to download Android apps and play them on your PC with keyboard and mouse support, giving more flexibility than touch controls on your Android phone.


The advantage of using BlueStacks is that it allows you to play the game on PC for free, with a micro traction option to buy skins and DLCs. 


To play Among Us on PC, you will need to download and install BlueStacks on your computer. And because it is an online installer, the installation kit will download instantly.


After installing the BlueStacks platform on your PC, you will need to simply launch BlueStacks and search for Among Us in the App Center.


Click Install to start the installation process on the newly emulated device.


Thank you for viewing the article, if you find it interesting, you can support us by buying at the link:: https://officerambo.com/shop/
There is a problem with your tablet driver [Wacom]


How can I fix There is a problem with your tablet driver error message?


1. Use DriverFix


There is a problem with your tablet driver message can affect Wacom tablets, and the problem is usually caused by corrupted or outdated drivers. This is where DriverFix can come in handy.


The software will automatically scan your PC and give you a detailed report on all outdated drivers. Now you just need to select which drivers you want to update and that’s it.


DriverFix is almost completely automated, and you can schedule the software to automatically scan and update all your drivers.


Other useful features:


  • Incredibly fast

  • Online database has more that 18 million driver files available

  • Driver backup

  • Download manager for driver downloads

DriverFix

DriverFix


DriverFix is a automatic driver update software that can update and fix all your Wacom tablet driver issues.


2. Remove the driver completely and reinstall it


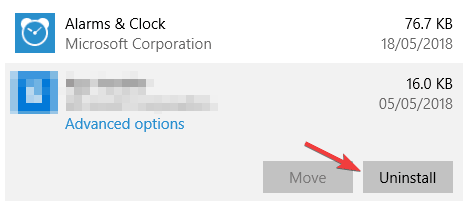
  1. Open the Settings app > Apps and uninstall all Wacom software.
    uninstall software there is a problem with your tablet driver

  2. If asked to restart your PC, choose not to.

  3. Locate the following folders and remove them. Keep in mind that some of them might be hidden so you’ll need to reveal them:
    C:Program FilesTablet
    C:Users<user>AppDataRoamingWTablet

    C:Users<user>AppDataLocalTempwactemp
    C:Users<user>AppDataLocalWacom

  4. Now go to the following directory:
    C:WindowsSystem32

  5. Locate and remove all wacom_ Usually, there is only a wacom_tablet file, but if you have more, be sure to remove them all. Here are the files that can appear and that you need to remove:•
    • WacDriverDLCoinst.dll

    • Wacom_Tablet.dll

    • Wacom_Touch_Tablet.dll

    • WacomMT.dll

    • WacomTabletUserDefaults.xml

    • WacomTouchUserDefaults.xml

    • Wacom_Tablet.dat


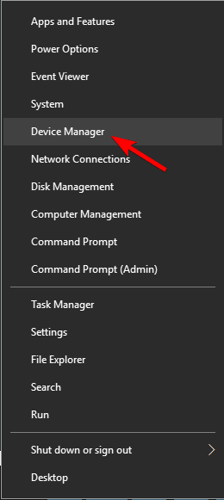
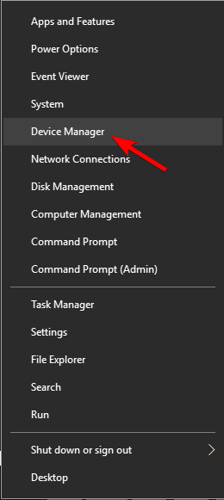
  6. Press Windows Key + X and select Device Manager.
    device manager there is a problem with your tablet driver

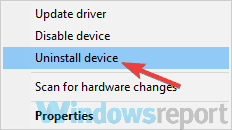
  7. Expand the Human Interface Devices section and uninstall all devices with HID, USB, and Wacom in its name. To do that, right-click the device and choose Uninstall device.
    uninstall device there is a problem with your tablet driver

  8. After removing all devices, restart your computer and the drivers should be reinstalled automatically.

  9. Optional: For the best performance, it’s advised to download and install the latest Wacom driver.

This is a simple solution that has worked for some users, but keep in mind that uninstalling your USB devices might disable your mouse/keyboard until you restart your PC.


3. Remove All User Preferences


  1. Locate Wacom Preference File Utility and start it. It should be located in the Wacom installation directory.

  2. When the software opens, click on the Remove button in the All User Preferences section.

After doing that, the Wacom There is a problem with your driver error will be gone. Keep in mind that this solution might only work for older Wacom models.


4. Restart Wacom service


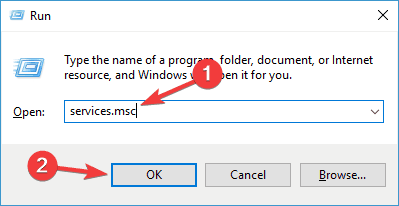
  1. Press Windows Key + R and enter msc. Press Enter or press OK.
    services run window there is a problem with your tablet driver

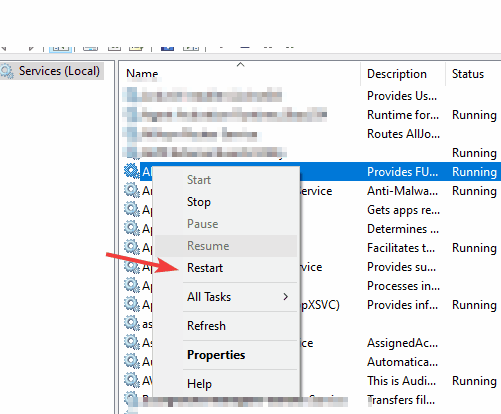
  2. Locate the Wacom service on the list, right-click it and choose Restart from the menu.
    restart service there is a problem with your tablet driver

Keep in mind that this is just a temporary solution, and you’ll have to repeat it whenever this error message appears.


Wacom There is a problem with your driver error message will prevent you from using your tablet, but after using our solutions, the problem should be completely resolved.


Thank you for viewing the article, if you find it interesting, you can support us by buying at the link:: https://officerambo.com/shop/