- Countless Windows 10 users can't always enjoy the Upgrade Assistant due to a series of errors.
- Disabling the third-party antivirus and using the Media Creation Tool are both viable options.
- You can also consider running the Update troubleshooter. In fact, take your time to check out these great troubleshooting tools.
- Lastly, bookmark our Windows 10 Errors Hub in order to get easy access to similar tips and tricks.

Contrary to the popular belief, luck doesn’t have anything to do with the preference of Windows 10 upgrades.
Users who get the updates before the general population, avoid OTA and stick with the Upgrade Assistant.
This tool is great to install major updates just after the release. However, some of those users are, seemingly, unable to upgrade their system with the Upgrade Assistant.
There’s the reoccurring error that prevents them from finalizing the installation process.
How can I fix Upgrade Assistant errors in Windows 10?
- Make sure you meet the requirements
- Run Update troubleshooter
- Disable third-party antivirus and unplug the peripherals
- Use the Media Creation Tool
- Repair previous Windows 10 installation
- Perform a clean reinstallation
1. Make sure you meet the requirements

Firstly, let’s start with the essential reminder. When we say to meet the requirements, we mostly refer to storage space. You’ll need at least 16 GB of free space to install a major update.
In addition, we encourage you to double-check the drivers and uninstall third-party applications. This isn’t needed by default, but there are reports about third-party programs causing update issues.
Once you’ve done that, restart the update/upgrade process and look for changes. If the error is persistent, move on to the next step on the list.
2. Run the Update troubleshooter
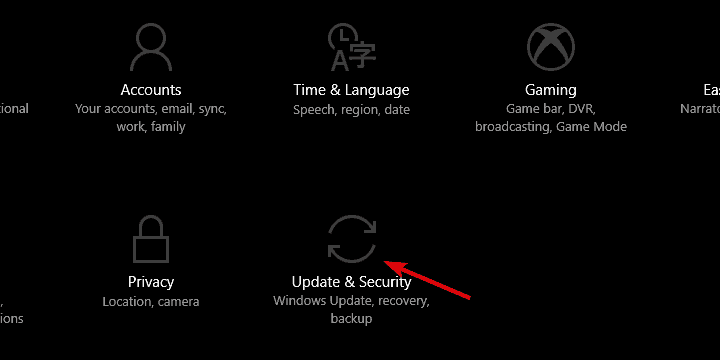
- Right-click Start and open Settings.
- Choose Update & Security.
- Select Troubleshoot in the left pane.
- Expand and run Windows Update troubleshooter.
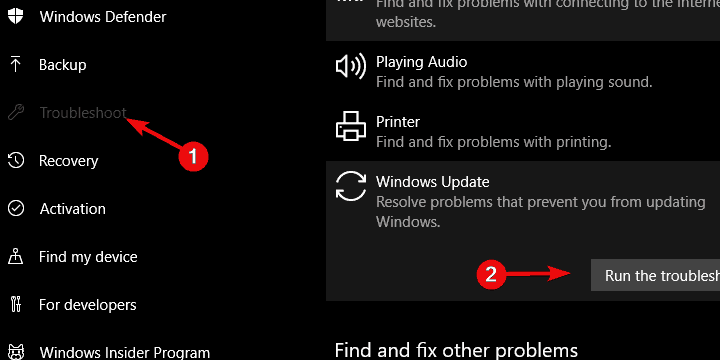
- Follow the provided instructions.
Windows 10 comes with the built-in troubleshooter for all system-related features. That includes the Windows Update troubleshooter.
This is, probably, the most used troubleshooter due to the sheer number of update issues. Ideally, it would find and fix the problem causing the Upgrade Assistant error.
If you’re having trouble opening the Setting app, take a look at this article to solve the issue.
3. Disable third-party antivirus and unplug the peripherals

We already mentioned the negative effect of third-party apps. The system should be able to upgrade without meddling with the installed software, but that doesn’t work every time.
The programs that are especially causing errors are third-party antivirus solutions, which integrate deep into the system core. That’s why we suggest uninstalling them.
Even if you think of simply disabling them until the upgrade is successfully administered, this won’t happen all the time. Therefore, just let IObit Uninstaller do the trick for you.
IObit Uninstaller
Get IObit Uninstaller, remove your antivirus in just one click, and get things back to normal.
Furthermore, we also suggest unplugging all external hardware, with the mouse being the only exception. It seems there’s the stall leading to an error when the update fails to install the drivers for certain devices.
And don’t forget that there’s a way to avoid all these from the start. Bitdefender Antivirus Plus won’t interfere with your system, so that’s your chance to forget all about annoying Upgrade Assistant errors.
Bitdefender Antivirus Plus
When facing Upgrade Assistant errors, it’s time to think of a different antivirus. Bitdefender is a top choice!
4. Use the Media Creation Tool
- Download the Media Creation Tool.
- Plug in the compatible USB flash drive with at least 6GB of free storage space.
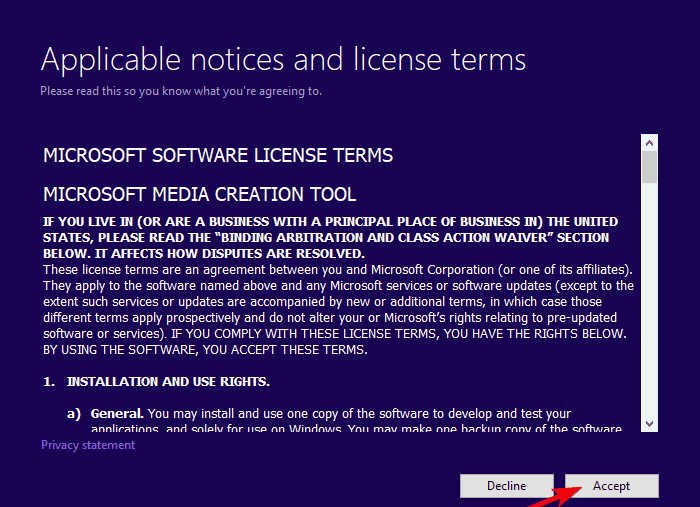
- Run the tool and accept the License Terms.
- SelectCreate installation media (USB flash drive, DVD, or ISO file) for another PC.
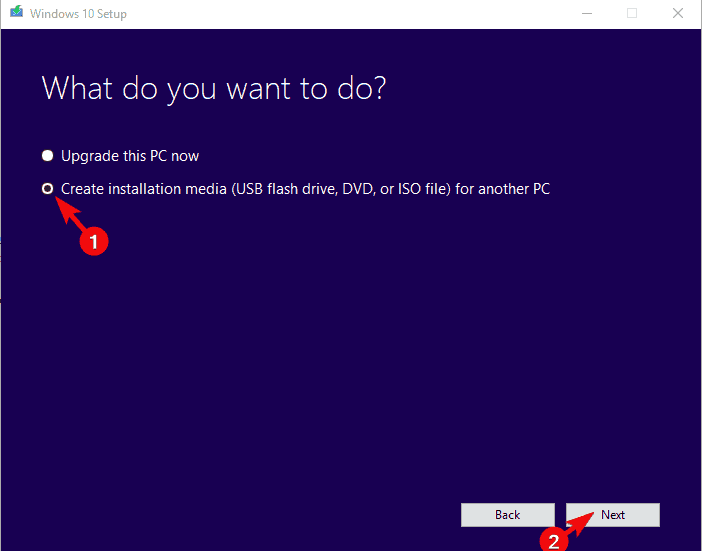
- Choose the preferred language, architecture, and edition and click Next.
- Choose a USB flash drive and click Next.
- Wait until everything is done.
Now, there are multiple ways to install the same update. Besides the standard over-the-air update via the system and Upgrade Assistant, you have Media Creation Tool at your disposal, as well.
This tool comes in handy when you need to create the installation media. However, you can also use it to download and install the update at hand.
Be it a small patch or the major update. To do so, just download the Media Creation tool, accept the License Terms, and click Update now.
In addition, if this fails, you can create the installation media and install updates from there. Success or fail, you’ll be needing the bootable Windows 10 drive for the final two steps either way.
Use the above steps in order to create the bootable media drive with ease.
5. Repair previous Windows 10 installation
- Press Windows key + I to open the Settings app.
- Choose Update & Security section.
- Select the Recovery from the left pane.
- Under the Reset this PC option, click Get started.
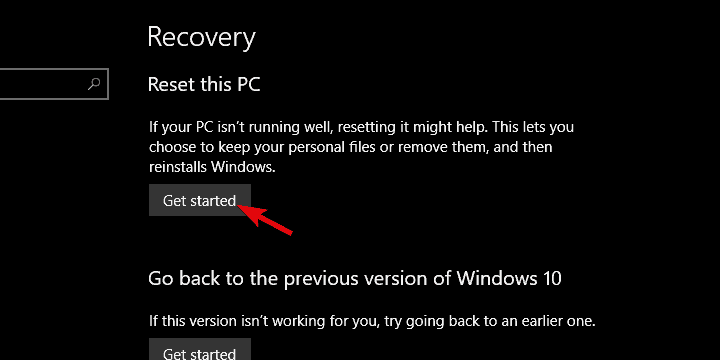
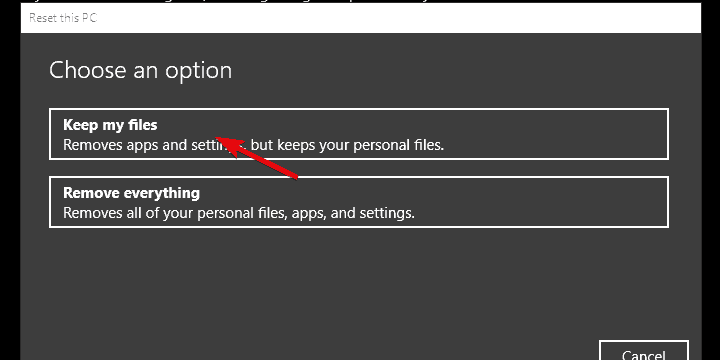
- Preserve your files and continue with the procedure.
The most common critical reason for this occurrence is given by issues with the previous installation you made.
Whether that was a failed major update or something else, we suggest repairing the system installation.
If you’re able to access the system interface when the Upgrade Assistant error occurs, you should be able to reset your PC to factory values.
In addition, you can boot from the bootable USB drive and load the installation files. Just, instead of going for the clean install, click on the Repair and repair the system.
6. Perform a clean reinstallation

In the end, if all of the previous steps fell short, the approach which remains is the clean reinstallation.
With the clean reinstallation, you should be able to start from scratch and the updates will be automatically administered during the installation.
Not sure how to perform a clean reinstallation of Windows 10? Follow the steps we provided in this quick guide.
That should do it. In case you still have some questions or, perhaps, alternative solutions, be so nice to share them in the comments section below.
Editor’s Note: This post was originally published in July 2018 and has been since revamped and updated in September 2020 for freshness, accuracy, and comprehensiveness.
Was this page helpful?
Get the most from your tech with our daily tips
Thank you for viewing the article, if you find it interesting, you can support us by buying at the link:: https://officerambo.com/shop/
No comments:
Post a Comment