- Microsoft Office is one of the most used tools all over the world and comes with a suite of applications that covers almost every aspect of your work.
- In this article, we will explore how you can transfer your Office to another device or user in no time.
- Make sure to check our How-To Hub for more related articles and guides.
- This article is part of our much larger Windows section, so check that as well for more useful info.

Don’t we love it when companies listen to our complaints and when they make changes to their policies, product agreements just to suit our needs?
Such was the case with Microsoft and its Office products – the 2013 edition. Many consumers were seriously angered by the fact that according to the latest policy change, we were not allowed to transfer Office to a different computer or users.
Finally, this has changed, and a feature that has always been in high demand is now possible – Microsoft is letting us transfer the Office suite to a different PC or user.
For a step-by-step guide on how to transfer Office to a different computer, keep on reading.
How can I transfer the Microsoft Office Suite to a new computer
1. Use an easy transfer tool

If you are looking for the easiest, fastest, and most secure way to transfer Office on a different PC, we suggest using a dedicated transfer tool.
Laplink PCMover Professional is able to transfer any edition of Office, other applications and accounts as well.
All you need to do is install the tool on both PCs, the old one and the new one, and then follow the on-screen instructions for the transfer to start.
Make sure that you have the product key for the programs you need to move so that you can install them on the new devices once the transfer is completed.

Laplink PCMover Professional
Transfer any applications, files, settings, or user profiles from one PC to another one with this amazing software.
2. Transfer them manually
2.1. Deactivate Office
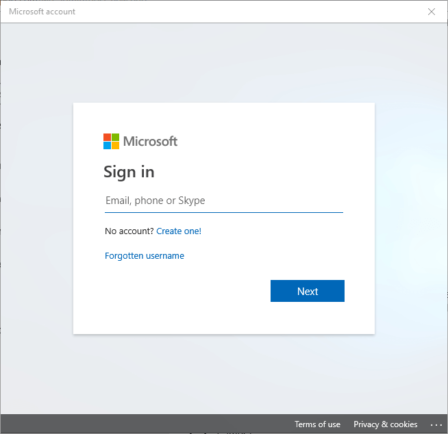
- Log in to your Microsoft Office account.
- Under My Account, select the Install option.

- Next, select Deactivate Install and confirm your action to deactivate Office.
2.2. Uninstall Office 2013 from your computer
- Go to Start and Control Panel.
- Next, select Programs and Features.
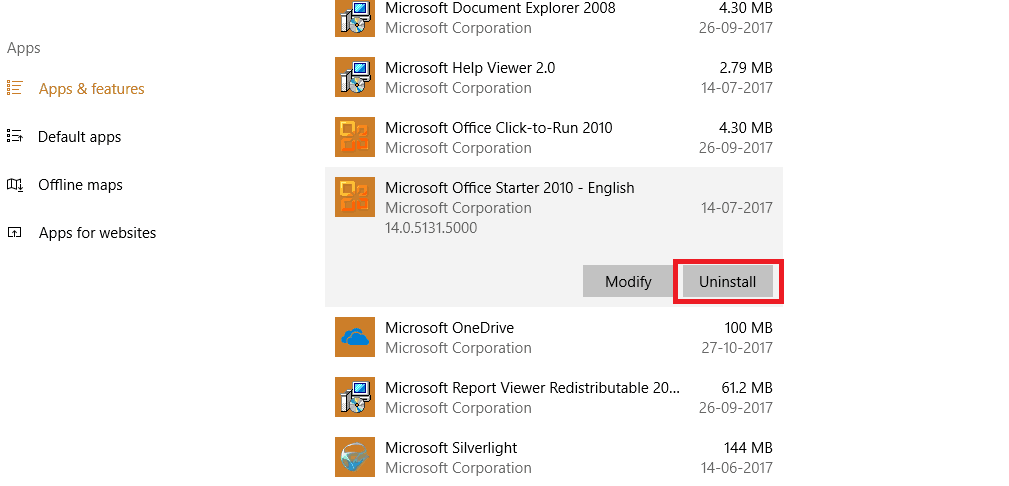
- Click on the Uninstall button.
2.3. Install Office
- Log in to your Microsoft account on the new computer.
- Go to My Account, and select the Install button.
- Office 2013 will start downloading.
- Double-click the downloaded file to launch the install process.
- Follow the onscreen instructions to install Office 2013.
However, if you want to have Office 2013 installed on more than 1 computer, maybe you should check out one of the Office 365 subscriptions which will allow you to deploy your copy on up to 5 units that run Windows or Mac.
That’s about all the steps you need to do in order to transfer your Office to another PC. If you have additional suggestions or recommendations, feel free to list them in the comments section below.
Editor’s Note: This post was originally published in March 2013 and has been since revamped and updated in September 2020 for freshness, accuracy, and comprehensiveness.
Was this page helpful?
Get the most from your tech with our daily tips
Thank you for viewing the article, if you find it interesting, you can support us by buying at the link:: https://officerambo.com/shop/
No comments:
Post a Comment