- The automatic update function of Windows 10 makes your Internet slower because Microsoft uses the computers of its users to provide other users with updates.
- You can temporarily increase the bandwidth by following some simple steps from this article.
- For helpful tech tutorials, as well as various tips and tricks, take a look at our How-To section.
- Check out our Network Hub for more great guides and other networking tools.
All users have been victims of the slow Internet speed on Windows 10, and despite troubleshooting the router, the problem failed to be resolved.
Windows 10 used a bit of data across network computers since it used a peer-to-peer system, in order to deliver the updates in a much faster way.
This means that a part of the bandwidth is consummated by the P2P update system. Therefore, in order to increase the Internet speed on Windows 10, users need to make some changes in the settings.
The following methods will work on both Windows 10 Home and Windows 10 Pro.
How can I increase bandwidth on Windows 10?
1. Switch off Updates Delivery
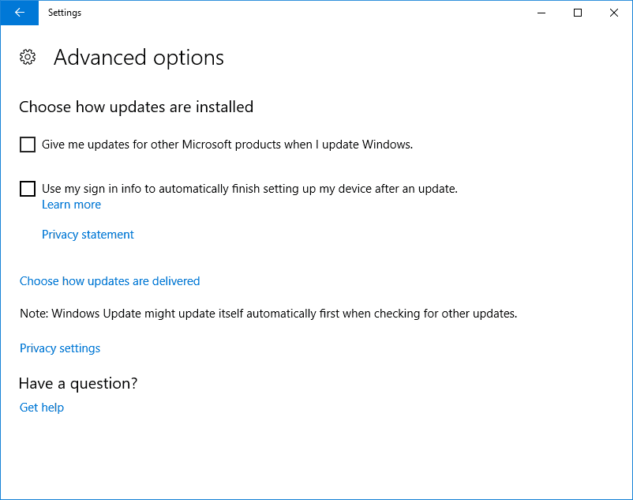
- Head over to Settings.
- Go to Update & Security.
- Select Advanced Options.
- Choose Updates Delivery.
- Turn off the toggle.
Your laptop will use your bandwidth to deliver Windows 10 updates to other users on the network. The updates delivery option is switched on by default in all versions of Windows 10.
2. Measure your bandwidth usage with PRTG Network Monitor

Before you begin to increase your download speed, you should first check your connection for available bandwidth. This will give you an idea of what your Internet provider is promising you and what will reach your home.
With the versatile and powerful software PRTG Network Monitor from Paessler you can for example monitor the availability of devices, measure your bandwidth usage or analyze the data stream.
This great tool allows you to monitor where in the network there is a bottleneck so you could solve the issues and free up the bandwidth. It also reads the traffic data from your router and displays the results to an intuitive web interface.
PRTG Network Monitor
Get rid of bandwidth issues and monitor all activities in your network with PRTG Network Monitor.
3. Edit the setting called Limit reservable bandwidth settings
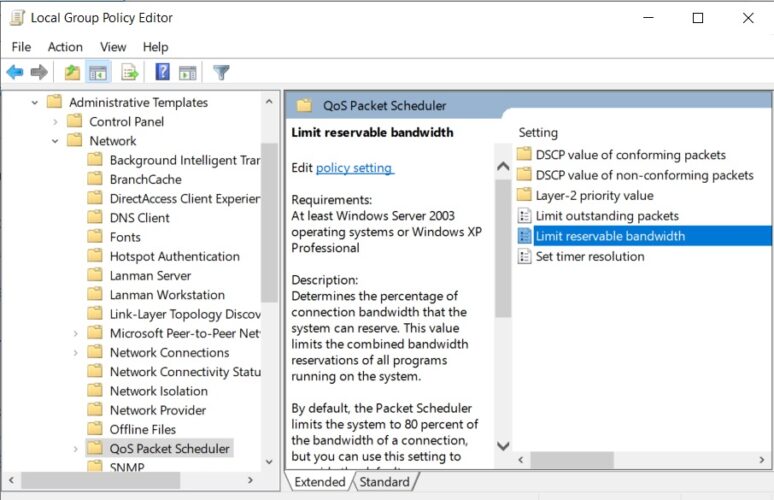
- Press the Windows Key + R.
- Type gpedit.msc in the Run command box.
- Open the Local Group Policy Editor.
- Head over to Computer Configuration.
- Go to Administrative Templates.
- Double-click on Network.
- Select QoS Packet Scheduler.
- Choose Limit reservable bandwidth and open the settings.
- Click on the Enabled button and set the bandwidth to a lower percentage.
Windows reserve a certain amount of bandwidth for its Quality of Service which includes Windows update and other programs that constantly send feedbacks.
However, be forewarned that allocating zero bandwidth to the QoS is expected to interfere with the update process and eventually compromise on the safety front.
Looking for the best bandwidth monitors for Windows 10? Here are our top picks.
4. Flush DNS and clear temporary files
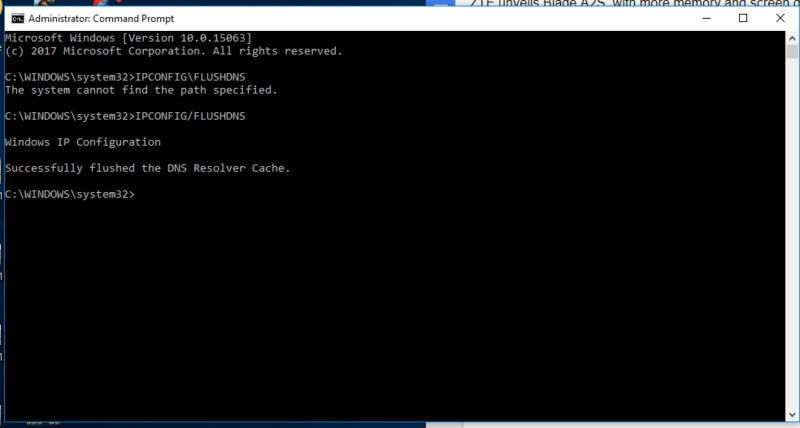
- Press the Win key + X to open Command Prompt.
- Select Command Prompt (Admin).
- Type IPCONFIG/FLUSHDNS and press Enter.
- Close Command Prompt and return to the desktop.
- Press Windows+R and open Run.
- Type %TEMP% and press Enter.
- Select all the content and use right click to delete the temporary files.
For any more questions or suggestions, don’t hesitate to reach for the comments section below.
Editor’s Note: This post was originally published in September 2017 and has been since revamped and updated in September 2020 for freshness, accuracy, and comprehensiveness.
Thank you for viewing the article, if you find it interesting, you can support us by buying at the link:: https://officerambo.com/shop/
No comments:
Post a Comment