Then, right click on your device and choose Update Driver. Select Search automatically for updated driver software.
Downloading and installing the driver manually is also an option to consider. Do this if Windows doesn’t automatically find a driver update for your printer, or you don’t have an installation disk.
You can check the manufacturer’s website then find the latest driver for your printer. And if you have the installation disc, it may contain the software for installing a driver for your printer.
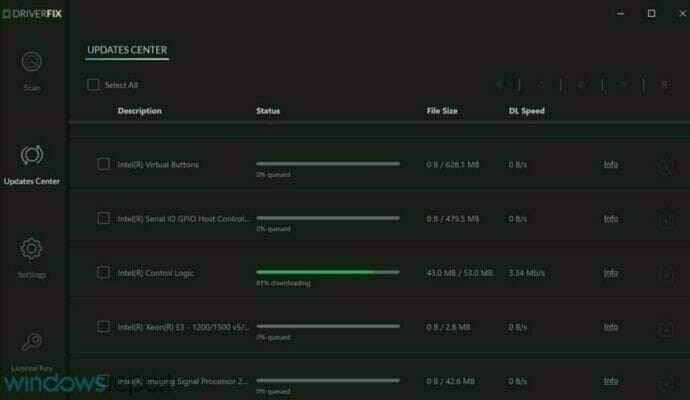
Another method that you can use to update your drivers is by using a tool such as DriverFix. Install it and you’ll update all outdated drivers automatically with just a couple of clicks.
This method is perfect if you don’t want to search and download drivers manually, so be sure to try it out.

DriverFix
Don’t know what to do when Windows cannot connect to the printer? Use DriverFix to easily update drivers!
2. Ensure your printer is turned on and connected
Check the power switch if it is turned on, and ensure the printer’s power cable is plugged in to an electrical outlet.
If you’re on a shared printer or network, ensure all computers and routers are turned on as well. Plug in your power surge protector and turn it on.
Plug in the printer’s USB cable properly to your PC. For wireless printers, turn on the wireless option from your printer then run the printer’s wireless connectivity test from the menu option.
If these are clear, and you still cannot connect the printer to Windows, then your computer may not be connecting to your wireless network.
3. Uninstall and reinstall your printer
- Select Start.
- Click Settings.
- Choose Devices.
- Click Printers & Scanners on the left pane.
- Find your printer and click on it.
- Select Remove device.
Follow the above steps to remove your printer. Then, reinstall your printer (wireless or local) using the following procedure:
- Select Start.
- Click Settings.
- Choose Devices.
- Click Printers & Scanners on the left pane.
- Select Add a printer or scanner.
- Choose the printer you want to add then select Add device.
Note: You can print a test page to ensure the printer works correctly. If it is installed but doesn’t work, check the device’s manufacturer website for troubleshooting or driver updates.
To connect to a local printer, plug in the printer’s USB cable to an available USB port on your computer, then turn on the printer.
2. Temporarily disable your antivirus security software
Another option is to try uninstalling third-party software on your PC, such as computer cleaners or antivirus tools.
When it comes to protecting your PC – using an antivirus- temporarily disable it because you need it to prevent your computer from security threats.
Immediately after you’re done fixing the connection error, you can enable it back. However, if the antivirus is indeed causing this issue, perhaps this is a good moment to consider switching to a different one.
If you’re looking for a reliable antivirus that won’t interfere with your system in any way, try using Bitdefender antivirus.

Bitdefender Antivirus Plus+
If you choose Bitdefender, there’s no need to worry about safety and printer connection issues.
3. Check if your printer is compatible with Windows 10
- Right click Start button.
- Select Control Panel.
- Click on Hardware and Sound.
- Select Devices and Printers. You will see a list of devices, and another for printers.
- Check under Unspecified section to see if your printer is listed there.
Some printers may not necessarily work with Windows 10, or may have limited functionality altogether, so you need to check if your printer is in this category before using the solutions below.
Once you establish whether your printer is unspecified or not, go to the next solutions to fix the issue.
4. Reboot your computer
This is the first line of action whenever such an issue comes up (or any other issues with your computer and any other hardware you may be using along with it).
However, if you restart your computer and nothing happens on your printer, you can go to the last solution.
5. Check Default printer settings
- Click Start.
- Click Settings.
- Choose Devices.
- Click Printers & Scanners on the left pane.
- Scroll to Let Windows manage my default printer.
- Turn the option off.
If your printer keeps switching from the default one, you can change this setting on Windows 10, from the current printer to the one that you want to be using.
Do not hesitate to correct the default settings.
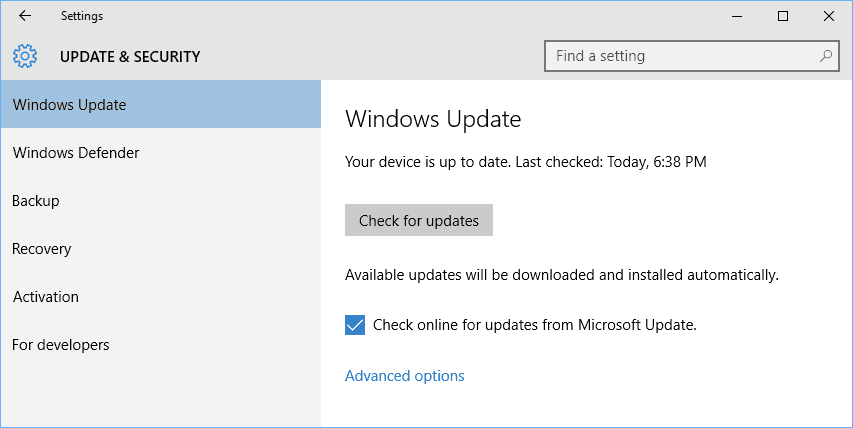
6. Perform a Windows Update
- Go to Start.
- In the search field, type Windows Updates.
- Click on Windows Updates Settings from the search results.
- Click Check for update.
- Install the latest Windows Updates.
For a healthy computer, you need to keep updating Windows with the latest system updates, and drivers. This also helps resolve any issues or difficulties you may be experiencing.
Refer to the above steps in order to check and install Windows Update (manually).
7. Clear spooler files and restart spooler service
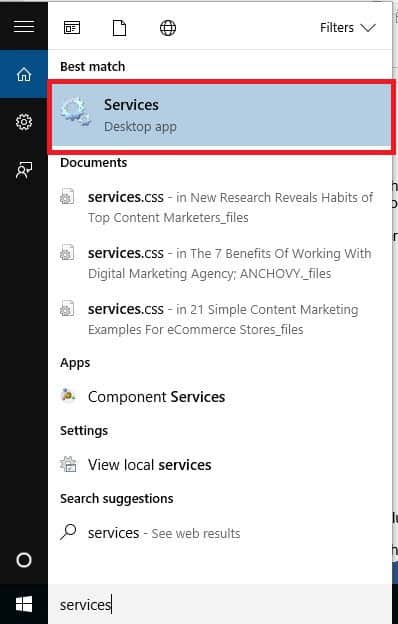
- Click Start.
- Go to the search field box and type Services.
- Click Services from the search results.
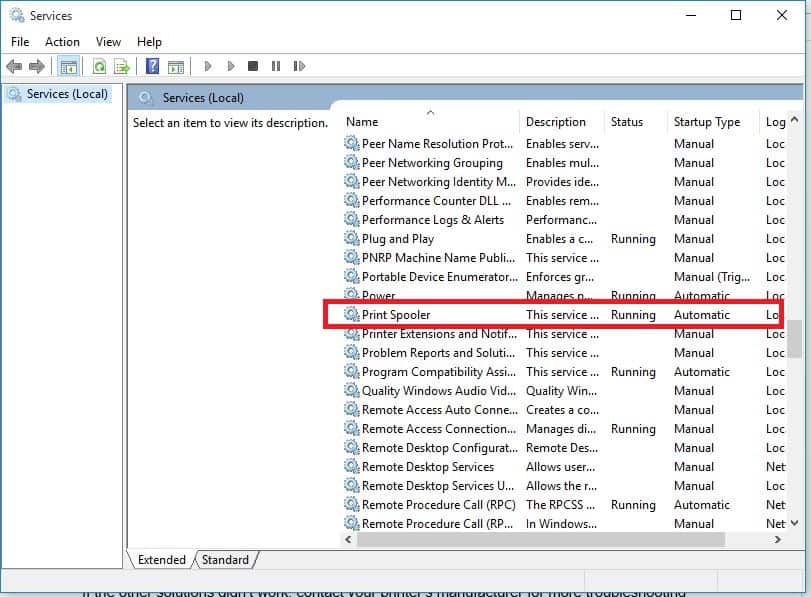
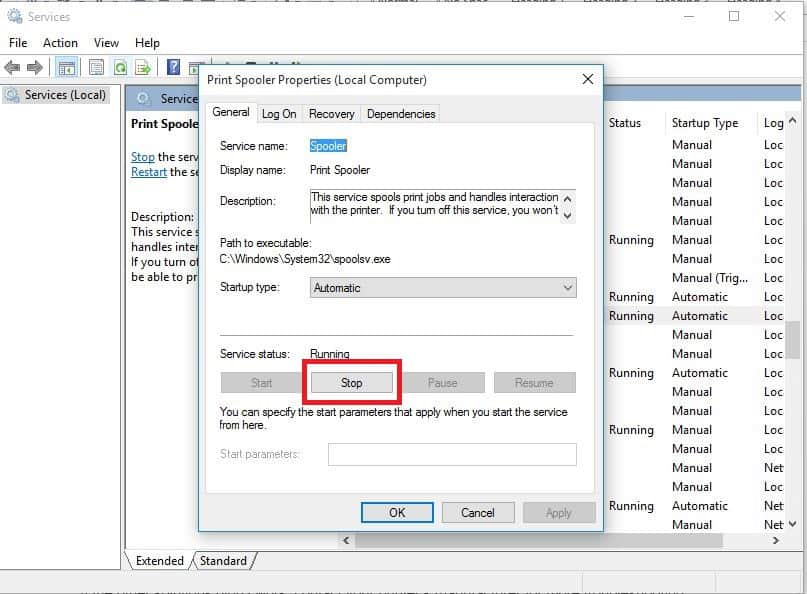
- Under Services, double click Print Spooler.
- Select Stop then OK.
After disabling the service, do the following:
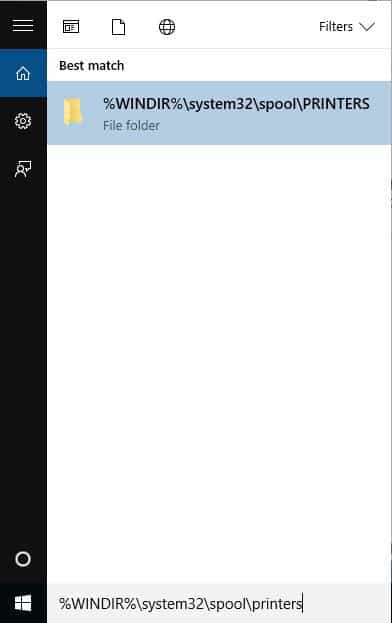
- Go to the search box again and type %WINDIR%system32spoolprinters.
- Select the file folder. You need admin privileges to access it.
- Delete all the folders in the folder.
- Under Services, double-click Print Spooler again.
- Click Start.
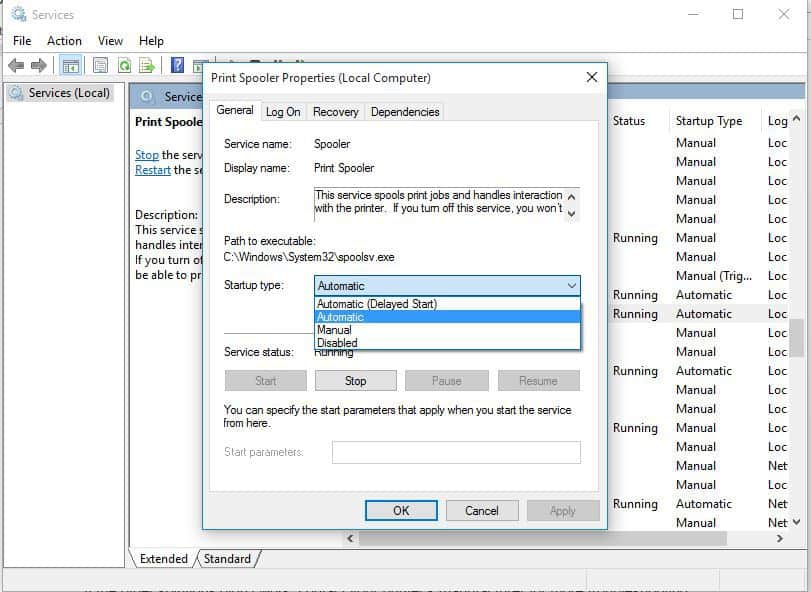
- Go to the Startup Type list.
- Select the Automatic box.
- Click Apply then click Ok.
If the previous six solutions are unsuccessful, you may need to clear spooler files then restart the spooler service.
8. Check with your manufacturer if Windows cannot connect to the printer
If the other solutions didn’t work, contact your printer’s manufacturer for more troubleshooting and support based on your specific issue.
Did any of these solutions work for you? Share with us your experiences in the comments section below.
Editor’s Note: This post was originally published in March 2019 and has been since revamped and updated in September 2020 for freshness, accuracy, and comprehensiveness.
Thank you for viewing the article, if you find it interesting, you can support us by buying at the link:: https://officerambo.com/shop/






No comments:
Post a Comment