- When the WLANSVC auto-config stops working it can be very frustrating.
- The guide below will teach you how to solve this issue, so keep reading
- Bookmark our Windows 10 page if you need more network-related troubleshooting articles.
- In the Fix section, you will find a lot of useful articles if you need more help with your PC.

Not being able to get online can be the most frustrating thing to deal with, especially since most of our activities have been transposed to the virtual world.
Under these circumstances, the last thing we would ever like to experience is having the Wlansvc application stopping on its own.
That being said, the issue, no matter how vexing it might sound, can well be fixed with a few tweaks to the software settings on your device.
In this article we are exploring exactly how to fix it, so make sure to keep reading.
Wlansvc application has stopped working
- Quick fixes
- Run Network Troubleshooter
- Renew IP address
- Update network adapter driver
- Uninstall Network adapter driver
- Roll back network adapter driver update
- Disable Firewall, Antivirus software
- Use network reset
- Re-install Windows 10 afresh
1. Quick fixes

However, before getting to the more serious stuff, it would be worth checking out a few minor details first as most wlansvc issues have often been found to do with minor adjustments. This include re-starting you router by disconnecting it from the power source.
If the router comes with back-up batteries, remove those as well. Disconnect the LAN cord too if that is how you connect to the router.
Wait for about 30 secs and put it back on power. If you removed the batteries, put those back in as well before you connect it to the mains.
2. Update network adapter driver
- Type Device Manager on the taskbar search box.
- Next, select Network adapter.
- Select the particular adapter installed on your PC.
- Long press the adapter name (or right click on it) and select Update driver.
- Select Search automatically for updated driver software.
- Close Device manager.
However, if Windows is unable to select the best driver applicable to your PC, you can also do a manual search for the same. Here is how.
- Launch Device Manager and select Network adapter.
- Select the Network adapter installed on your PC.
- Press on the network adapter name (or right-click on it) and select Update driver.
- Select Browse my computer for driver software.
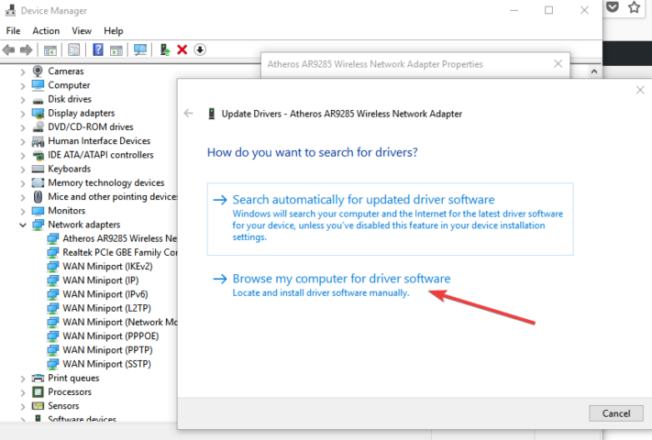
- Navigate to the location where you downloaded the driver software.
- Close Device manager.
Note: Visit the official website of the network adapter manufacturer and download the most recent software for the particular make of adapter installed on your PC.
Update drivers automatically
There is an easier way to update your drivers, which includes using dedicated software.
Drivefix is a great tool that will scan your device very fast and will automatically update your drivers. The program does not require prior installation.
All you need to do is download Drivefix and once that’s completed, launch the software and allow it to scan and update the drivers.

DriverFix
Update your device drivers and stop having issues with Wlansvc application closing on it's own.
3. Run Network Troubleshooter Type Network Troubleshooter in the taskbar search box and select Identify and repair network problems from the list of options that appears.
Follow the on-screen instructions and identify and remedy the problem.
4. Renew IP address
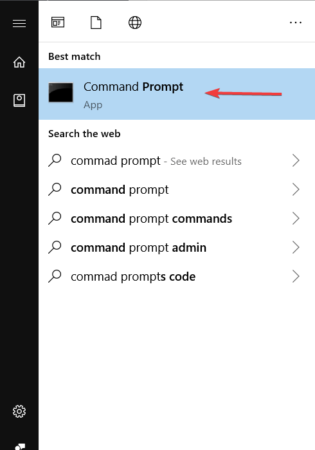
- Type Command prompt in the taskbar search box.
- Select Command Prompt.
- Run the following commands followed by pressing Enter in each case.
netsh winsock resetnetsh int ip resetipconfig /releaseipconfig /renewipconfig /flushdns
5. Uninstall Network Adapter driver
Another extremely effective method to deal with wlansvc stopping problem is to manually install the network adapter driver followed by restarting your PC.
This way, Windows downloads and installs the most appropriate software which thankfully should solve the issue. Here is how you do this:
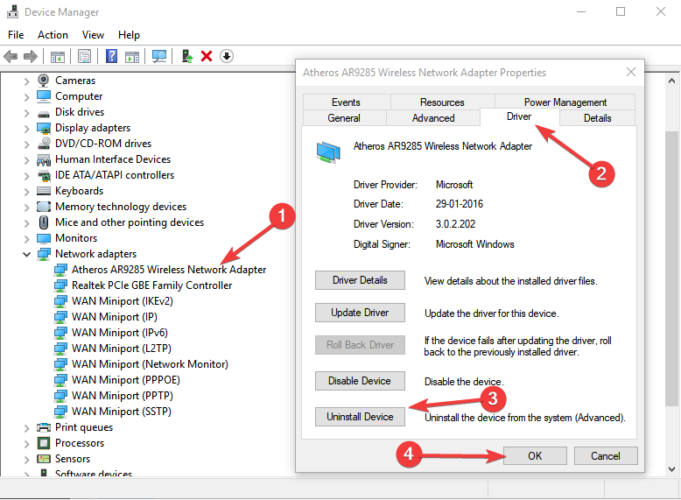
- Type Device Manager in the taskbar search box.
- Device Manager from the search results.
- In Device Manager, select Network adapter
- Next, select Network adapter name.
- Long-press or right click on the network adapter name.
- Select Uninstall device followed by Delete the driver software for this device.
- Follow on-screen instructions and close Device Manager after you are done.
6. Rollback network adapter driver update
- Type Device Manager as before in the taskbar search box.
- Within Device Manager, select Network Adapter.
- Select Network Adapter name.
- Long press (or right-click) on the network adapter and select Properties.
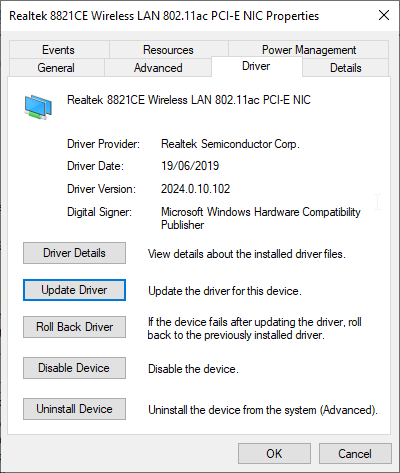
- Next, select Driver tab and Roll Back Driver.
- Restart your PC and check if the issue has been resolved.
7. Disable Firewall, Antivirus software

- Type Command prompt in the task bar search box.
- Click on Yes if faced with the Run as administrator query.
- Type netsh advfirewall set allprofiles state off‘ at the command prompt.
- Press Enter.
Try connecting to the internet but make sure you only visit a trusted site.
If the page loads fine than the firewall software was the culprit, get in touch with the company or visit their website to see if there are updates available.
To turn back on the firewall, type netsh advfirewall set allprofiles state on and press Enter again.
Disable Antivirus
- Type System and security in the taskbar search box and
- select Review your computer’s status and resolve issues from the options provided.
- Click on Security to expand the tab.

- Your antivirus software should be listed under Virus protection.
- Similarly, anti-malware software you have should be mentioned Spyware and unwanted software protection.
- Refer to the corresponding software documentation to find out ways to turn them off.
Note: Before getting along with this step, it is important to understand that this is fraught with danger and you need to exercise caution, taking care to visit only trusted sites while your online guard is down.
8. Use network reset
- Click on Start and select Settings.
- Press the Network & Internet and select Status.
- Next, choose Network reset.
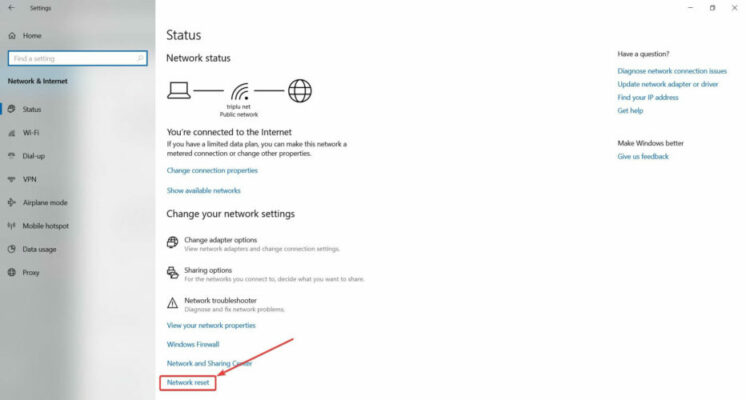
- This will launch the Network reset screen.
- Click on Reset now.
9. Re-install Windows 10 afresh

This happens to be a proven method to deal with all connectivity issues even though this can be the most time-intensive of all steps mentioned above.Go for a fresh install of Windows 10 if all other steps mentioned above fails.
So there you have it, an exhaustive list of solutions to follow when your Wlansvc keeps stopping. Here also are a few other resources that might be of help to you.
Editor’s Note: This post was originally published in February 2018 and has been since revamped and updated in August 2020 for freshness, accuracy, and comprehensiveness.
Thank you for viewing the article, if you find it interesting, you can support us by buying at the link:: https://officerambo.com/shop/
No comments:
Post a Comment