One of the main features of Windows 10 are its apps, but unfortunately certain errors with Windows 10 apps can appear. Users reported This app will not work on your device error message, and today we’re going to show you how to fix that problem.
But first, here are some more problems and similar error messages that basically mean the same thing. And yes, can be resolved with the same solutions:
- Xbox Play Anywhere this app will not work on your device – This error is likely to appear when you’re trying to open Xbox Play Anywhere games.
- Windows Store this app is not compatible with this device – This error could mean either the app is indeed incompatible with your computer, or your system recognizes it as incompatible. In the latter case, try some of the solutions listed below to resolve the problem.
- This app can’t run on your PC old game – If you’re unsuccessfully trying to run an older game on your Windows PC, check out this article.
- Windows Store does not work on this device – If you have a problem with the Store itself, check out this article.
This app will not work on your device [FIXED]
Table of contents:
- Delete Windows Update cache files
- Make sure that you have the latest updates installed
- Search for the application in Windows Store
- Reinstall the app
- Reset the Windows Store
- Reset the app
- Run the app troubleshooter
- Make sure the Application Identity service is running
- Disable your antivirus or firewall
- Perform the SFC scan
- Run DISM
Solution 1 – Delete Windows Update cache files
According to users, this problem can appear due to your Windows Update cache, and in order to fix the problem it’s recommended that you delete it. This is a simple procedure and you can do it by following these steps:
- Open Command Prompt as administrator. To do that, press Windows Key + X to open Win + X menu and choose Command Prompt (Admin).
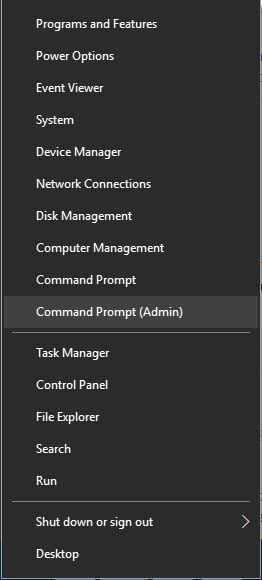
- When Command Prompt opens, enter net stop wuauserv command and press Enter to execute it. By running this command you’ll stop Windows Update service from running. Minimize Command Prompt.
- Now navigate to C:WindowsSoftwareDistributionDownload folder. If you can’t access this folder, be sure to enable hidden files and folders. To do that, just click the View tab and check Hidden items option.

- Once you enter Download folder, delete everything from it.
- Go back to Command Prompt and enter net start wuauserv command to start Windows Update service.
Another way to delete Windows Update cache files is to create a batch file and run it in order to clean Windows Update cache. To do that, follow these steps:
- Open Notepad and paste the following code:
- net stop wuauserv
- CD %Windir%
- CD SoftwareDistribution
- DEL /F /S /Q Download
- net start wuauserv
- Click on File and choose Save As.

- Set Save as type to All Files and enter remove.bat as the File name.
- Click Save to save changes.

- Now you just need to locate remove.bat file that you created, right click it and choose Run as administrator from the menu.
Using batch file is faster and more advanced solution, but if you’re not comfortable with using batch files, you can manually disable Windows Update service and delete the contents from the Download folder.
Solution 2 – Make sure that you have the latest updates installed
This app will not work on your device error message can sometimes appear if your Windows 10 isn’t up to date. To fix that, be sure to run Windows Update and download the latest updates for your PC.
Many software problems can occur due to certain bugs in Windows 10, and in order to avoid these problems it’s always recommended to keep your Windows 10 up to date.
Update drivers automatically
It is very important to choose the right driver versions from the manufacturer website. In case you choose and install the wrong one, this will not only be an issue for the GPU but may harm all your system.
Tweakbit’s Driver Updater (approved by Microsoft and Norton Antivirus) will help you update drivers automatically and prevent PC damage caused by installing the wrong driver versions.
After several tests, our team concluded that this is the best-automatized solution.
Here is a quick guide on how to use it:
- Once installed, the program will start scanning your PC for outdated drivers automatically. Driver Updater will check your installed driver versions against its cloud database of the latest versions and recommend proper updates. All you need to do is wait for the scan to complete.
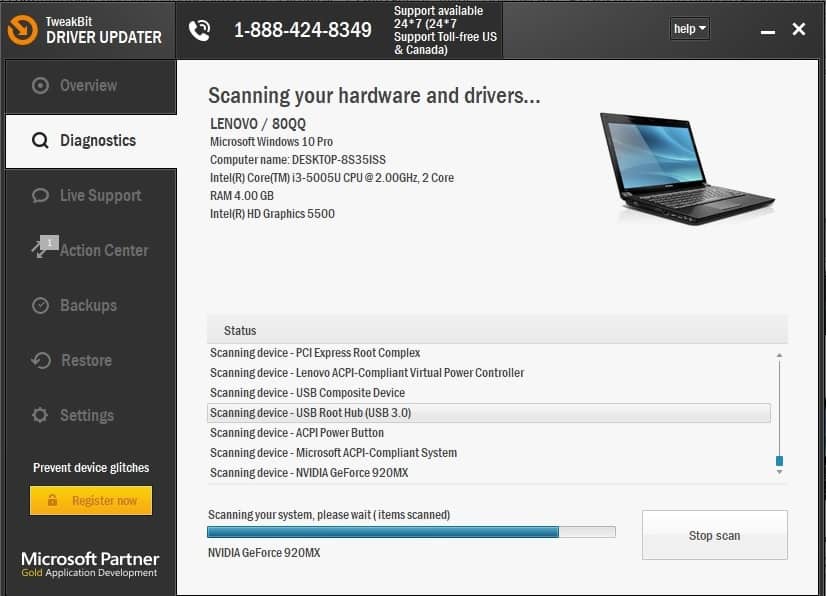
- Upon scan completion, you get a report on all problem drivers found on your PC. Review the list and see if you want to update each driver individually or all at once. To update one driver at a time, click the ‘Update driver’ link next to the driver name. Or simply click the ‘Update all’ button at the bottom to automatically install all recommended updates.
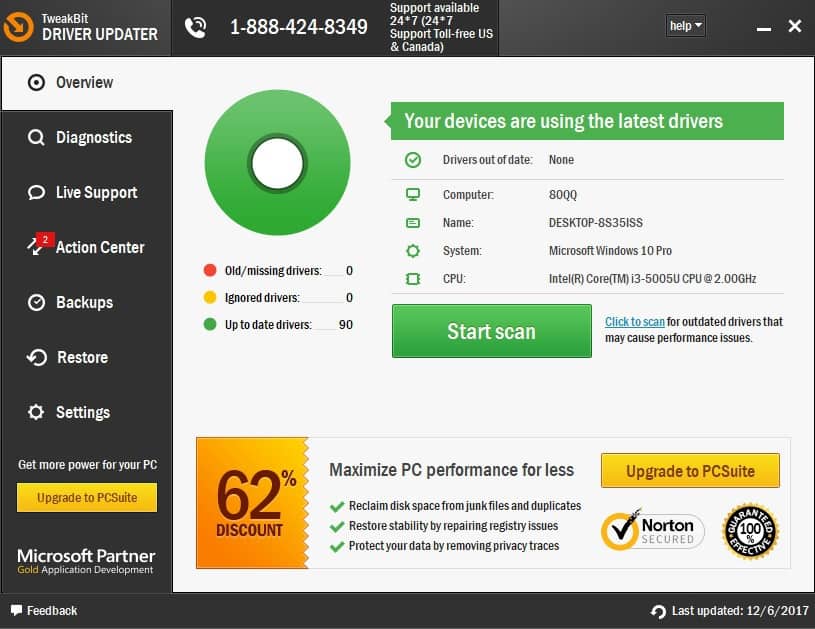
Note: Some drivers need to be installed in multiple steps so you will have to hit the ‘Update’ button several times until all of its components are installed.
- Once installed, the program will start scanning your PC for outdated drivers automatically. Driver Updater will check your installed driver versions against its cloud database of the latest versions and recommend proper updates. All you need to do is wait for the scan to complete.
Solution 3 – Search for the application in Windows Store
Few users reported that this issue occurs if you access Windows Store via link on a certain website. To avoid this problem, you need to start Windows Store on your PC and search for the application manually. To start Windows Store, do the following:
- Press Windows Key + S and enter store. Select Store from the list of results.
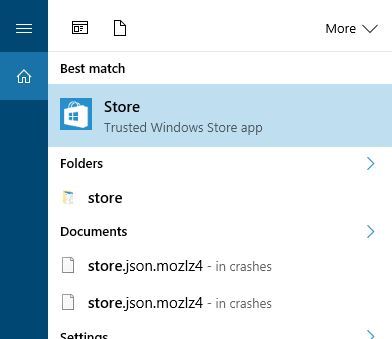
- When Windows Store opens, enter the name of the application in the search field.
- Locate the application and try to download it manually.
Solution 4 – Reinstall the app
The next thing we’re going to try is reinstalling the app that gives you the “This app will not work on your device” error. As you’re probably used to resolving various software problems with reinstallation, this method might also be just as useful here.
Uninstalling Windows 10 apps is a little bit different than deleting regular win32 programs. That’s because each app has its own path and code. Since we don’t know which app causes the problem, we compiled a lengthy uninstallation guide for almost any app you can think of. Hopefully, you’ll find instructions for your app here.
Once you’ve uninstalled the app, just head over to the Store and install it again. Maybe it’ll work this time.
Solution 5 – Reset the Windows Store
All the Windows 10 apps are tightly connected to the Microsoft Store. So, any problems with the Store may lead to issues with individual apps. If that’s the case, we should resolve the problem with the Store, and theoretically, your apps will start working again.
One of the most common, but also effective, solutions to various Store problems is, you guessed it, the reset command. Here’s how to easily reset the Microsoft Store:
- Go to Search, type wsreset, and go to the WSReset.exe command.
- Wait for the process to finish, and restart your computer.
Solution 6 – Reset the app
We’ll apply the same logic to the individual app. So, if none of the previous solutions got your app to work, try resetting the app itself. Here’s how to do that:
- Go to the Settings app.
- Head over to Apps > Apps & Features.
- Select the app you want to reset, and go to Advanced options.
- Scroll down and click Reset.
- A small window then opens stating, “This will permanently delete the app’s data on this device, including your preferences and sign-in details.” Press the Reset button to confirm.
Solution 7 – Run the app troubleshooter
Windows 10 features a handy troubleshooting tool for the most common problems in Windows 10. Luckily, this tool also handles the faulty apps. Just run the troubleshooter, and your problem will either get instantly resolved, or you’ll receive further instructions on what to do next.
Or you’ll get nothing. But it won’t hurt to run the troubleshooter, anyway.
Here’s how to run Windows 10‘s troubleshooting tool:
- Go to the Settings app.
- Head over to Updates & Security > Troubleshoot.
- Now, click Windows Store Apps, and go to Run the troubleshooter.
- Follow further instructions, and let the wizard finish the process.
- Restart your computer.
Solution 8 – Make sure the Application Identity service is running
The Application Identity service is crucial for running Windows 10 apps. So if this service isn’t running, neither will your apps. Here’s how to make sure if this service is on:
- Go to Search, type services.msc, and open Services.
- When Services window opens, find Application Identity service and double-click it.
- When Application Identity Properties window opens, find Service status section.
- If Service status is set to Stopped, click the Start button to start the service.
- Click Apply and OK to save the changes.
- Close Services window and restart your computer.
Solution 9 – Disable your antivirus or firewall
It’s not even a secret anymore that Microsoft’s software products and third-party antivirus solutions don’t live in a harmony together. We’ve already heard numerous stories about antiviruses messing up Windows updates or some system features.
In that manner, it’s quite possible that your antivirus software recognizes your app as a threat, and doesn’t allow it to run.
To determine if that’s indeed the case, disable your antivirus for a few minutes, and check if your app behaves differently. If you’re able to run the app seamlessly when the antivirus is off, you have two options. Either abandon the app, or change your primary antivirus solution.
If you’re looking to change the antivirus, we strongly recommend BitDefender. Sure, it may not act any different than other antiviruses when it comes to recognizing legit Windows 10 apps as threats.
But, it’s a damn good antivirus, that will keep your computer safe at all times. At least until you make some notorious hacker angry enough to go after you, in that case, you’re done.
You can try BitDefender here.
Solution 10 – Perform the SFC scan
If the above-mentioned Windows 10 troubleshooter didn’t get the job done, we’ll go one step further. Maybe there’s something deep down in your system that that prevents your precious apps from working. For that cause, we’ll use the SFC scan.
This is a command-line troubleshooting tool for various system errors within Windows. If something’s rotten in the state of Windows, this tool will expose it.
Here’s how to run the SFC scan in Windows 10:
- Go to Search, type cmd, and open Command Prompt as Administrator.
- Type in the following line, and press Enter: sfc/scannow
- Wait for the process to finish and restart your computer.
Solution 11 – Run DISM
DISM (Deployment Image Servicing and Management) is the final troubleshooting tool we’re going to try here. It goes deeper than the SFC scan, as it deploys the system image all over again.
Hopefully, a freshly deplyed system image will allow your apps to run without any problems.
Here’s how to run DISM in Windows 10:
- Type cmd in the Windows search bar, right-click on the Command Prompt and run it as an administrator.
- In the command line, copy paste these lines one by one and press Enter after each:
- DISM /online /Cleanup-Image / ScanHealth
- DISM /Online /Cleanup-Image /RestoreHealth
- Wait until the procedure ends (it might take up to 10 minutes).
- Restart your PC.
This app will not work on your device can be an annoying error, but you should be able to fix it by using deleting Windows Update cache. If that solution doesn’t work, feel free to try any other solution from this article.
Editor’s Note: This post was originally published in November 2016 and has been since completely revamped and updated for freshness, accuracy, and comprehensiveness.
RELATED STORIES YOU NEED TO CHECK OUT:
Was this page helpful?
Get the most from your tech with our daily tips
Thank you for viewing the article, if you find it interesting, you can support us by buying at the link:: https://officerambo.com/shop/
No comments:
Post a Comment