- If your PC won't restart several times during updates as indicated by the Windows message, it's possible that the process is incomplete.
- But don't worry, there are several ways to fix this and we elaborate on the solutions below.
- Want to be prepared for similar situations? Read more in our Windows Updates Errors collection of articles.
- You can find the complete library in our Windows Troubleshooting Hub.

Some Windows 10 users experienced this problem after downloading and installing Windows updates.
Namely, when the update is almost complete, the screen shows the familiar Windows loading animation with a notification that Working on updates 99%; Don’t turn off your PC. This will take a while, and Your PC will restart several times at the bottom of the screen.
However, nothing happens and the PC keeps displaying this message.
This problem could be as a result of corrupt directories, malware infection, and incomplete updates.
If you are wondering how to fix the Your PC will restart several times issue, his guide puts you through 7 solutions to resolve it.
How to fix Your PC will restart several times error?
- Scan your device with an antivirus
- Run an SFC scan
- Run the DISM command
- Run the Windows Update troubleshooter
- Run System Restore in Safe Mode
- Reset the PC
- Reset Windows Updates components
1. Scan your device with an antivirus
Malware can infect your PC registry leading to the above-mentioned problem. Hence, we recommend using a powerful third-party antivirus such as BullGuard to perform an in-depth scan.
So, if the updating process fails to complete, restart your device and install this antivirus tool.

BullGuard Antivirus
Download BullGuard now to have updated protection for your device against the latest malware.
The tool provides a triple-layer, real-time protection, plus scanning signatures for all kinds of anomalies associated with malware. Any detected malware is quarantined and then neutralized before the infection can even begin.
Here’s how to scan the system for malicious software using BullGuard:
- Download the product for free using the link above. The installation process is quick and easy.
- After the initial configuration steps, allow the tool to optimize your PC.

- Then, go to the Antivirus module, click on the options, and select Quick Scan or Full Scan. The former will scan only the most important elements of your device, while the latter will perform an in-depth scan that can last more than an hour.
- Restart the PC afterward.
If the error persists, you should move to the next steps.
2. Run an SFC scan
- Go to Start, type cmd, then right-click on Command Prompt and select Run as Administrator.

- Now, type the sfc /scannow command.
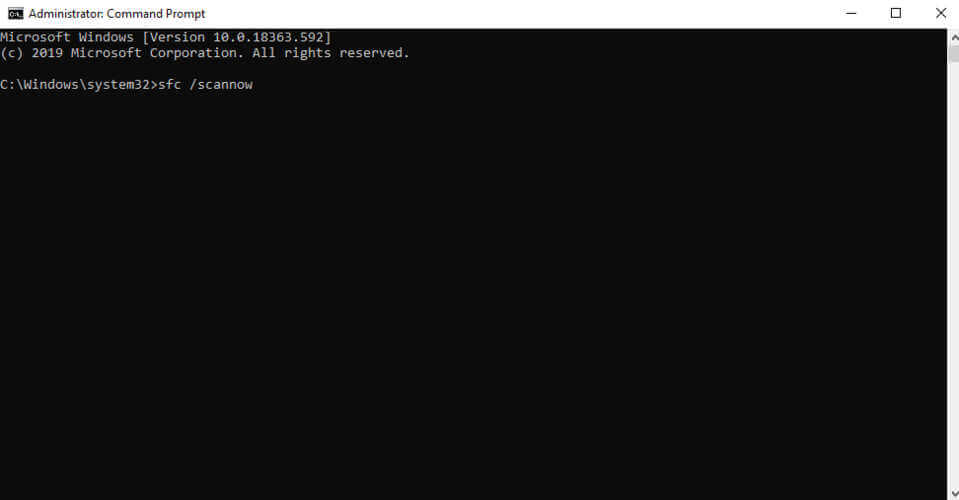
- Wait for the scanning process to complete and then restart your computer. All corrupted files will be replaced on reboot.
Sometimes, the updating process fails due to missing or bad system files. That’s why the System File Checker scans for the corrupt or missing files and repairs them.
3. Run the DISM command
- Press Windows key + X and run Command Prompt (Admin).
- Copy and paste the following command on the command line:
DISM/Online /Cleanup-image /Restorehealth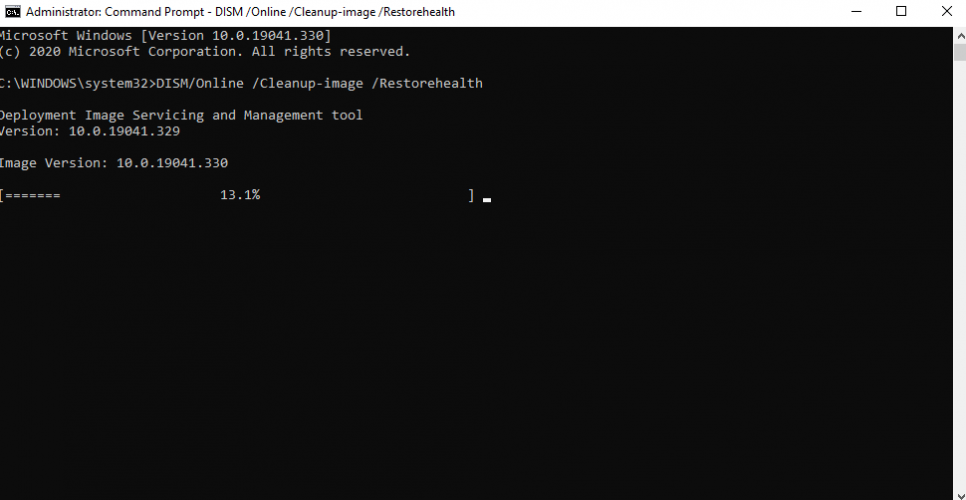
- In case the DISM can’t obtain files online, try using your installation USB or DVD. Insert media and type following command:
DISM/Online /Cleanup-Image /RestoreHealth /Source:C:RepairSourceWindows /LimitAccess - Be sure to replace the
C:RepairSourceWindowspath of your DVD or USB.
Just like the SFC scan, DISM (Deployment Image & Servicing Management) is also a tool for dealing with various system errors, although more advanced errors. Therefore, if the SFC scan didn’t get the job done, your chances are better with DISM.
4. Run the Windows Update troubleshooter
If you’re running a newer version of Windows 10 or the Windows 10 Creators Update, you can definitely use the Windows Update troubleshooting tool. This tool is suitable for fixing several system-related issues most especially Windows Update problems.
Meanwhile, if you’re not sure how to use the new troubleshooter in Windows 10, just follow the instructions below:
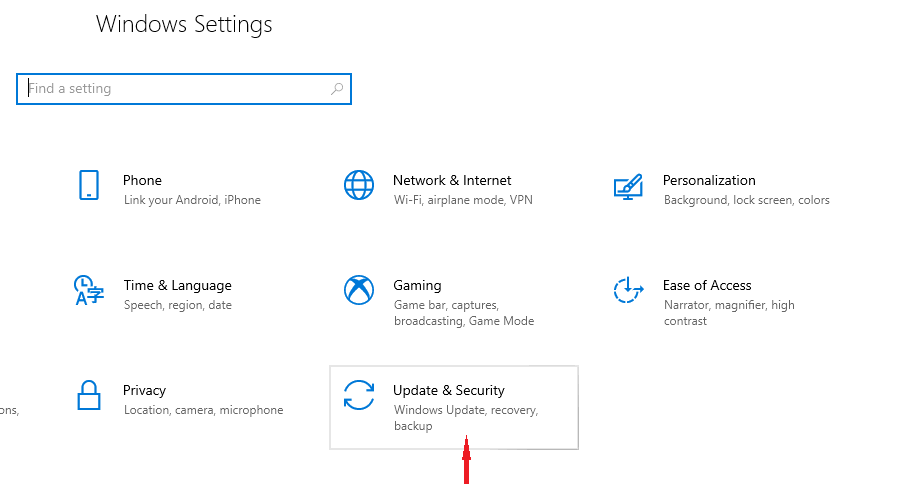
- Go to Settings
- Head over to Update & Security, then Troubleshoot.
- Go to the Additional troubleshooter option.
- Find WindowsUpdate, and click Run the troubleshooter.
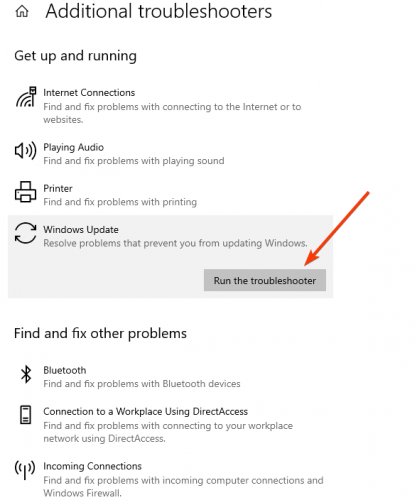
- Follow further on-screen instructions.
- Restart your computer.
5. Run System Restore in Safe Mode
- In the search bar, type system restore.
- The PC will prompt you to choose a restore point. Open the menu and, in the System Protection tab, click on System Restore.
- Choose one of the available dates.
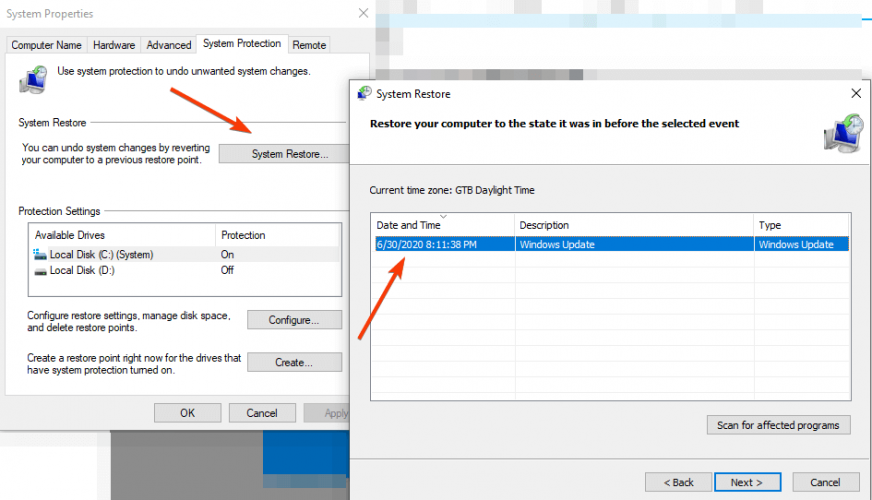
- Follow the prompts to revert back to a certain restore point.
- Wait for the process to complete, and then reboot.
Safe Mode is a diagnostics mode in Windows that starts your PC in a limited state, with only basic files and drivers running.
However, you can perform a system restore in safe mode to revert back to a certain restore point before the Your PC will restart several times error problem.
Note: Make sure you are able to identify the restore point before the error message display. Also, System restore does not affect any of your files, documents, and personal data.
6. Reset the PC
- Open Settings, then Update & Security and go to Recovery.
- The Reset this PC option should be the first you see. Click on Get started to proceed.
This option is an advanced recovery option that restores your PC to its factory state.
In a similar manner, but running in Safe Mode you should also be able to revert to a previous version of Windows. An intact Windows.old file (stored in C:Windows.old) is the important precondition for the downgrade.
7. Reset Windows Updates components
Disclaimer: This solution contains steps that are part of modifying the registry. Please note that serious problems may occur if you do this incorrectly. Hence, follow these steps correctly, and carefully.
We highly recommend that you back up the Registry before you modify it. Also, you can restore your PC to a working state in case a problem occurs.
Here’s how to manually reset the Windows Updates Components:
- Right-click Start.
- Select Command Prompt (Admin).
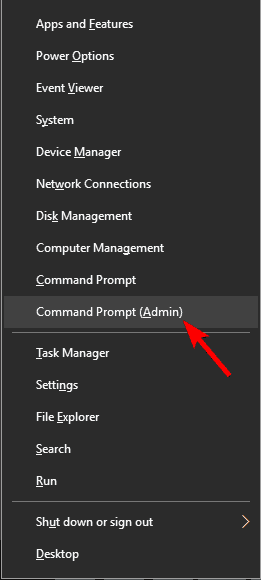
- Click Yes when asked for permissions.
- Stop the BITS, Cryptographic, MSI Installer, and Windows Update Services by typing the following commands in command prompt (hit Enter after each command you type):
net stop wuauservnet stop cryptSvcnet stop bitsnet stop msiserver
- Rename the SoftwareDistribution and Catroot2 folder by typing the commands below in the Command Prompt then press Enter after each command you type:
- Ren
C:WindowssoftwareDistribution SoftwareDistribution.old - Ren
C:WindowsSystem32catroot2 Catroot2.old
- Restart the BITS, Cryptographic, MSI Installer, and Windows Update Services by typing the following commands in Command prompt:
net stop wuauservnet stop cryptSvcnet stop bitsnet stop msiserver
- Type Exit in the Command Prompt to close it.
After trying out the steps above run Windows Updates again and follow the prompts to complete Windows Update process.
However, some Windows users reported getting Access Denied prompts when trying the step above. Here’s what to do if your access is denied:
- Log in first as administrator or use administrator user account
- Stop the Windows Update service and try to rename SoftwareDistribution folder
- Right-click on Start.
- Select Run.
- Type services.msc and press OK or enter.
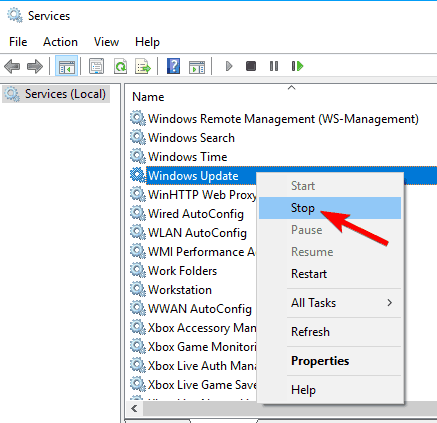
- Scroll down and locate Windows Update service.
- Right-click and select Properties.
- Stop the service.
- Follow the steps again to reset Windows Update Components.
After you complete the process, go to Services window again, now start Windows Update service, and then restart the computer.
Note: We highly recommend that you check the Give me updates menu for other Microsoft products when using Windows update option. Windows Updates downloads and installs updates required to run Windows efficiently.
Let us know if any of these solutions helped fix Your PC will restart several times problem.
FAQ: Learn more about Windows 10 updating errors
- What do I do if my computer is stuck updating?
Since there might be several reasons why your PC got stuck while updating, you should try a few basic troubleshooting steps that work in most similar situations.
- How long should Windows update take?
If the updating process runs smoothly and doesn’t get stuck or something similar, it takes from several minutes to some 20-30 minutes, depending on the updates.
- What to do if your laptop is stuck on restarting?
If your laptop is stuck on restarting after an update, try booting in Safe Mode and install updates there.
Editor’s Note: This article was originally published in June 2018 and was revamped and updated in July 2020 for freshness, accuracy, and comprehensiveness.
Was this page helpful?
Get the most from your tech with our daily tips
and
If you are looking for a cheap and genuine microsoft product key, warranty for 1 year.
It will be available at the link: https://officerambo.com/shop/
Microsoft Windows Embedded 8.1 Industry Pro : https://officerambo.com/product/windows-embedded-8-1/
Key Windows 7 Professional / Home Base / Home Premium (2 USER) : https://officerambo.com/product/key-windows-7/
Microsoft Windows 8.1 PRO (2 PC) : https://officerambo.com/product/microsoft-windows-8-1-pro/
Windows Server 2012 R2 : https://officerambo.com/product/windows-server-2012-r2/
Visual Studio Enterprise 2019 : https://officerambo.com/product/visual-studio-enterprise-2019/
Windows Server Standard / Datacenter / Essentials : https://officerambo.com/product/windows-server-all-version-standard-datacenter-essentials/
Microsoft Office Professional Plus for Windows : https://officerambo.com/product/microsoft-office-professional-plus-for-windows/
Microsoft Office Home and Student for Windows : https://officerambo.com/product/microsoft-office-home-and-student/
Key Microsoft Access 2016 : https://officerambo.com/product/key-microsoft-access-2016/
Microsoft Visio Professional : https://officerambo.com/product/microsoft-visio-professional/
Microsoft Project Professional : https://officerambo.com/product/microsoft-project-professional/
Account Microsoft Office 365 Profestional Plus 2020 Update For 5 Devices : https://officerambo.com/product/account-microsoft-office-365/
Key Microsoft Windows 10 Profestional / Profestional N : https://officerambo.com/product/key-microsoft-windows-10/
Key Microsoft Windows XP Pro : https://officerambo.com/product/key-microsoft-windows-xp-pro/
Microsoft Office Home and Business for Mac : https://officerambo.com/product/microsoft-office-home-and-business-for-mac/
No comments:
Post a Comment