- Windows will sometimes require permission from Trustedinstaller to allow you to make changes to important system files.
- Only if you are sure that by performing that action you keep the OS intact, you can change file permissions and complete the action.
- We have a whole section dedicated to Fixing Corrupt Files so check it out for useful information.
- This article is part of our Windows 10 Errors Hub, where we've documented almost everything there's to know about this topic.

TrustedInstaller is a legit Windows component and belongs to Windows Modules Installer. It is also one of the core components of the Windows Resource Protection, included in every version of Windows since Vista.
Although you work as an Administrator in your system, when trying to access, rename, or delete certain files you might stumble upon a message like You require permission from TrustedInstaller to make changes to this folder.
It usually happens when changes affect core Windows files, as a measure to protect the system. But, if you are confident about your action and you know for sure what you are doing, there’s a tweak you can apply to allow you to move forward.
How do I get permission from TrustedInstaller?
- Right-click on the file or the folder you want to change or delete, and select Properties.
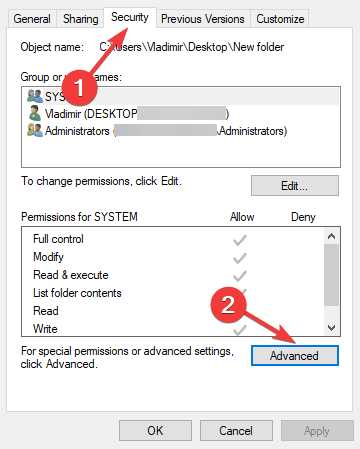
- On Properties window, open the Security tab and then click on Advanced.
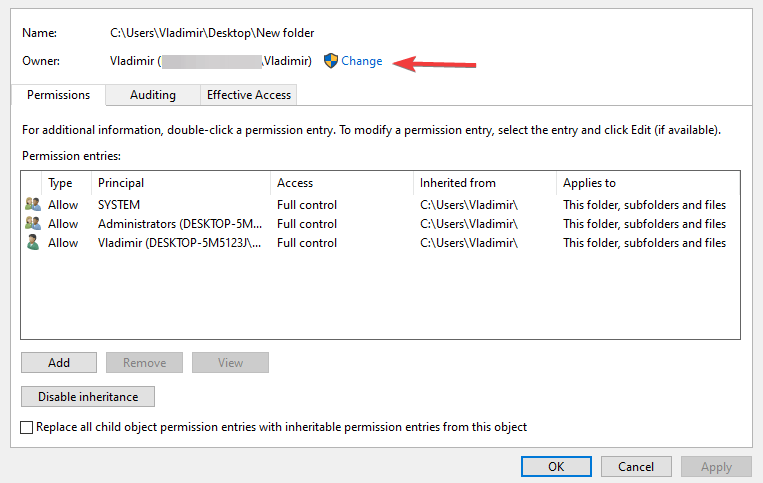
- You will see that the owner of the file is TrustedInstaller. So click on Change. (For older Windows versions, there’s an Owner separate tab).
- In the window that pops up, type the user name you are using on your computer, click Check Names button. Windows will automatically check and complete the full object name. Then click on OK.
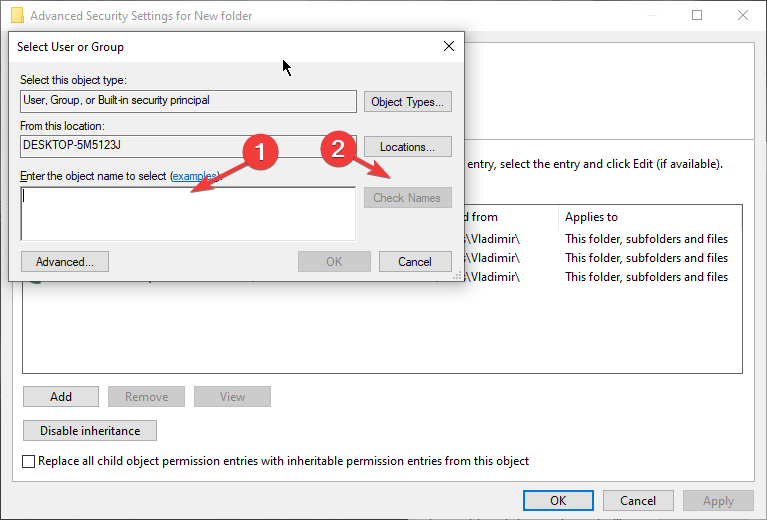
- If applicable, also check the box next to Replace owner on sub containers and objects (if any), then hit OK.
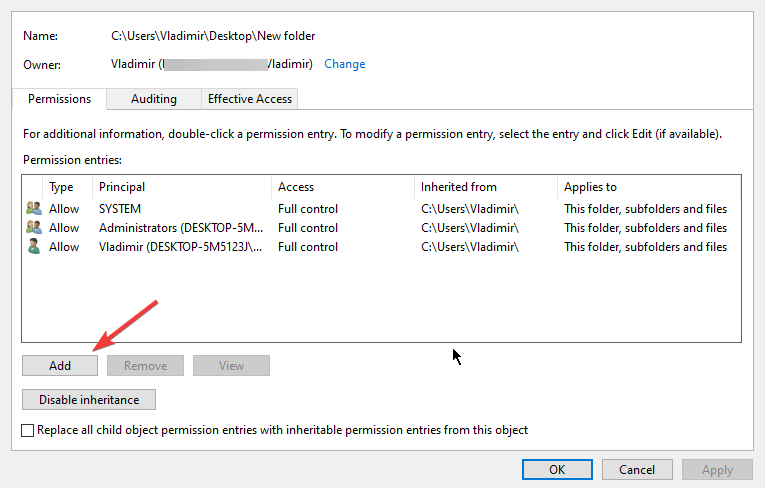
- Back to Properties, click Advanced, then click on the Change permissions button under the Permission tab.
- Click on Add, then on Select a principal, and repeat the action in step 4.
- Tick the box next to Full control in the Basic permissions section, and hit OK.
- And once again click OK to apply the changes.
This will change ownership, and you should not require permission from TrustedInstaller to perform the action you wanted.
FAQ: Read more about accessing restricted files
- How do I get permission from TrustedInstaller to delete files?
To delete a file or folder protected by TrustedInstaller, right-click on it and go to Properties. Then, click on the Security > Advanced > Change to proceed further. Enter your administrator name > click Check Names > OK. Do the same in the Advanced > Change permission section in Properties.
- Why do I need administrator permission to delete a file?
This is a security and privacy feature applied by Windows to protect important system files. This is why the system will require administrator permission (or the permission of another Windows service) to delete or rename an important file.
- Can’t delete files even though I am the administrator?
Go to Properties > click on the Security > Advanced > Change to proceed further. Enter your administrator name > click Check Names > OK. Do the same in the Advanced > Change permission section in Properties.
Was this page helpful?
Get the most from your tech with our daily tips
and
If you are looking for a cheap and genuine microsoft product key, 1-for-1 warranty from us for 1 year.
It will be available at the link: https://officerambo.com/shop/
Very pleased to serve you
Thank you :))
No comments:
Post a Comment