
In this blog, we’ll walk you through how to train your users against threats with Attack Simulation Training. In the modern IT world, there is a constant battle going on between hackers and users. Viruses, phishing, and malware are a few of the examples that your organization’s users could face during their daily activities. To protect them against these kinds of threats, you can do a lot, like leveraging Defender for Office 365 to quarantine or block suspicious contents and check your emails for spoofing and other traces of identity fraud.
These actions are all performed in your Office 365 environment, but there is also the human factor to keep in mind. What if we could educate our users to detect these kinds of threats themselves? Because with this knowledge, they could make use of their company IT resources in a much safer way.
This is where Attack Simulation Training comes into the picture. With this tool, you will be able to test your user’s alertness and teach them how to detect and respond to phishing techniques in emails and other platforms.
The Attack Simulation Training we’re going to talk about here differs from the Attack Simulator you can find in the Security and Compliance center because it adds the training capabilities and extensive options for adding your own payloads.
Now that we know this feature exists, let us build our own attack simulation, shall we?
Note: This feature is currently placed in public preview by Microsoft, and therefore you might be faced with sudden unexpected behavior.
Licensing for Attack Simulation Training
To use the public preview, you will need either a Microsoft Defender for Office 365 P2, Microsoft 365 E3 or E5, or Microsoft Security E5 subscription. Microsoft 365 E3 has recently been added to the list of required subscriptions, as you will find in the following article.
Creating an Attack Simulation Training
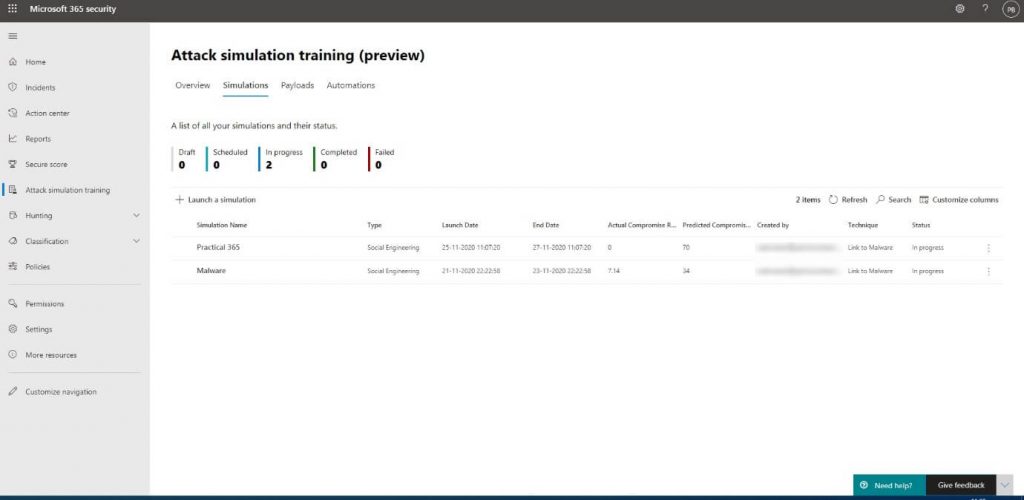
We start by going to https://security.microsoft.com/attacksimulator. Here, we will find the Attack Simulation dashboard, where we have an overview of all the previous and currently running simulations, including all the metrics that were collected from it.
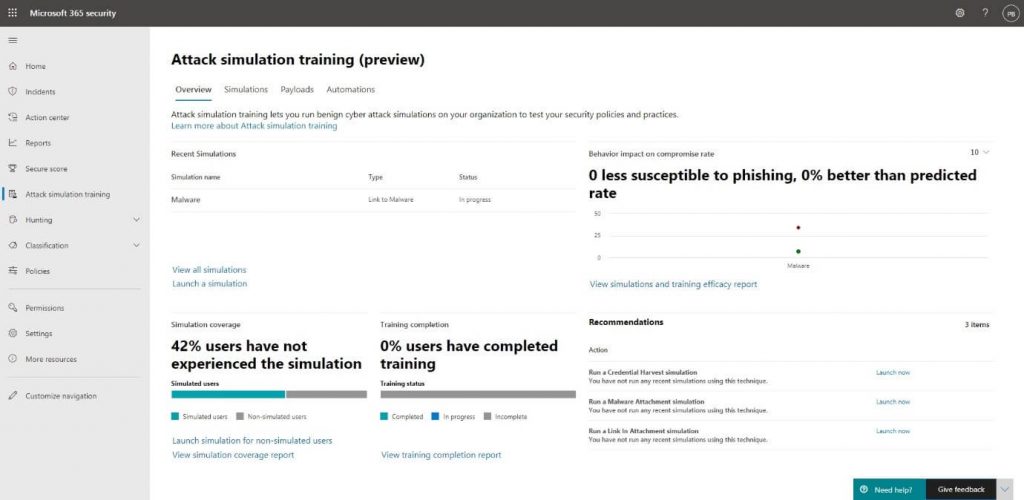
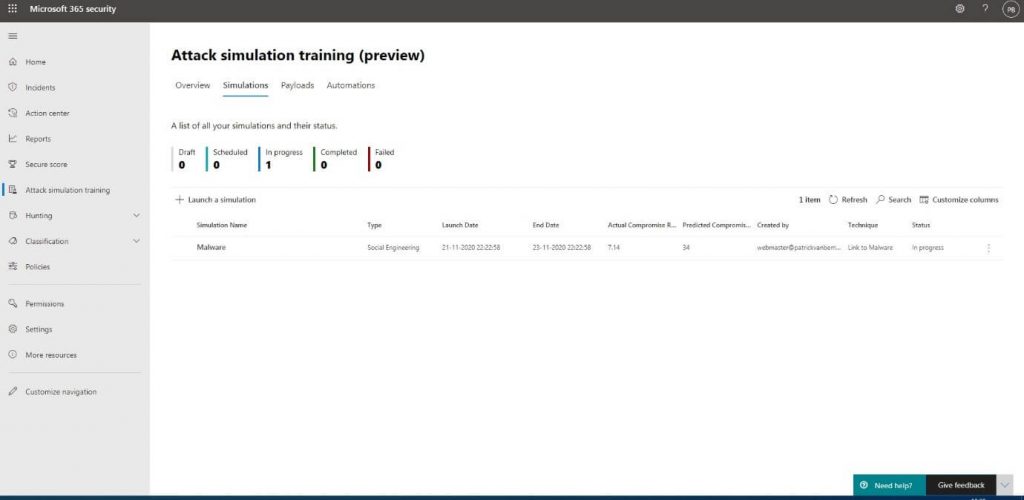
To start creating our own simulations, we will go into the Simulations tab and click on + Launch a simulation:
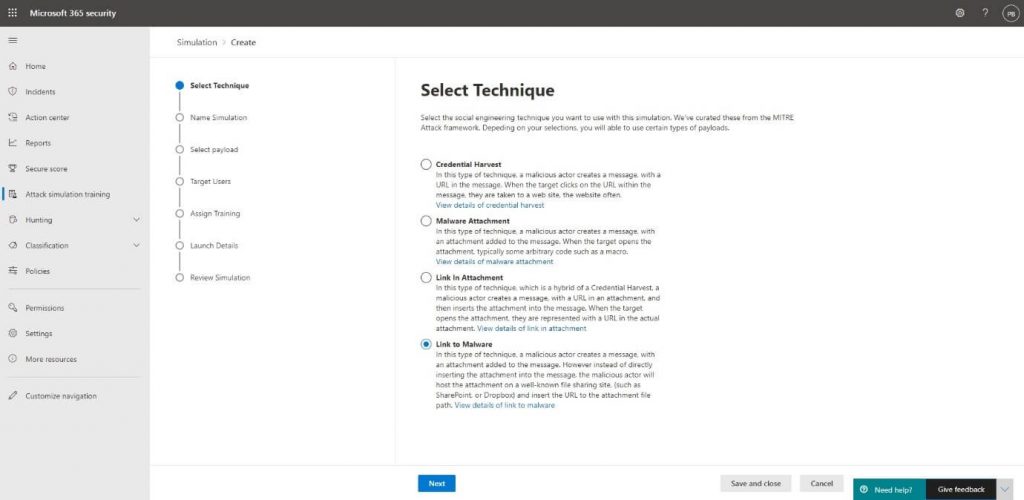
Then, we will select which kind of technique we want to use to trick the user and try to get them to perform a certain action. We will try to let the user click a link to download a file containing malware for this blog. Of course, this simulation won’t let us download a real malware file, but it will create a placeholder instead:
Read More: O365 Account Breaches – Detection, Investigation & Remediation with Cloud App Security
The techniques Microsoft offers are all based on real-life attacks collected by the MITRE Corporation. You will find more information about the MITRE knowledge base and how Microsoft is using the results to improve their Defender security products via the following article.
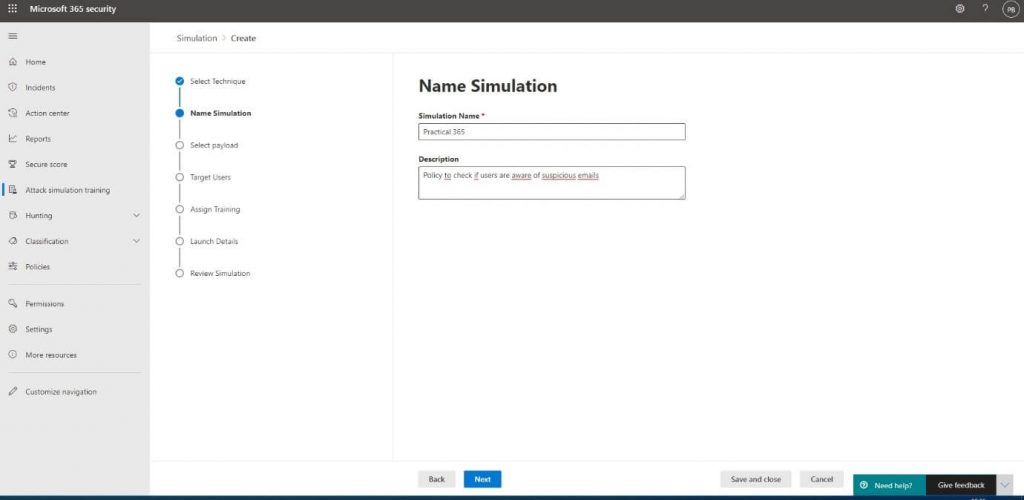
Next up is naming and adding a description to the attack for our own reference. Our attack will be called Practical 365, and we will check if users are conforming to company policies by not clicking links in emails sent to them before checking the source of the email and what’s behind the link:
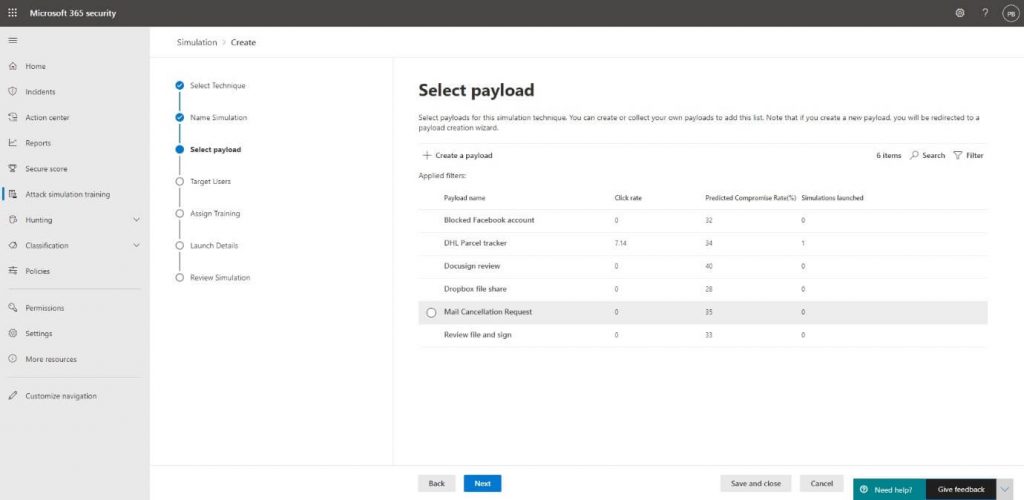
You will then be presented with the option to select a payload.
Payloads database
A payload is a predefined set of properties that make up the contents of the attack. This will include indicators for the user on how they could have recognized the attack and the contents, such as the fake email body.
The attack simulation payload database contains 50 sample payloads created by Microsoft. They’ve looked at real-life attacks, so the samples aren’t just simple templates. You will find these samples and can add your own from the Payloads tab.
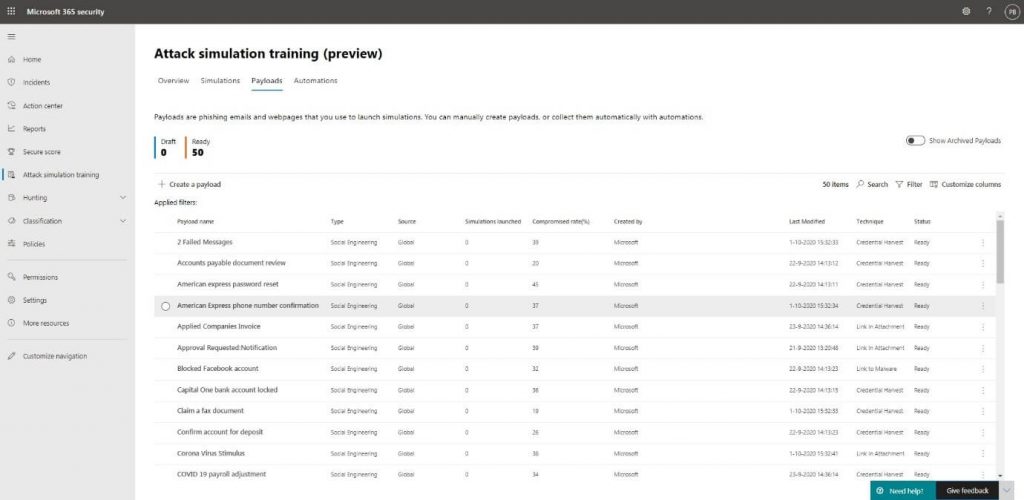
Creating your own payload
Now to get back to adding our own payload, we will click on + Create a payload:
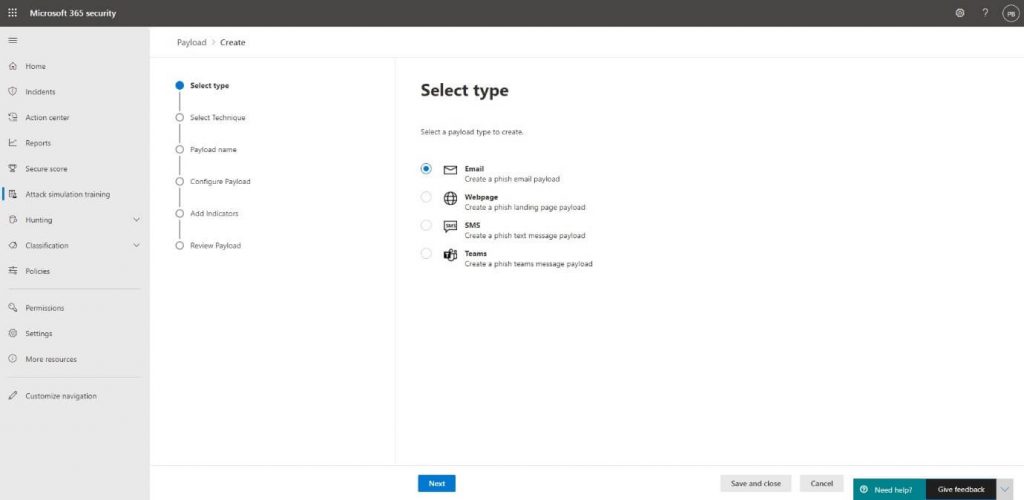
We will then select the type of payload. Microsoft is adding more payload types along the way, but we will add an Email payload for the purpose of our own attack:
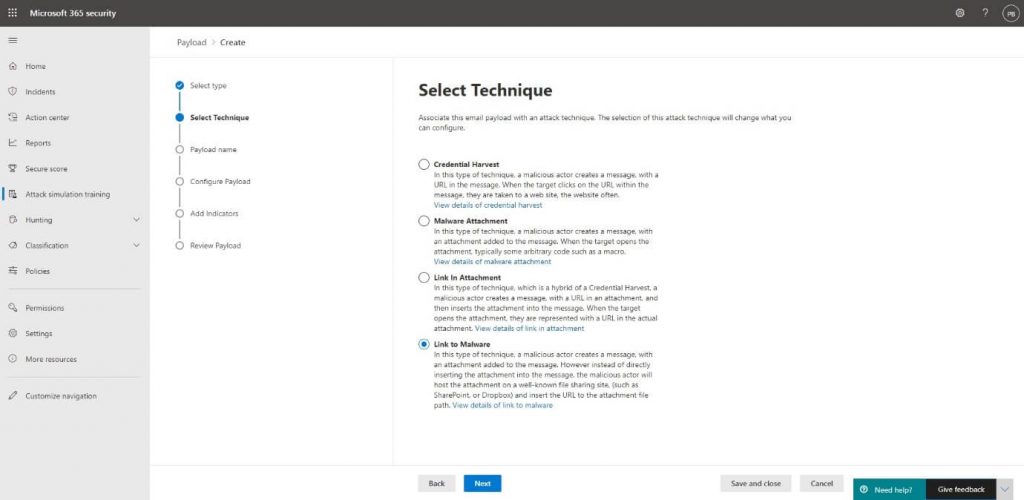
Our attack will use the Link to malware technique, so we will select this one to use the payload in our own attack:
Then, we will enter a Name and Description for the payload:
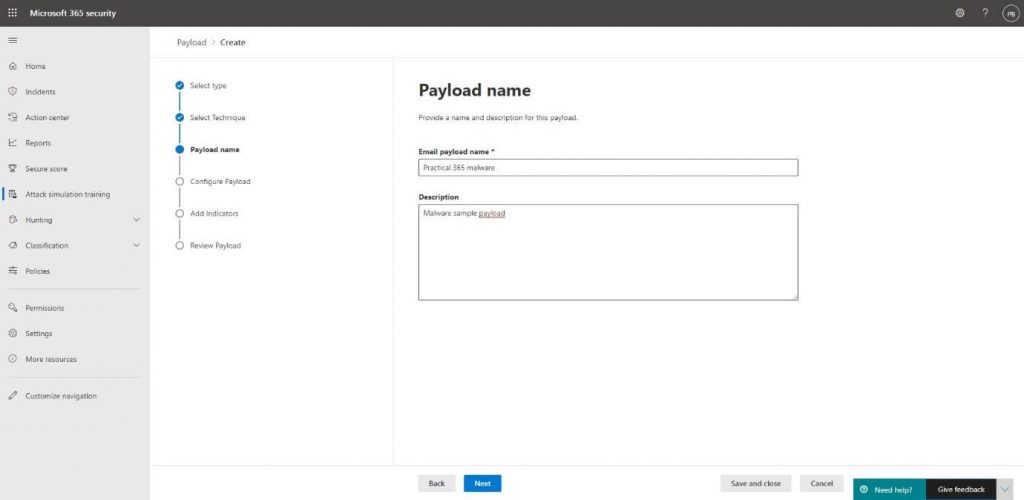
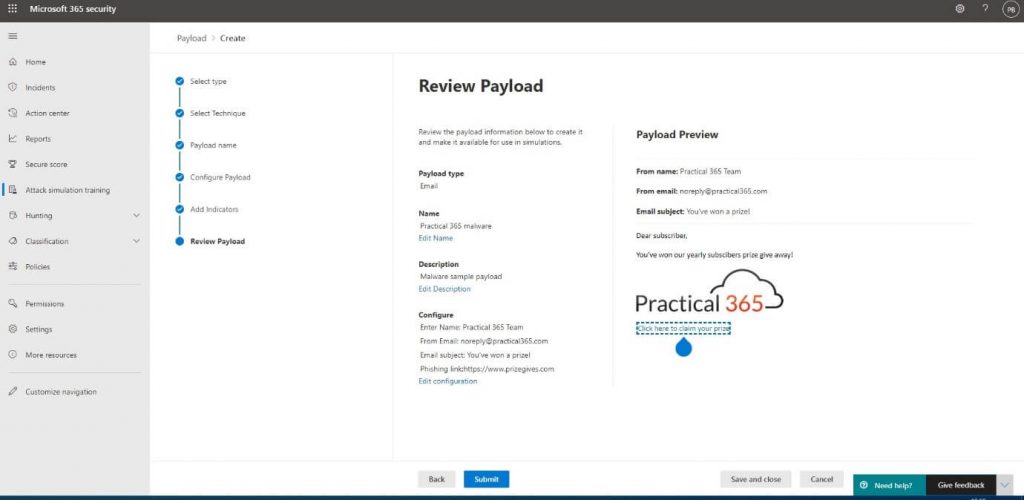
The next part is crucial in tricking the user and requires you to develop a real-life scenario, so try to specify the details like the From Email address in the most sufficient way possible:
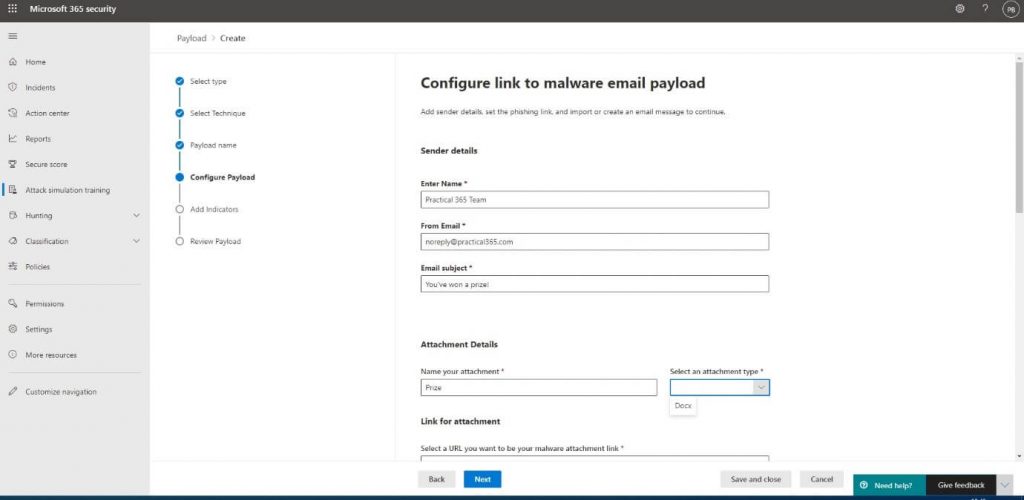
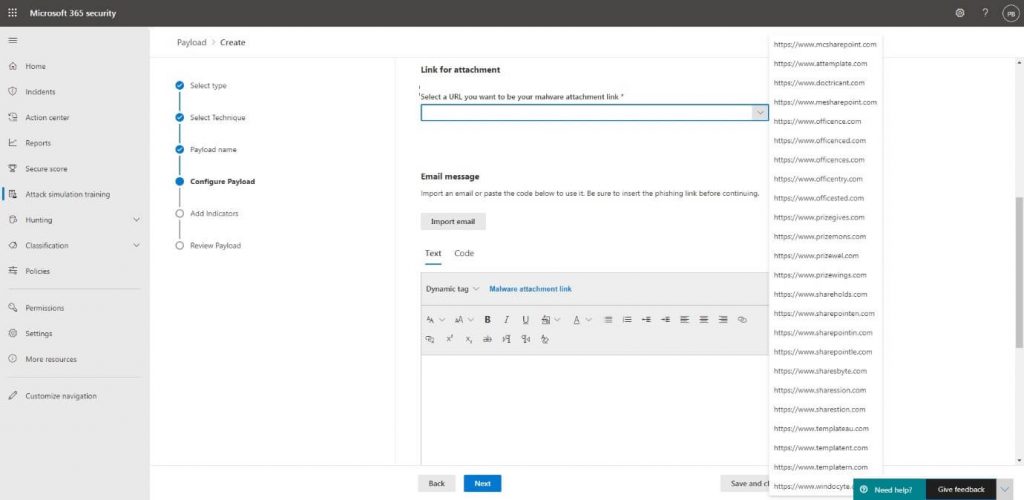
The Attachment Details are also important because the user might be suspicious when it has to download a file to collect their prize. The Link for attachment also must comply with the email template we’re going to create. Because our users are the lucky winners of a prize, the URL www.prizegives.com will be the most appropriate one:
The last part we’ll need to create is the email body containing the link to the malware file. You can create your own email or import an existing email and add the link into the body. There’s also the possibility to add in HTML code. I’ve added the Practical 365 logo by adding the <img> tag:
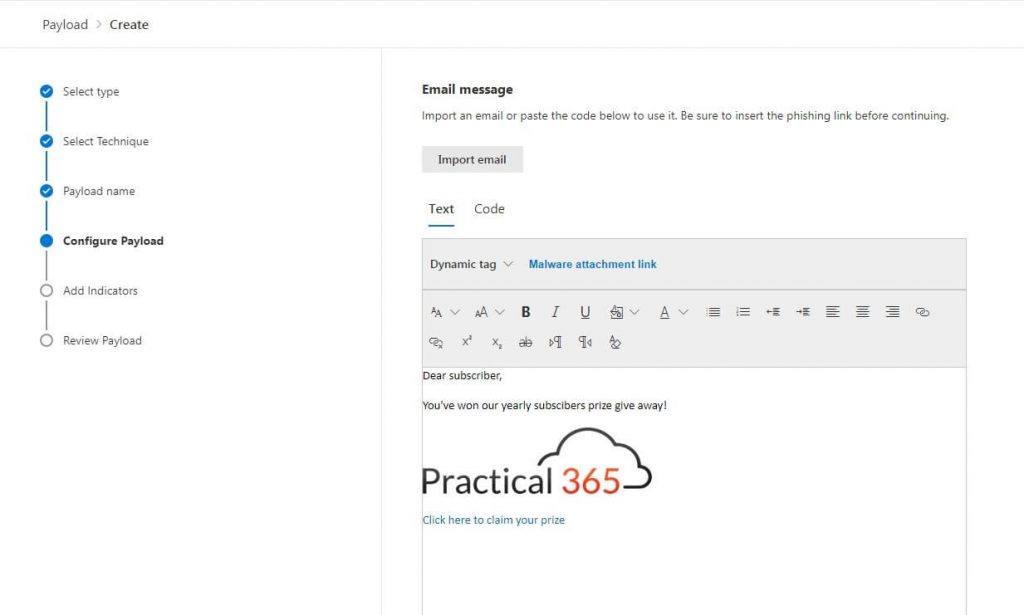
To also give the users a hint that this email is not real, I’ve entered subscribers instead of subscribers in the body. he final properties we will have to enter for our payload are Indicators. These indicators are shown when the user has downloaded the placeholder file and will show them how they could have noticed that the email was fake.
My email contained the following indicators:
Spelling and grammar irregularities – Subscribers instead of subscribers
Domain spoofing – The email address noreply might or might not exist
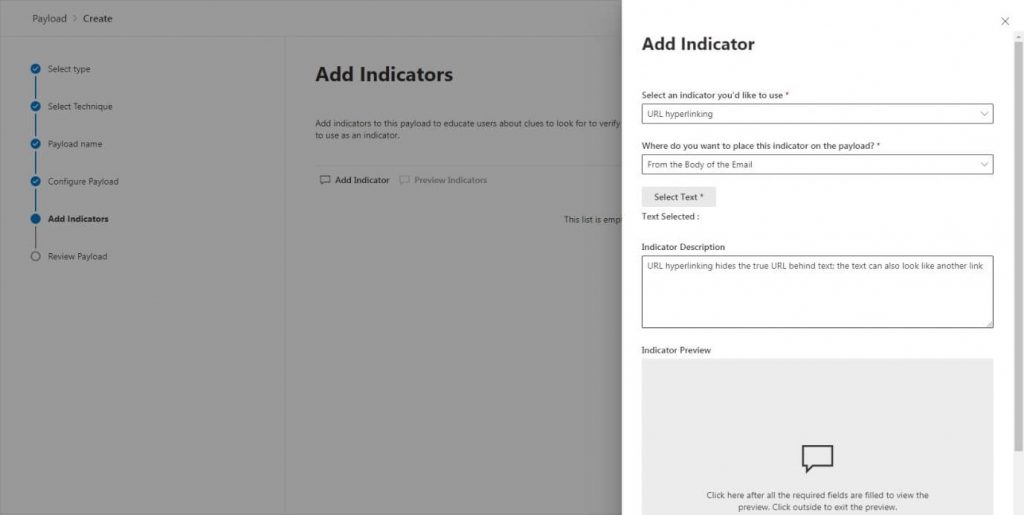
URL hyperlinking – The URL led to a fake website www.prizegives.com
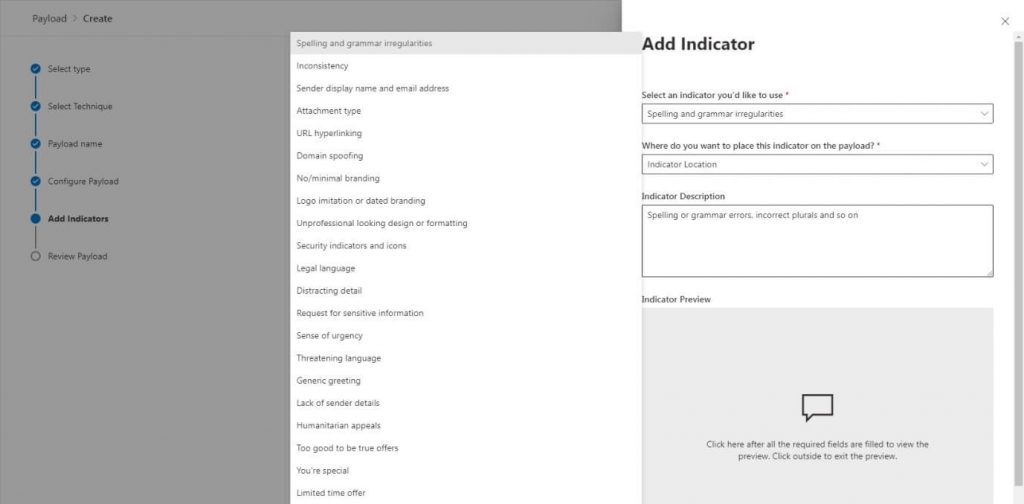
For each indicator we add we will need to specify where users could have found it. In the below sample, I have added the URL and specified in the body of the email where they could have found it:

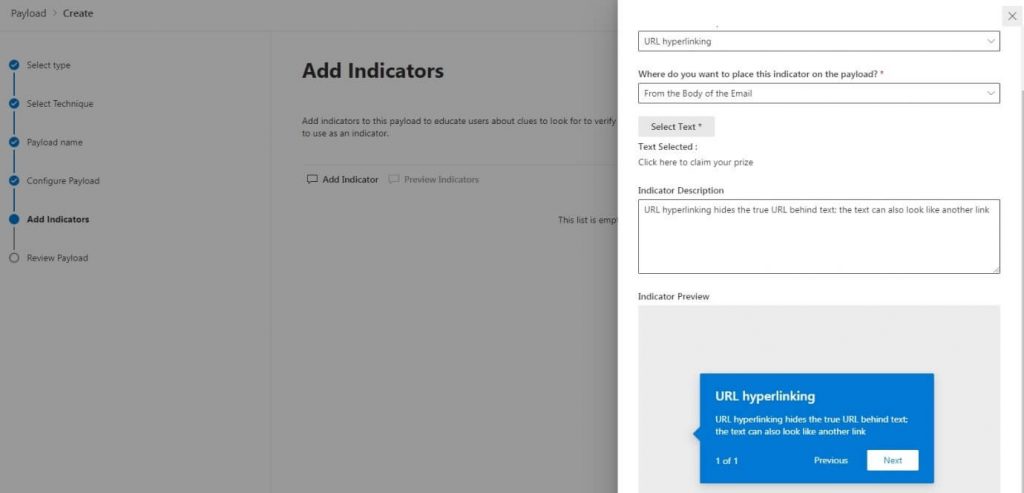
We are then able to review the payload we have created and use it in our attack:
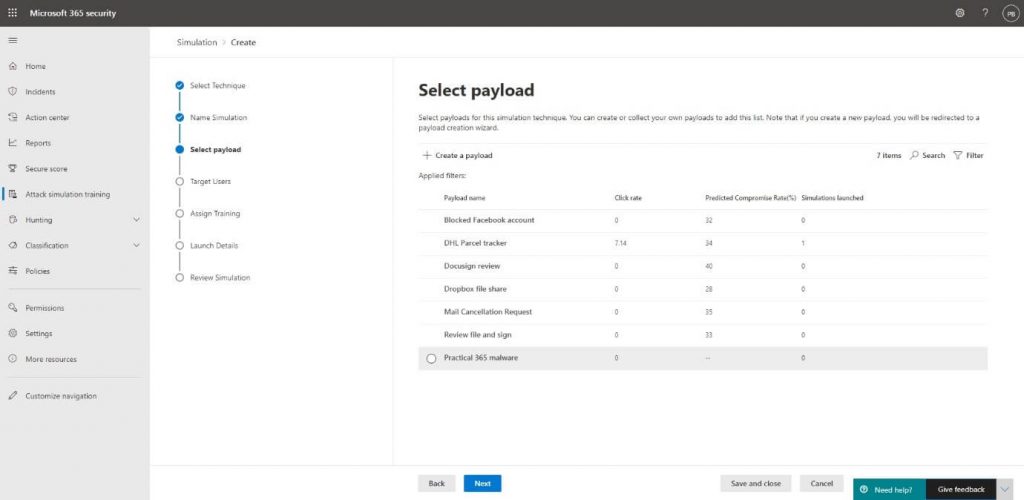
We then specify which user we want to target the attack at on the Target Users step:
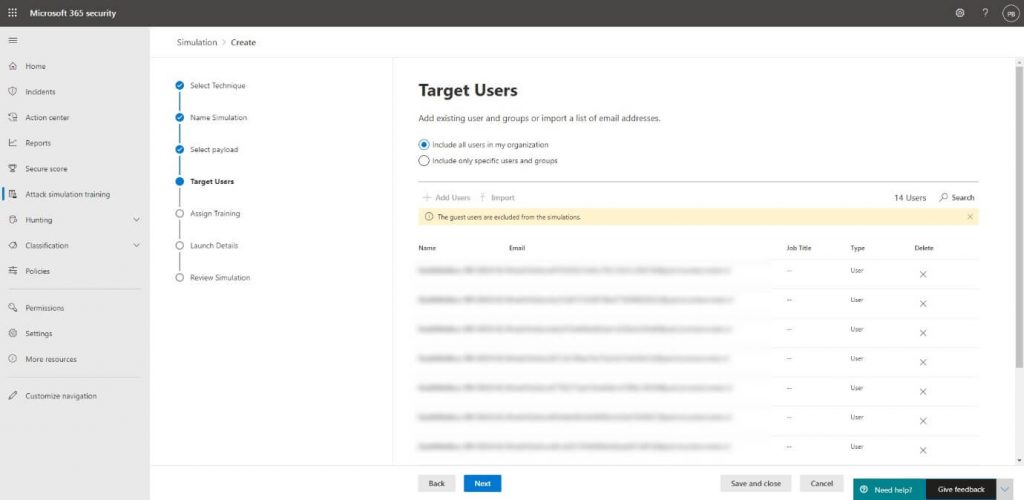
An important thing to note here is that you cannot add guest users because this is not allowed by legal causes. From a technical perspective, the email might get blocked while your own Exchange Online Protection or Defender for Office 365 will recognize the attack and exclude it, so it doesn’t get quarantined or blocked.
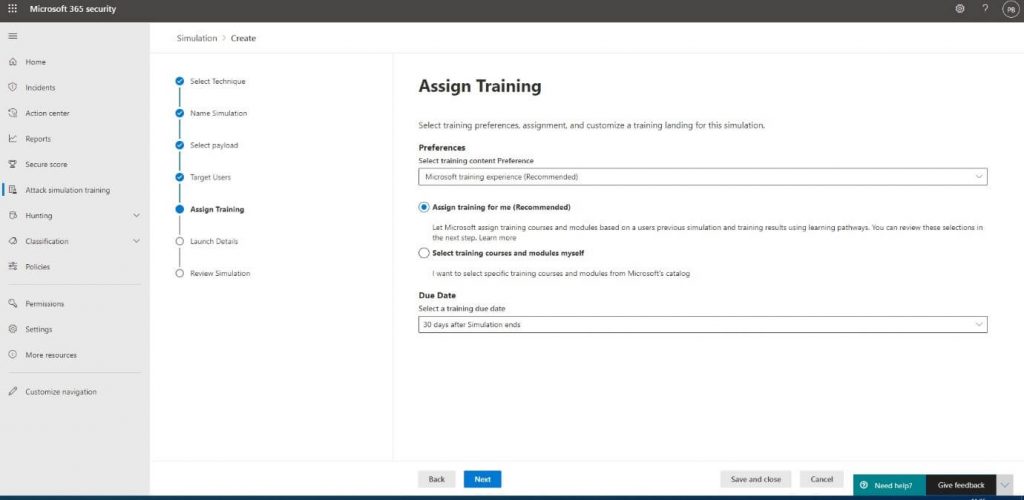
We will then let Microsoft select the training modules to supply to the user or choose the modules ourselves. The advantage over selecting it ourselves is that Microsoft has predefined modules for the type of attack you select. We can also set a Due Date for the users to complete training. They will be reminded to complete the training before the specified period ends:
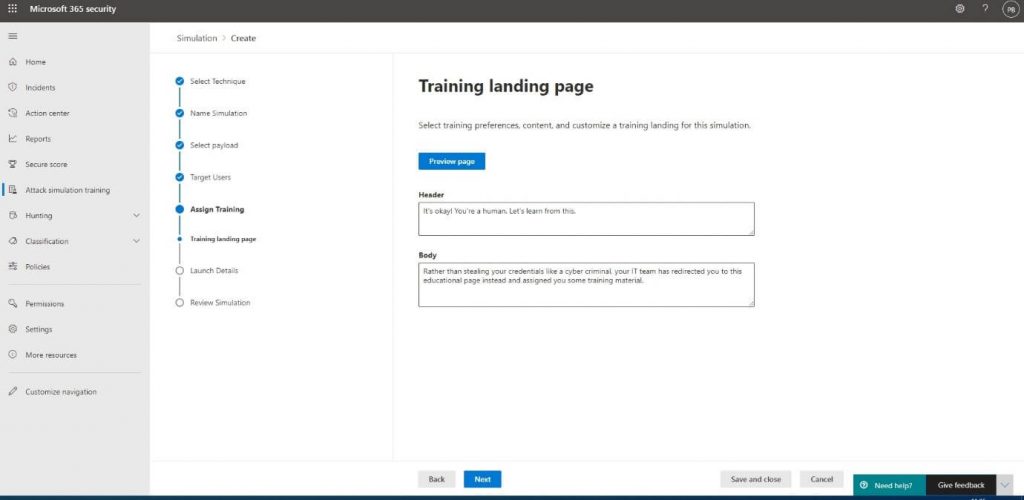
We would also want to specify the text for the placeholder file to personalize the message users receive after opening the file:
At the Launch details, we’re able to launch the attack at a later point in time, which can be convenient when you’re creating it near or during the weekends:
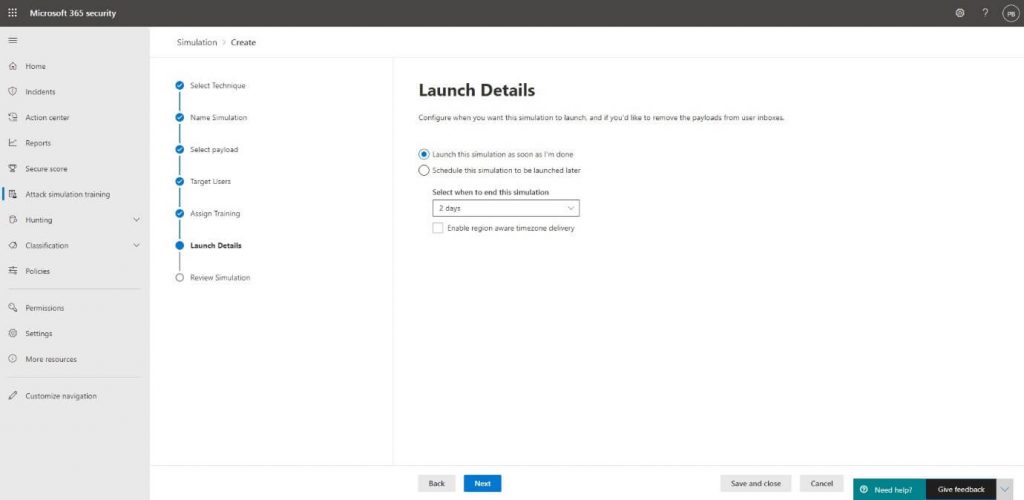
To launch the attack at the specified time, we will click Next, and on the Review Simulation tab Submit after we reviewed the options:
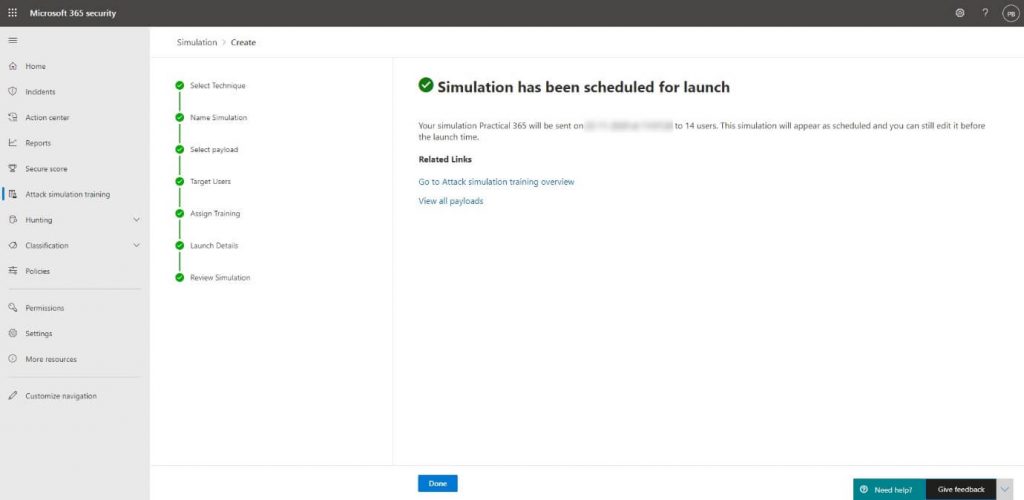
The end result
The selected users will receive a shiny looking email containing a link that leads them to the file:

When they click the link, download, and open the file, they will be presented with the contents from the Training Landing page. A preview of the email with the Indicators will also be shown:

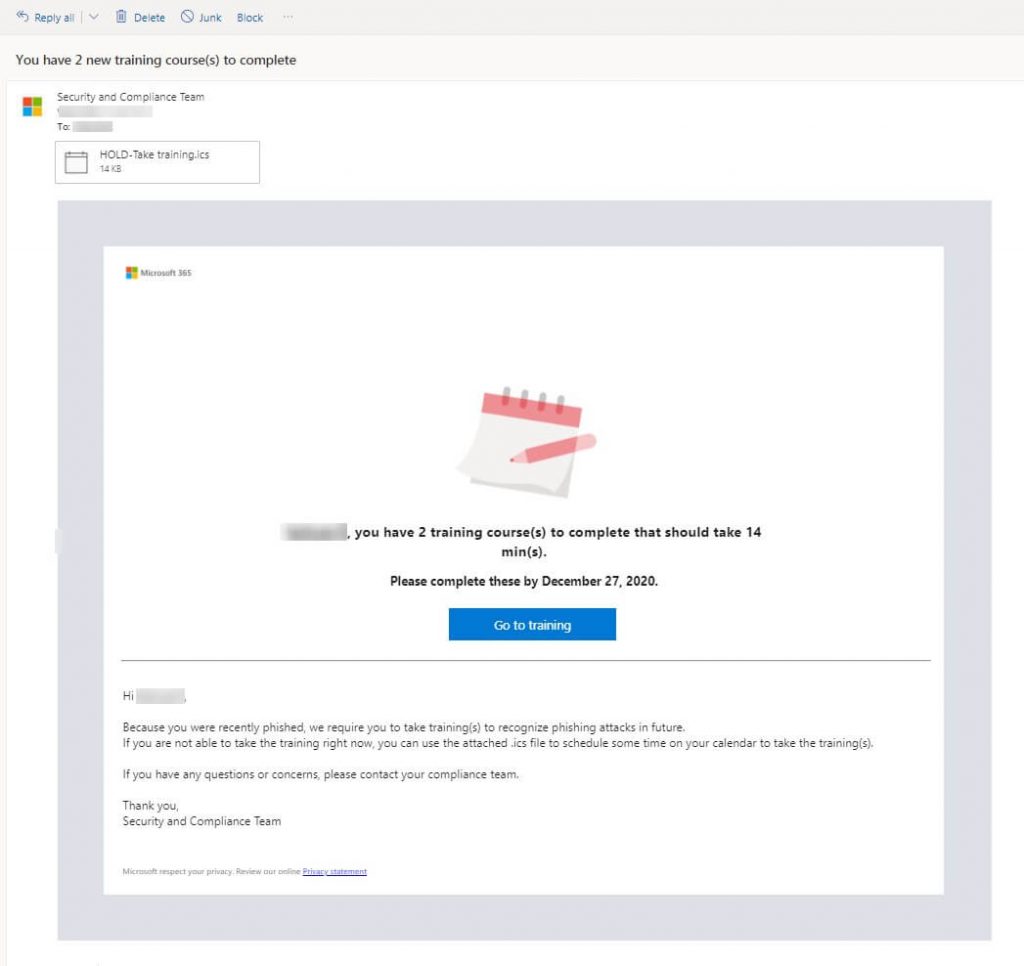
There will also be an email sent to the user containing the offer to start the simulation training right away or schedule it by clicking the included ICS file. The training will be offered with the due date to complete that we specified earlier:
Training assignments
When you click on the Go to training button, you will be directed to https://security.microsoft.com/trainingassignments where you will find the training advised for the attack type you were challenged by earlier:

By clicking on the categories, the user will be presented with the affiliated training course:
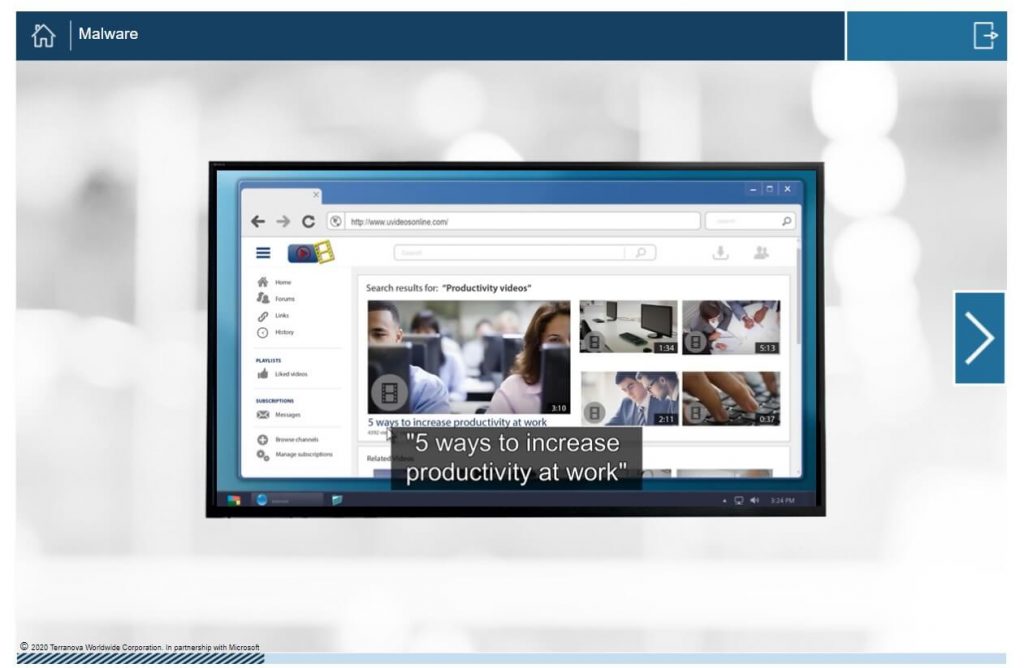
You will be able to see how many users completed the training by going to the report of the attack, which we will discuss in the next topic.
Reviewing your attack status
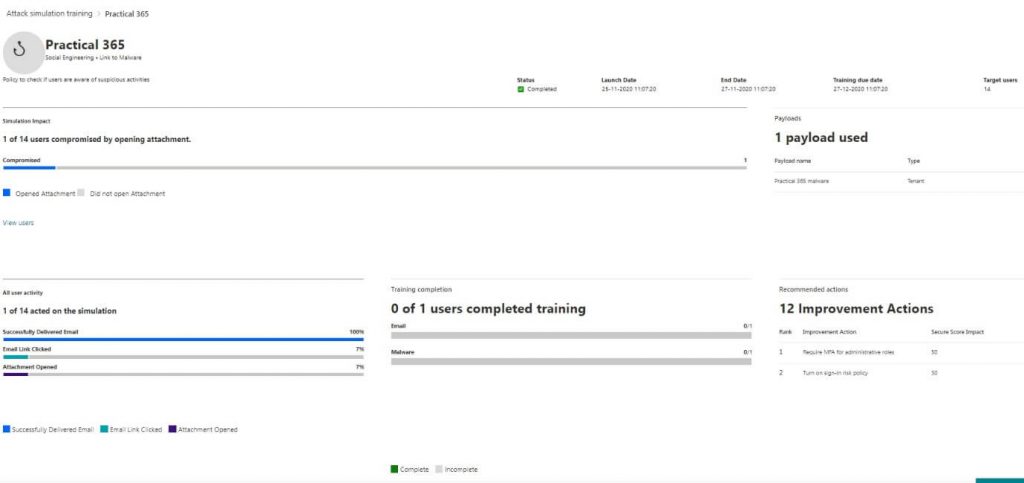
All the actions a user takes during the attack will be reported back to the Simulation Training dashboard and will allow you to follow the progress of your attack. By going into the Simulations tab and clicking the simulation, you will be presented with the attack results:
As you can see, I have completed all the actions that were part of the attack, like clicking the link and opening the file. I will also be presented with the actions I can take as an admin to protect my users against these kinds of phishing attacks:
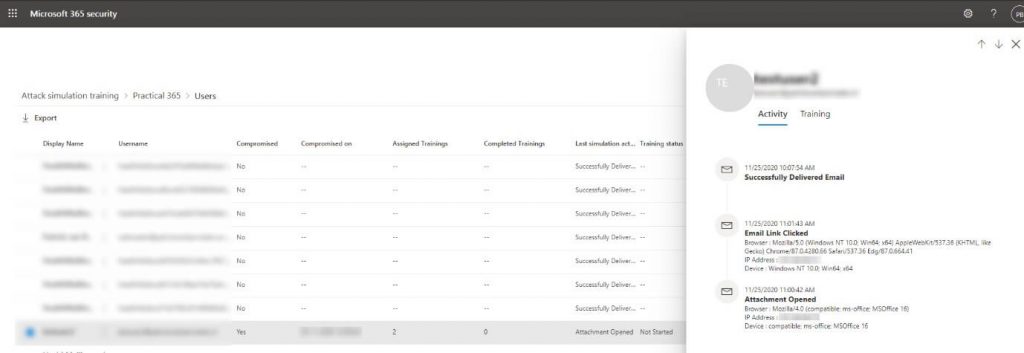
To view the details on a per-user base, we will select View users, which will open the details pane:
Now that you know how you can create your own attacks and educate your users: you can withstand the real-life attacks produced today.
If you have any questions, please let us know in the comment section.
Thank you for viewing the article, if you find it interesting, you can support us by buying at the link:: https://officerambo.com/shop/
No comments:
Post a Comment